
Our lunch spot in the shade with a nice ocean breeze
18 Remove Forebeam
 Our lunch spot in the shade with a nice ocean breeze |
Summary: Although the week started off with a bang, it ended with a bit of a whimper, and we didn't get quite as much done as we'd hoped. Jon managed to get all the gear off the foredecks, including the 2 pulpits, the massive fore‑beam, the anchor platform, and the stubborn plate that holds the aft end of the anchor platform to Ocelot's bow. Jon and Golf designed the new mechanism for holding Ocelot's trampolines, which should be stronger and more aesthetic than our old sail‑track system. The guys started to lay down the epoxy fairing compound that's to go under the final layers of fiberglass on deck, but they weren't able to finish fairing it smooth. Houa managed to get the new stove and oven installed, but he's spending a lot of time on fiddly little bits like the new drawer under the oven. We appreciate all the work he's putting in and we really appreciate the quality of his work, but we also have lots of other things for him to do. More guys joined the team and started sanding the topsides in preparation for painting them. Looking at other boats around us, it can take a long time to get the hulls as flat and smooth as we'd like them. Finally, they started working on the strip behind the cockpit, the last area of the deck that needs the foam sandwich rebuilt.
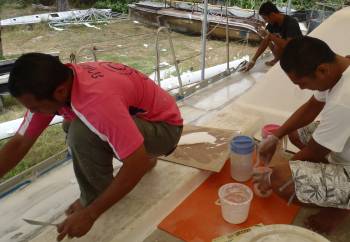 E-U, Max, & Golf lay epoxy mud on the port side-deck |
Monday, February 20:
An excellent day! We got lots of good stuff done. The guys didn't seem to bat an eyelid when
Golf told them that we weren't going to lay the long sheets of fiberglass along the decks but were
instead going to put some epoxy mud on the deck first, to smooth it out. They dove in with a
will and Ocelot now sports snowy white side‑decks. Instead of his normal silica filler, Golf added
some micro‑balloons to make it easier to sand. The guys put down 2 layers of epoxy mud on both
side‑decks. They also put down some glass reinforcing strips around our big forward
hatch on starboard, so they didn't quite finish mudding the front of starboard side.
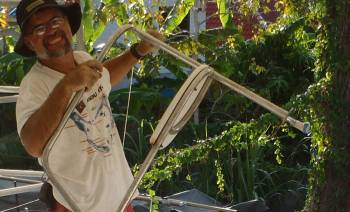 Jon gets the port-side pulpit removed! |
Jon also had a good day. First he put all the gas fittings onto the new stove/oven, so it's all ready to slide into it's nook as soon as Houa is ready for it.
We've been worried about the 6 bolts that hold the bow pulpits down to the fore‑beam. They're stainless steel bolts going into aluminum, and they don't want to come out. Jon's been dosing them with penetrating oil for the last few days, but he can't get very close to the threads. Today he put a heavy punch on top of the bolts and gave them each several good whacks with a hammer. That seems to be what they needed, as they all came out after that "percussive maintenance". Sue volunteered to go down into the fo'c's'l's (defined as "th' c'b'ns f'rth'st f'rw'rd") which are still full of itchy fiberglass grindings, to hold some nuts so Jon could remove the final bolts and remove the pulpits entirely. WOOT! Another worry out of the way!
 Removing the pins holding the anchor support beam |
Then Jon attacked the anchor support - the beam that runs down Ocelot's centerline at the front and holds the middle of the trampolines. It's held on with 2 big pins at each end, each of which has washers and split‑pins at the ends. He removed the split‑pins (a fiddly job when you're hanging way above the ground) and washers, tied the beam so it wouldn't fall, and drove the pins out with a hammer and punch. It all went pretty smoothly, and the beam was soon lowered to the ground. Now it needs the hardware removed so the guys can strip off the paint and then prime and repaint it. Golf has also promised to replace the worn‑out teak grating that the anchor chain runs over.
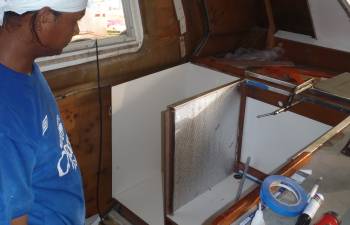 Houa examines the insulation & Formica he's installed |
Next up was the fore‑beam. Two big aluminum pads are bolted to the insides of Ocelot's bows, and the fore‑beam is connected to those pads with massive bolts. In fact, those bolts are so massive that we don't have any sockets large enough to loosen them. But the 8 bolts holding the pads to Ocelot's bows are "only" ¾" (19mm) so we concentrated on those. This required another trip into the fo'c's'l's to remove the nuts right up in the very bows, so now we're both covered in itchy fiberglass dust. We got all the nuts off and 2 of the 8 bolts removed, but we should be able to remove the other bolts tomorrow.
In the galley, Houa put some insulating foam on either side of where the stove/oven is to go, and stuck Formica on the walls of the cabinet he's building next to the oven. He originally didn't want to put Formica behind the oven because it's usually held on with contact cement, which will release with heat, but we asked him to put it on with epoxy, which can handle much higher temperatures. He should be ready to install the stove and oven tomorrow!
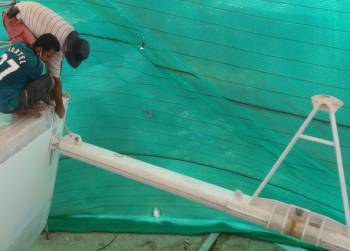 Jon & Boy lower Ocelot's big fore-beam |
Tuesday, February 21:
Most of today was spent sanding down the epoxy‑mud (actually more of a fairing compound) and grinding
away some of the gelcoat up on the bows. Knowing this, we stayed away for the morning and only came
to the boatyard in the afternoon. Jon promptly got to work removing the fore‑beam. First
he tied up both ends with ropes, then he tied a slip‑knot in the middle of each rope. The
shorter rope would keep the ends from falling far when the bolts were removed, and then the knots could be slipped to provide
longer ropes for lowering the beam to the ground. He removed the 4 bolts holding up the right
end, then lowered that end to waiting arms on the ground. Then he removed the bolts from the
left end (difficult to hold the beam up while removing the bolts) and lowered that end. It all
went very smoothly. Jon still has to remove some rollers and things, but then Golf will have
more for his workers to do. Unfortunately, it will be a lot harder to put the fore‑beam back
on...
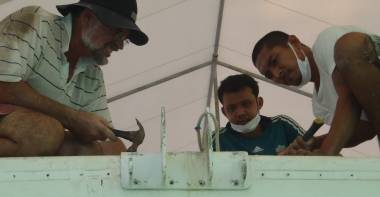 Jon, Boy, & Golf work on the anchor support mounting plate |
Then Jon attacked the big mounting plate for the inboard (aft) end of the anchor platform, just in front of the anchor winch. Twelve nuts had to be removed from inside our anchor lockers (lucky Jon) and the bolts removed. We were hoping the plate would then be lose, but no, it seems it was also stuck on with silicone. We don't usually think of silicone as much of an adhesive, but for such a large surface area, it held the plate hard. Several of us had to pry it off by pounding screwdrivers and wedges under the plate before it finally popped off. Hope it goes back on easier than it came off...
Max and Boy prepped the right side of starboard fo'c's'l's hatch, then laid some glass reinforcing strips there. They also put some more of the epoxy fairing compound on the decks for smoothing down tomorrow.
 Grinding the gelcoat off the insides of the bows |
Inside, Houa epoxied some Formica to the back of the oven compartment, and to the bottom of the new cabinet he's making to the left of the stove. He's also been putting dividers into our new cutlery drawer under the oven. Golf started varnishing the drawer cabinet next to the entryway, but it will require several more coats (done when the air is relatively dust‑free) before the drawers can be replaced.
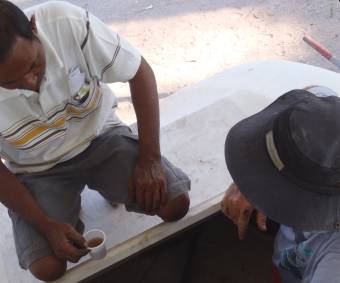 Hem & Jon checking the fuel quality in our port tank |
Golf's been thinking about getting some more workers for next week. We've only had Houa, Max, Boy, & (occasionally) E‑U recently, but jobs like stripping the paint off the fore‑beam and anchor platform, and long‑boarding the hulls where the gelcoat has been ground off, are labor intensive but don't require a lot of oversight.
Wednesday, February 22:
We told Golf yesterday that we'd like to step up the pace of work a bit, if possible, so today we
got 2 new workers to join our crew. One was put with Max to work on flattening the decks,
smearing down epoxy fairing compound and sanding it smooth so we can put another layer of fiberglass
on top (hopefully on Friday). The other is working with Boy, grinding some of the gelcoat off
the bows so we can reinforce them with fiberglass. The area they're working on is on the
insides of the bows, where our trampolines attach to the hulls. Our tramps used to be attached
with sail‑slides running in a length of aluminum sail‑track, but the slides keep breaking (and once
we pulled one of the sail‑tracks right out of the starboard hull). We want to run a bit of
reinforcing fiberglass from the decks, over the edge, and down a few inches. This will also
cover one of the hull‑deck joint lines, making it stronger. Then we'll glass in some PVC pipe,
cut some access points out of the PVC/glass, run a fiberglass rod inside the PVC pipe, and string
the tramps to the fiberglass rods. This should not only be more aesthetically pleasing, but
also stronger than our old sail‑track system.
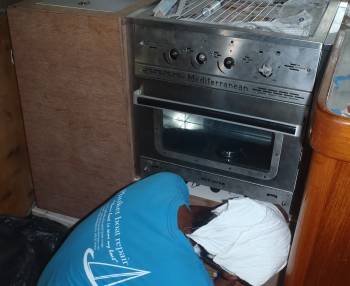 Houa, checking the fit of our new stove and oven |
Jon started out the day by removing the anchor rollers and other fittings from the the fore‑beam and anchor platform that were removed yesterday. He could only work while the grinders were taking a break, or else there was too much fiberglass in the air. Later, our mechanic came by with news that our starboard injector pump had suffered because of water in the fuel. We checked our fuel/water separator and it did have a bit of water in it, but not very much. Hmmm... This probably means that we have a bit of water in our starboard fuel tank, which will be a bit of a bear to get out. Hopefully we can find someone with a fuel‑polishing system so we can filter the fuel without having to decant it into jugs. We think there are about 100 liters of fuel in that tank...
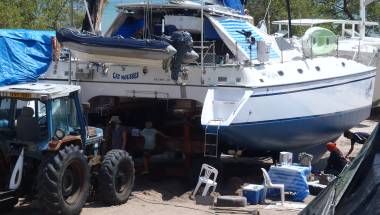 Cat Mousses up on the trailer, getting ready to launch |
In the galley, we tried fitting the stove/oven into its new home. It fit like a glove! Houa still has to put in the brackets that keep it from sliding around, but that should be pretty easy. He is also almost finished with the cabinet between the sink and the stove.
Our French‑Canadian friends on Cat Mousses, with their 4 adorable blonde kids, have finally finished their 6‑week refit just across from us and are launching their 1990 Privilege 39' catamaran on the high tide just before midnight. The name of their boat is quite a play on words, beyond the obvious Cat/Mouse and Catamaran. "Mousses" is also a French word for cabin‑boys, and "cat" is how the number 4 (quatre) is often pronounced in French. So Cat Mousses means that they have 4 cabin‑boys on board (their kids, actually 3 boys and a girl). Clever.
Thursday, February 23:
Quite a crowd working on Ocelot now. Some were on deck, fairing down the epoxy in preparation
for laying the final 2 coats of glass down the length of the deck. Unfortunately, some of them
hadn't been briefed about WHY they were sanding. Jon caught one of the new workers happily
sanding with his board along Ocelot's length, recreating the dish in the decks that we're trying to remove.
<sigh> If these guys aren't watched, they'll happily sand until Ocelot is nothing more than a
pile of dust. Now we have to put more fairing compound down and sand it flat again. So
it looks like it will be Saturday (maybe) before we can lay the glass.
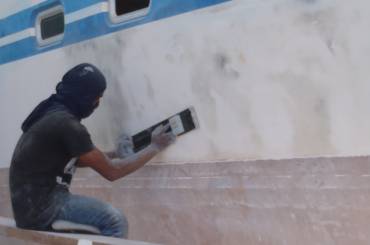 Long-Boarding Ocelot's topsides, sanding off the black paint |
Others were working on Ocelot's topsides, which is what you see between the deck and the water. This area needs to be smoothed in several steps, with increasingly finer sandpaper, until it's essentially mirror‑smooth. They use "long‑boards" - long strips of slightly flexible wood or plexiglass with sandpaper underneath - to flatten out any blemishes and to smooth the slightly curved hull. Hard work! They spray a very light coat of black paint randomly on the hull so they know where they've sanded. It will get several undercoats, then 2‑3 topcoats of a high‑gloss linear polyurethane paint. The high gloss means that any blemishes will show up pretty obviously, so preparation is key to making it look good.
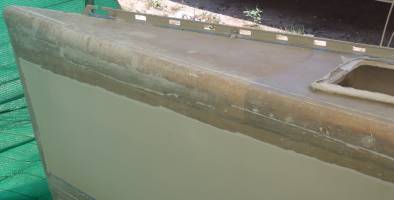 Starboard bow, showing the old repair job & hull/deck joint line |
Up front, Boy has finished grinding most of the gelcoat back. This has exposed an ancient repair that Jon made when the sail‑track holding the trampolines started pulling out of the hull (bringing significant hunks of fiberglass with it). Golf has indicated that he'd like to grind out Jon's repair and do it properly, even though there will be very little stress on that area with the new tramp‑support system we're planning to use. He's that kind of guy - you gotta love it!
We visited a rigging shop today to talk about our headstay, which we'd like to replace. Traditional stainless steel rigging wire has 19 round strands - a central strand, then 6 strands around that (twisted in one direction), and then 12 strands around that (twisted in the other direction, so the twists counteract each other). Dyform is a special type of rigging wire that doesn't always use round strands. It has a large central core strand, and D shaped strands around the outside, with smaller wires filling in the gaps. The advantage of Dyform type wire is that it has more steel for a given diameter, so it's 30‑40% stronger for a given diameter (and about twice the cost). There are now actually 3 companies producing Dyform type wire - Dyform was the first, but now Compak and Hamma are producing very similar wire. We refer to "Dyform" here in the generic, meaning the type of wire, not necessarily the company.

 Normal 1x19 wire vs. Dyform |
Our current headstay is ½" (12.7mm) Dyform wire, last replaced in Tahiti in 2004, so it's about at the end of it's normal life (wire rigging should be replaced every 7‑10 years). The problem is that when Ocelot was built in 1995, all Dyform wire was produced in imperial (inch) sizes, but now it's only produced in metric sizes, and only in even metric sizes above 10mm. When we replaced our headstay in Tahiti, it was 8 years old and had 3 broken strands (that we found). So we're very hesitant to go down in size - 12mm Dyform has only 89% of the strength of our current ½" (12.7mm) Dyform. We'd rather go up, but the next step is to go to 14mm Dyform, which doesn't fit inside our headsail roller gear very well.
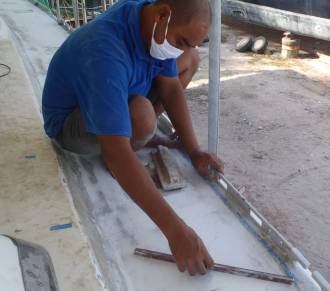 Checking the decks to make sure they are flat |
The rigger we talked to (JP, the head rigger at Rolly Tasker) has worked at ProFurl, the company that makes our roller‑gear, and he also test‑sailed on Kronos #1, so he certainly knows our situation. But he's also something of a pragmatist, rigging boats with what's easily available. He says that 12mm Dyform should be fine for Ocelot, but we're not entirely convinced. We'll probably completely disassemble our roller‑gear and see if we can get 14mm Dyform in there before we make our final decision. The good news is that both 12mm and 14mm Dyform are readily (if expensively) available.
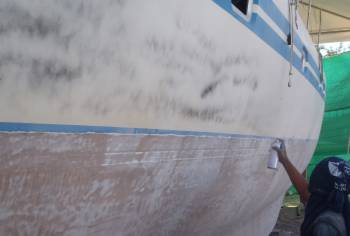 Black spray-paint will let them see where they've sanded |
Friday, February 24:
A noisy, dusty day, but at least that means work was getting done. The noise was exacerbated
by Golf running his (un‑muffled) air‑compressor so the guys could use air‑tools as they sanded the
topsides smooth. Since this process requires a close examination of the hull, a few cracks
were found in the gelcoat which Golf insisted had to be ground back so the glass underneath could be
checked. No problems were found, but Golf's a careful and thorough guy.
Up on deck they continued to sand the epoxy fairing compound to make sure the decks are flat. Now that they know what they're trying to achieve, they're very careful. They finished the entire deck except for a small bit up at the port bow which had new fairing compound laid down and hadn't cured yet. Hopefully that will be quickly faired down on Saturday morning so we can lay the final 2 fiberglass strips along the entire deck.
Houa has been having a lot of fun creating a masterpiece for our galley - the piece that goes around the bottom of the oven and forms the wall next to the sink. It's a complex shape with our new cutlery drawer in the middle of it, and he's making sure that the grain of the drawer‑face matches the grain of the whole sheet. Years ago in the US we found a wonderful cabinet maker who did this for our huge wall of cupboards in our kitchen when we remodeled, but you don't see that sort of quality often, and we weren't expecting it out here.
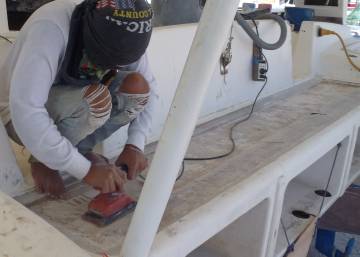 Prepping the final area of the deck that needs repair |
Saturday, February 25:
Didn't get quite as far as we'd hoped today. The guys fairing the decks smooth kept going too
far and needing a bit more fairing compound put down. Since we're using stronger epoxy (rather than
polyester) fairing compound, it takes a while to cure. The upshot is that the deck still needs
a bit of work before the final layers of fiberglass go on. Maybe Monday??
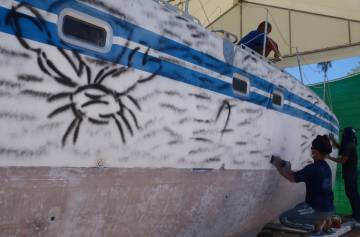 Long-boarding the topsides, with a crab watching... |
Since they couldn't get the decks ready in time, the guys started working on the area behind the cockpit, where our storm anchor usually lives. This is the last area that still needs foam epoxied in. Unfortunately, here again they were too aggressive when they cut the top layer of the deck off, and they cut through some vital fiberglass. Unlike the decks, this is not an area where we can reinforce it from below, so we have to do all our reinforcing above. We started this process by laying a couple of strips of biaxial fiberglass down along the outside lip of that aft section. This should make that area strong enough to take the weight of the water‑jugs we use to make sure the foam is well bonded to the underlying fiberglass. This area still needs the lip around the edge (what used to be the edge of the teak) ground off, so we have more fiberglass to grab onto. Boy should be able to finish that pretty quickly, but since Ocelot is currently stern into the wind, the whole boat will be subjected to ground fiberglass dust blowing around.
On the topsides, the guys on port side were filling in some of the gelcoat that they ground off yesterday. None of the cracks showed any problems, but we feel better that Golf checked them all. On starboard side they sprayed black paint on the topsides (to mark where they've been) and then sanded most of it off. The guy spraying got a bit silly and painted a crab on Ocelot's flank. Good to see the guys having a bit of fun with their work.
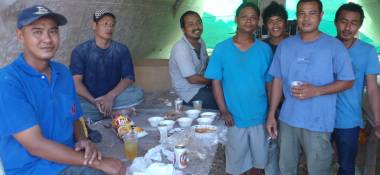 Our current crew (minus Boy & Golf) enjoying after-work food |
Jon didn't get much done on Ocelot as he was helping a friend sort out his battery charging system for several hours. And the guys knocked off a bit early as this is their last day of the week, the day we traditionally throw them a bit of a party. Golf usually does a dinner party for his guys once a month, so he decided to combine the parties this month. We provided our traditional beer, chips, and soft drinks. Golf has a friend who just opened a new restaurant, so he brought roasted chicken, spicy Tom Yam crab soup, more beer, ice, roasted fish, and an interesting fruit that we don't know (so nobody knew the English name for it!) In Thai it's called "falang" which means "foreigner." We wonder where it came from originally!
Thai Refit:
Ocelot Pages:
Top Level: Home | Destinations | Cruising Info | Underwater | Boat Guests | Ocelot | Sue | Jon | Amanda | Chris | Site Map | Make a Comment
|
If our information is useful, you can help by making a donation |
Copyright © 2000‑ Contact: Jon and Sue Hacking -- HackingFamily.com, svOcelot.com. All rights reserved.