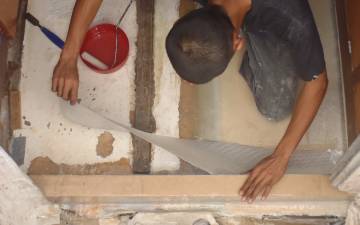
Max glassing the sides of his door support beam
23 Start Transoms
 Max glassing the sides of his door support beam |
Summary: The week started off with a bang but ended with a bit of a whimper. Max worked on the entryway all week, first building and installing a beam for our sliding door to sit on, then building supports and the floor just outside the door and installing them, then fitting and installing foam on the steps to the cockpit and finally cutting and shaping the foam for both sides of the steps. Our new trampoline holders were glassed on up front, and Baw built foam fillers for the cutouts under our emergency hatches and glassed them in. The big news is that Golf started both transom extensions, but after making good progress, that work has stalled while they figure out how to make the 2 sides the same. Boy ground off all the gelcoat on both transoms in preparation for installing new steps and side‑walls. Jon got the mast stripped and all the wires out, so mast, boom, and forebeam are all ready for sanding and painting. The long‑borders have been working all around the hull and she's looking very smooth.
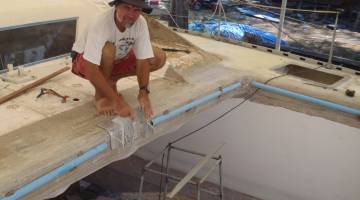 Blue PVC pipes, held on with super-glue prior to glassing |
Monday, March 26:
Another good day. When we arrived, Max had already epoxied all his bits together into a very
strong beam to support our sliding glass entryway door. Max is a funny guy. He arrived
today sporting a new haircut - with racing stripes on the sides! He also brought his
laptop and speakers, so he could rock‑out while
working.![]()
But Max is a great worker, and we love what he does. He put the door frame together on top of his beam, measured the ends to make sure everything was correct, and epoxied his beam to the floor. Then he added fillets of epoxy mud along the sides and ends, gluing it to neighboring structures (door frames, etc) and laid an additional sheet of glass on each side for a bit more strength. It shouldn't be going anywhere.
Up on the bows, E‑U and Golf were putting on our new trampoline holders. These used to be sections of aluminum sail‑track bolted to the hulls, and the slides in the tracks held our tramps. But the sail‑tracks were only bolted on in a few places, and sometimes the loads on the tramps can get high enough to pull the bolts out (and/or break the sail‑slides). So Golf came up with the idea to split some PVC pipe in two, and glass it to the hulls. Cut rounded slots in the fiberglass and pipe, put a fiberglass (or steel) rod inside the pipe, and tie our trampolines to the rod. Simple, elegant, strong, and nicer looking.
 Reflection in our neighbors paint - click to see larger image |
So today they took sections of split PVC pipe and tacked it where it needs to go, holding it up with bits of wood and super‑glue. Tomorrow they're planning to put a fillet of epoxy mud on each side of the pipes, and then lay fiberglass over them to hold them to the hulls.
The team sanding the hulls smeared on a bit more epoxy mud in places they deemed needed it. They also put a bit over the new fiberglass on the bows, so they can fair them in nicely.
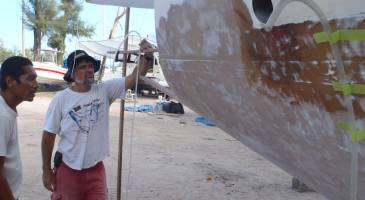 Checking where the waterline will come to with a hose-level |
Sue continued chipping away at the exposed balsa in front of the salon. We still need to talk to Golf about how he wants to repair that whole area. One decision we need to make is do we want access to our newly found tanks? This will require a complicated hatch, as well as drain holes in the bottom of the compartment, but obviously has numerous advantages.
One of our neighbors had his first layers of final paint sprayed on. Nobody's very pleased with the job except, surprisingly, the owner! There are dust specs, and the final finish has a bit of an orange‑peel texture instead of the mirror smooth finish expected of this sort of paint job. It looks OK from a distance, and very few folks will look at it from up close. Perhaps the solution is not to have high expectations (a good attitude for life in general).
It was actually the contractor who pointed out the problems, and he's said he's going to fix them. This attitude of taking responsibility for the work and genuinely wanting to do a good job is one of the delightful aspects of the Thai value system.
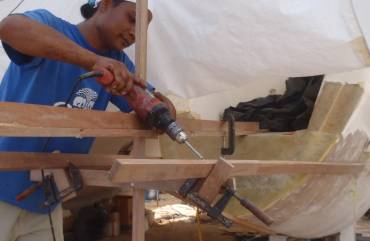 Houa building the frame for our transom extensions (take 2) |
Our exciting news is that Golf started on our transom extensions! For those of you just coming into this, we tried extending our transoms way back in November (week 3). Golf joined 2 sheets of thin plywood, screwed them to Ocelot's starboard transom, waxed them, and laid 6 sheets of fiberglass inside. But when we removed the plywood mold, we found that the glass had a lump in the side (where the plywood was joined) and it didn't go up fast enough so it was 4' (1.2m) out before it cleared the waterline. So we had it cut off before we flew home for Thanksgiving and Christmas.
Now we're trying a different approach. Jon's idea was to expand a bunch of pour‑foam back there, shape it to what we want, and glass it to the transoms. The foam wouldn't be structural (all the strength would have to be in the fiberglass skins) but it's easy to do and easy to get both sides looking the same and we're not extending the transoms too far anyway so strength isn't a big issue.
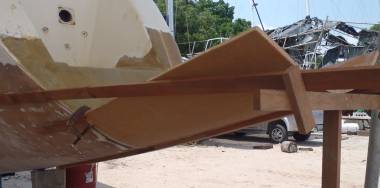 First bit of foam epoxied to our starboard transom |
But Golf has other ideas, and we've learned to let folks run with their own ideas if at all possible. Golf started by building a bit of a wood frame at the back, outlining where we want the outer skin to go. We originally wanted to simply continue the existing rocker (slope) up until it cleared the water, but we decided to push the rocker up by 1‑2' (~4cm), so the extension wouldn't get so long. Even so, it's out 33" (83cm) before it clears the water. We'll probably leave the back a bit in the water, as we don't want the water slapping under there.
Once the frame was in place, Houa scored a sheet of foam (so it bends) and they coated one side with fiberglass (for strength and flexibility). Tomorrow they'll lay it inside the frame and epoxy it to the hull. We may play with the shape of the outer end a bit until we get what we want. Then we'll lock it down and glass it up. We're very excited! Stay tuned...
Tuesday, March 27:
Just as we were leaving the boatyard last night it started spitting rain, and shortly after we
arrived at our apartment the heavens really opened up (and Phuket really knows how to do a
downpour!) Luckily, the guys were still at the yard so no damage was done, despite glassing
the foam just before the rain started.
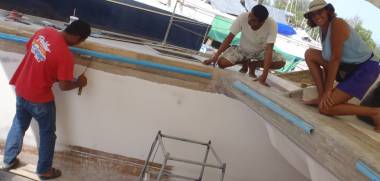 Golf & Sue watching E-U glassing up the trampoline holders |
The sheet of foam with the fiberglass on one side and grooves scored into the other side was trimmed this morning and then epoxied to the starboard transom, just like that! Since it wants to spring open a bit, the aft‑most end is a bit more flared than the forward end (where it's attached to the hull) but this actually doesn't look bad and it gives us a bit bigger swim platform. We want to extend the outside (starboard) wall to join the new extension, and how that join works is Golf's problem, so we're not sure how much of the flare we'll be able to keep. We Shall See...
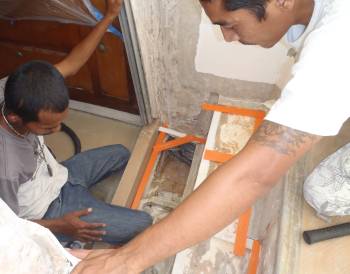 Baw & Golf working out how to repair Ocelot's entryway |
This complete dependence on Golf is a bit difficult for Jon. He likes to have a plan, to know where things are going, to plan for any difficulties, etc. But apparently boat builders operate very differently, slapping something together and knowing from previous experience that they can fix whatever problems come up. We have to trust that Golf knows what he's doing and can fix any problems that come up, but it's a strain on Jon.
Golf had a long conversation with Max, who's doing the reconstruction of Ocelot's entryway. The one small patch of balsa that we've been stepping on as we go in and out has been removed from the steps down from the cockpit, and the underlying fiberglass is too weak to step on, so it's now difficult to get into the salon/galley area until Max and Baw get the steps repaired. But they're starting from the bottom up, so their initial efforts will be the area just outside the entryway. This was a drain with a teak grate over it (where we usually took our showers). The floor of that needs to be rebuilt and made especially waterproof, as we used to have some water seeping in there sometimes, and making its way down to the guest cabin. Hopefully we can put an end to that sort of wandering water. Max and Baw spent the rest of the day building fiddly little bits of foam to epoxy together into the structures they need.
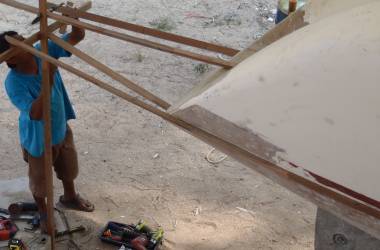 Houa setting up the framework for port side extension |
Another small project is to fill in the cutouts in the hulls under where our emergency hatches were. Foam blocks have been built up and shaped, but there was some miscommunication and some of the foam was shaved down too far, despite having the matter explained only moments earlier. Jon might have come unglued, but Golf just told the worker responsible what the final shape has to be (again) and how to repair his work. Once the foam blocks are correctly shaped they'll be epoxied in place and then glassed over to make the hulls smooth in that area.
Up forward, E‑U and Boy were glassing in the new PVC trampoline holders that they'd tacked up last night with super‑glue. The edges of the PVC pipes were smeared with a fillet of epoxy mud. Once that had cured, the little blocks of wood that had been super‑glued on were knocked off. Then 4 sheets of biaxial glass were laid over the PVC pipes, holding them securely to the hulls. Of the 4 trampoline holders, one has been glassed and another mudded, so the work here will continue for a bit.
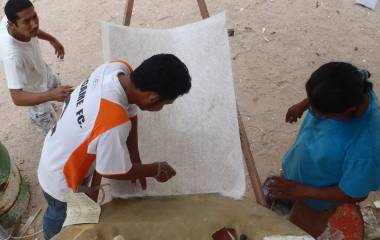 Golf, Boy, & Houa laying glass on top of the foam extension |
With a sheet of foam epoxied to the starboard transom and looking good, Houa started setting up to do the port side. Problem is, Ocelot is nowhere near flat. She's a good 2" (5cm) nose down and she's listing a bit to port as well. So trying to make the 2 transom extensions the same will be a challenge. Jon setup a tube with water in it as a water‑level, so we could find about where the waterline will come, but we're having to make assumptions that may not be based in reality - like that the old original factory waterline (still visible) is correct and symmetrical on both sides of Ocelot. But it's the best we can do in the circumstances.
So port side is setup and ready to receive its first sheet of foam, probably tomorrow. But the afternoon started clouding up, so Golf quickly laid a sheet of chopped‑strand fiberglass mat over the foam on starboard side. This isn't really structural as much as simple water protection. We should still be able to adjust the shape a bit if necessary.
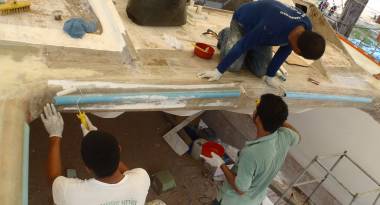 Glassing in the new trampoline holders on the bows |
Wednesday, March 28:
A bit of a slow start today as the guys ran out of epoxy early and Golf had to drive home to get
some more (apparently it can walk away if left out at night). But once Golf's team got into
the groove, they achieved lots of good things.
Up on the bows, E‑U and Boy finished mudding the 3 remaining trampoline holders to the insides of the bows. Then they laid 4 strips of biaxial glass over each one. This is apparently about twice as much glass as is really necessary, but Golf's a thorough man (which we like). Golf slipped a fiberglass rod inside each holder before the ends were glassed over. These are what we'll tie the trampolines to after he cuts the slots in the sides of the holders for the ropes.
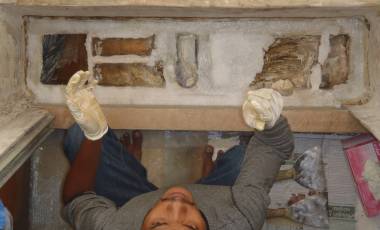 Baw waiting for the new floor just outside the entryway |
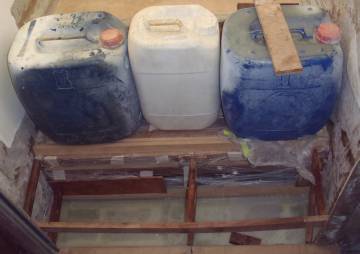
In the salon, Max and Baw were continuing their work just outside the entryway. This area is supposed to be a waterproof well with a big drain in the bottom, but much of that has been cut away. There's not enough room for a sandwich construction floor, but they made cute little glass covered foam supports and laid up a thick sheet of fiberglass (as the actual floor) on a plastic covered table. Once the glass was cured and trimmed to fit, they fitted the foam supports and then gooped everything in epoxy mud before putting their new floor in and working it down onto the mud. Once it was down where it was supposed to be, they weighed it down with water jugs until the epoxy cured.
Then they turned their attention to the area around the door, cutting the foam for the steps to the cockpit just outside the door, and also looking at how to rebuild the walls on each side of the entryway. So nice to see progress here every day!
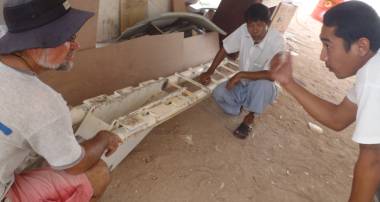 Talking to the metalworker about reversing the anchor box |
We have a bunch of metal work that we want done, but our metal shop of choice (Luk) is far away and they never seem to have the time to come to the boatyard, despite repeated requests. So today Golf called over a more local metalworker that he knows and likes, and we talked about the central strut that goes out to the middle of our forebeam and holds the middle of both trampolines. This aluminum structure also supports our anchor, and we'd like to modify it so the anchor is carried just in front of the anchor winch instead of all the way out at the forebeam. This will get the anchor's weight back a bit, where it belongs. It also means that the teak grate that goes over that beam should last much longer, without the anchor chain rattling over it all the time.
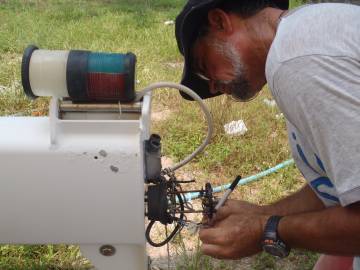 Jon removing bits from the top of Ocelot's mast |
This work is pretty easy - just cut 12 welds (2‑3 of which are already broken), turn the anchor box around, and re‑weld it where it was. The beam is supported the same way at each end, so we can then just mount it the other way around and the anchor box will be right next to the anchor winch. If this metalworker does a good job, we'll start giving him some of our other projects. We want to add stainless steel rollers to the end of the boom, where the main‑sheet comes out, to prevent the main‑sheet chafing so much. We will also want 2 stainless steel swim‑ladders made up, as well as stainless steel end‑caps for our new transom extensions, to protect them from errant (or ignorant) dinghy drivers.
But the big job will be creating new sinks for the galley, as we want the whole area done in stainless steel, with a lip around the edge to prevent water damage to surrounding wood, and with the sinks themselves welded in such that any water on that counter drains into the sinks. This will require a bit more skill (as well as Houa finishing the woodwork for that part of the galley) as sheet stainless steel is difficult to weld nicely, and it will all have to be polished so the welds don't show. We Shall See...
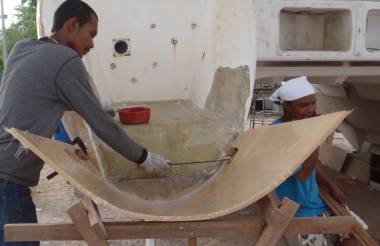 Baw epoxying on the port-side transom extension |
When he wasn't watching and directing the other work, Jon continued stripping the mast. He got the masthead light fixture off, as well as both fittings for the wind instruments, despite several bolts being fused into the aluminum.
In talking to other folks at they yard, we're beginning to wonder if we shouldn't replace our (rod‑rigging) diamond stays with one of the new ropes like Dyneema that are just as strong but are much lighter and cheaper than steel. We have 8 diamond stays and they're now 17 years old. We'd originally been told that rod‑rigging lasts up to 40 years, but now we're not so sure. And one problem with rod‑rigging is that when it goes, it goes all at once, with no warning. Hmmm...
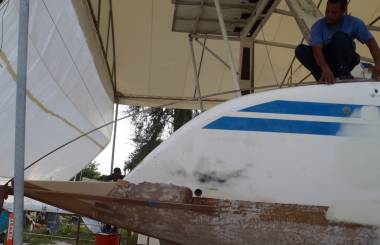 The stick outlines what's likely to be Ocelot's racier profile |
Houa started working on our port‑side transom extension. He slit a sheet of foam repeatedly, so it would bend easily. Then he put a layer of fiberglass on the un‑slit side for strength. This sheet of foam is a bit bigger than the piece on starboard, so it took a bit longer to make sure it was positioned properly. Jon also wanted a double check so he setup a straight‑edge from the deck above where our rudder mounts and measured down from that to the edge of each extension. Both measured 31.5" (80cm) so we're happy they're symmetrical.
By the end of the day, not only had Houa mounted the port extension, but he'd cut new foam marking out the size of our new swim‑platform on starboard. Baw had glassed the inside of the port extension, and we'd worked with Golf to design the swim‑ladders and stainless steel end‑caps for the extensions.
Golf also worked with E‑U on what the outer wall will look like. The inner wall we'll
leave essentially unchanged, to facilitate swimming and dinghy access, but we'll extend the outer
wall on each side so we have some protection and something to hold onto as we walk down to the
transoms, keeping similar lines to what we have now, but stretching them out a bit. It's all
very exciting...![]()
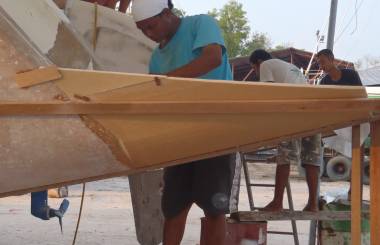 Houa working on the port-side transom extension |
Thursday, March 29:
The guys are on a roll, and we're just sort of hanging on for the the ride. This morning Boy
found and repaired a minor crack in Ocelot's gelcoat under the bridge‑deck, but that was pretty
minor.
 Epoxying new foam to the cockpit steps |
The fun stuff in the morning was happening in the cockpit. Max, with Baw helping him, shaved down 3 pieces of foam to replace the balsa we'd removed from the steps going down from the cockpit to the entryway. Then they mixed up several batches of epoxy mud and stuck the foam where it belonged. But sticking the vertical foam in place presented some interesting problems. For the horizontal step it was easy - just cover it in polyethylene and weigh it down with water‑jugs. But the vertical surfaces were trickier. Max worked out ways to brace the 2 vertical bits of foam against the door‑frame, insuring that the foam was well bonded to the underlying glass.
Max then turned to working on the walls on each side of the steps. Unfortunately, these side walls have to be foamed before we can start protecting any of the foam with layers of fiberglass. Some of the corners are fairly rounded, and Houa was slicing foam with his router so it would bend around the corners but Jon wasn't happy with this. Even with the slots, the foam will try to spring out of the corners, and if there are any air‑gaps behind the foam, it loses all the strength of a sandwich construction. So Jon worked with Golf and Max until we came up with a simple way to make sure the foam would fit into the corners without any air gaps.
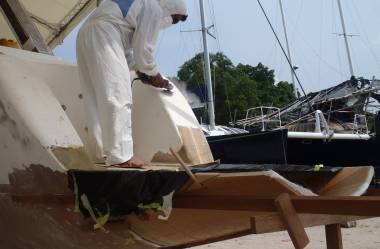 Boy grinding the gelcoat off stbd transom, above extension |
This is a tricky business, especially with the communications gap (Max is bright and understands some English, and Houa even more, but only Golf speaks very much). Max is justly proud of the job he's doing, and we want him to enjoy that responsibility, so we don't want to tell him how to do his repairs. We tried to tell Golf that we're not telling Max what to do, but asking for his approval. We think Golf understood, but we're not sure he really passed on our concerns.
We got a bit of a surprise from the metalworker we talked to yesterday. He wants $230 (later dropped to $215) to grind off 12 2" aluminum welds, turn the anchor box around, and re‑weld those 12 2" strips. The welds are all exposed so this work should only take 1‑2 hours. Something is wrong, but we can't get a clear explanation.
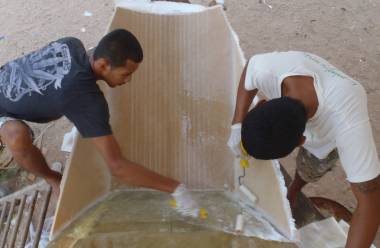 Max & Golf glassing the inside of starboard transom extension |
Apparently, this guy does stainless steel work (and nice work - we've seen it) but he doesn't have the equipment to weld aluminum (which requires an inert gas atmosphere, similar to welding stainless steel) so he's having to go through a 3rd party. We were hoping to find a metalworker that could do both aluminum and stainless, but perhaps that's asking too much.
We pulled the remaining 4 wires out of the mast, leaving strings in their place so we can pull new wires through after it's painted. We also removed the middle set of spreaders, so only the lower spreaders are left, but we need those for now as they're keeping the mast from rolling over. Golf also (finally) brought us a 30mm (1.18") socket so we could take the big mounting pad bolts off the forebeam. So now the mast, boom, and forebeam are essentially ready to strip and paint.
Boy was grinding the gelcoat off the edges of our sugar‑scoops to get down to the fiberglass, so we can build the walls up a bit and bring them down to the new transom extensions. Fiberglass dust is unpleasant enough that we headed down to our "lunch beach" until after lunch.
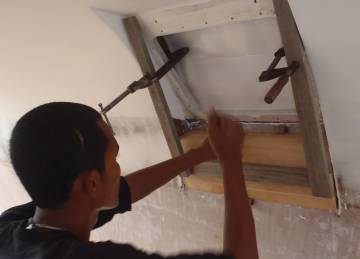 Baw mounting new foam block under the emergency hatch |
When we returned from lunch, Golf announced that the starboard extension was good and he wanted to glass the inside properly in 3 sheets of biaxial glass. While he and Max and Boy were doing that, Houa cut the corners off the port extension and used them to build the port extension up to where the floor will be. Presumably the port extension will get glassed tomorrow. The starboard extension also had "wings" added to bring it up to where the floor will be, but those extensions were a bit bigger on starboard (we used a bigger piece of foam initially on port). Unfortunately, there's a bit of a kink at the joint line which will have to be ground out before we glass up the outside of the starboard extension. Still, it's GREAT to see progress being made so quickly!
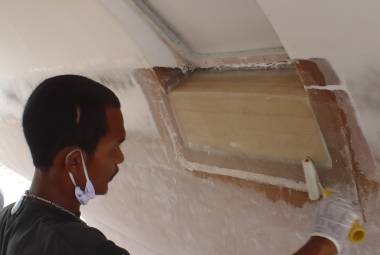 Baw glassing in his foam block under the emergency hatch |
Under the bridge‑deck, Baw was working on the area just below the emergency hatches. This area is indented, presumably so the hatch can open, but it's actually indented too much and upsets the water‑flow in that area. So Baw has been building up foam blocks to go in those 2 areas, and today he epoxied them in. He had to rig an elaborate mechanism to hold the foam in securely, but it looks like a good job. Soon those blocks will get glassed onto the hulls and faired in.
Friday, March 30:
A bit slower day compared to the last few, probably because we took a couple of sideways steps.
Baw seems to be in charge of filling the indents under the emergency hatches. He cut and
shaped 2 blocks of foam, and epoxied them in last night. Today he faired them down and covered
them with a couple of layers of biaxial glass. Once they smear some filler over it all and
sand it smooth, it will look like it has always been that way.
After he finished that, Baw started working on the central spine for our transom extensions. These will be fiberglass coated foam. We'll have a large spine running the length of each extension and bonded securely to our current transoms. Two frames will go across each spine, so the whole structure should be very strong.
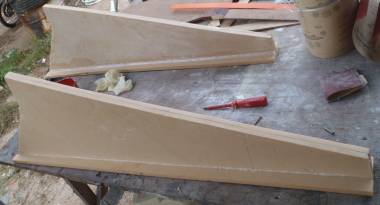 Center spines for the transom extensions (upside down) |
Max continued working around the entryway, shaping the foam that's to get epoxied on either side of the entryway. He was trimming and fitting for much of the day - presumably he'll be able to epoxy them in tomorrow.
The area just inboard from the entryway, a rather inaccessible space behind the sliding door and the fridge, has been a source of some concern. This is a balsa‑cored wall that's never been finished - the factory just left the top with naked balsa. The starboard end near the entryway shows a bit of water damage, but it's a difficult area to get into. We'd originally planned to dry that edge with heaters and then pour epoxy in at the top and let it percolate down and saturate the bad balsa and stiffen that wall, but then we won't really know the condition of the wall.
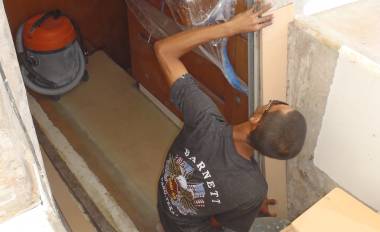 Max trimming & fitting foam around the entryway |
Today Golf and Jon took a closer look at that wall and decided that we could cut a strip out of the damaged (starboard) side of the wall, dig out the balsa, and fit some foam in there before glassing it over. Most of the wall seems OK, so we should only need to take out a strip perhaps 8" (20cm) wide. Golf thinks it would be easiest to do this work from the outside rather than the galley side. This is our battery compartment, but it also holds our alternator regulators, fridge compressor, inverter, solar panel controller, 2 huge wiring troughs, and autopilot motor and brain.
The other little sideways step is that our ever careful carpenter Houa measured the curve of our 2 transom extensions and found them different by an inch or so (2cm). Problem is, now that the foam has glass on both sides, it's very stiff. So he made several slices in the inside glass with a carbide‑tipped skill‑saw and then used ropes and wedges to force the port extension into the right shape. It probably would have been better to loft the whole thing before we started, but when you're working on sandy gravel and don't really know what the final shape will be, that's a bit silly. Boat‑builders here often seem to just slap something together and deal with things like this as they come up. OK...
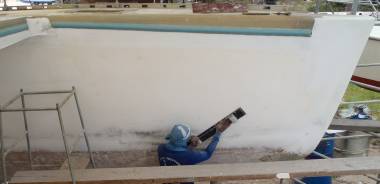 Long-boarding Ocelot's newly extended bows |
Poor Boy spent the day turning into a snowman, grinding off all of the white gelcoat in our starboard sugar‑scoop. The outside wall needs to be extended out to the new transom extension, and Golf will be making us proper steps as well, and both of these need to be bonded to good fiberglass, not just gelcoat. So Boy dressed up in a white coverall and spent the day grinding. But even completely covered, with mask and goggles, the dust gets in to your skin and starts to itch. It's a miserable job (and miserable to be around as well). Boy finished the starboard side, but still has all of port to do.
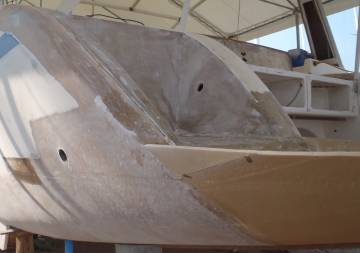 Port sugar-scoop with gelcoat (finally) ground off |
We haven't talked much recently about the guys working on the hulls but they're still patiently long‑boarding everything smooth. Now and then they smear a bit of epoxy filler here or there, spray on some black paint (so they can see where they've sanded), and sand it smooth. Looks a bit mind‑numbing to us, but they should have arm muscles like gorillas when they're finished.
Saturday, March 31:
This week started with a bang but is ending with a bit of a whimper. For the 2nd
day in a row, not much was accomplished, except, perhaps, by the long‑boarders.
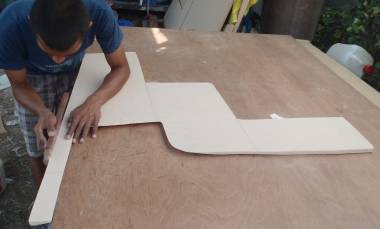 Max shaping a complicated bit of foam for our entryway |
The main bright point today was Max, trimming and fitting the foam panels to go around the entryway. Max is a good man - doesn't ask too many questions, just goes out and gets the job done. He's now got 4 foam panels ready to epoxy in - 2 on each side of the entryway. Apparently he's planning to come in tomorrow (Sunday) to bond them in, which means that we'll probably be here as well, as we like to see that sort of thing happening. Since these sheets are all vertical, they need something other than water‑jugs to hold them on while the epoxy cures, but I'm sure Max will figure something out.
On our way in this morning we stopped in at the shop that's working on the beam that holds our anchor. Golf apparently doesn't like this shop, as he says they charge "farangi" (foreigner) prices instead of Thai prices. They also once spoiled a paint job he was doing, causing him to lose money on that job. But at least they have a welder that can weld aluminum. They had already cut the anchor box off so Jon showed them how and where we need it welded back on. After some negotiation (all in Thai) we settled on $130 for the whole job - more than we were expecting, but much better than our original quote from another metalworker.
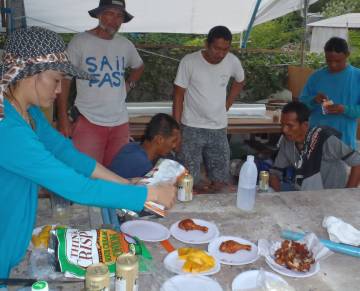 Mai, Jon, Golf, & Houa, with Max & Baw playing checkers |
Boy finally finished grinding off all the gelcoat around our transoms. This was a miserable job that took 2 whole days. We're sure he's glad it's over. The insides of the transoms (our "sugar‑scoops") will be getting new steps down to the new extensions, and the outside wall will also be extended to go down to the transom extensions. Both of these need real fiberglass to attach to, so the gelcoat had to go.
Houa is still struggling with our port transom extension, trying to get it to match starboard. We don't actually think it's possible. Once a structure like that gets bonded on, especially in a curve, there are very few ways it can be moved. Jon told Golf today that we should really have taken forms off the first one (once we got it where we wanted it) and used those to shape the second one. He also said that cutting port extension off and remounting it (or a new one) isn't failure, it's learning. We Shall See...
Poor Golf managed to get a flat tire at the yard today - not surprising given all the junk that's lying around. But his truck is lowered so it's difficult to get a jack under it, and his lug nuts are deeply recessed into special wheels, so it was a bit of a production getting the flat off. Then Golf and Houa (with the tire on Houa's lap!) climbed on a scooter to take it off to be repaired. Crazy... But when he returned he brought a bunch of fried chicken, rice, and mangos for our Saturday Afternoon Party.
Thai Refit:
Ocelot Pages:
Top Level: Home | Destinations | Cruising Info | Underwater | Boat Guests | Ocelot | Sue | Jon | Amanda | Chris | Site Map | Make a Comment
|
If our information is useful, you can help by making a donation |
Copyright © 2000‑ Contact: Jon and Sue Hacking -- HackingFamily.com, svOcelot.com. All rights reserved.