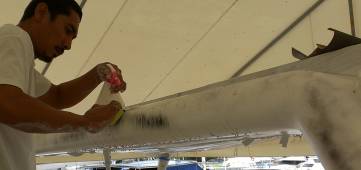
Golf wet-sanding the targa-bar
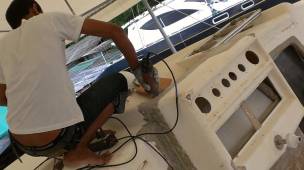
Baw prepping the helm area for gelcoating
46 Inject Bimini
Summary: The top of the targa‑bar got polished in preparation for the new bimini. The cockpit also got some gelcoat work, to prepare it for the new teak. The bimini got popped off its mold for the first time, but we were concerned about its stiffness, so we drilled about 100 tiny 2mm holes through to the joint between the foam layers and injected almost 3 liters of epoxy into that joint. We put some filler on the front edge, which was long‑boarded and shaped and then the front was glassed in. We laid a sheet of glass over the top on the starboard side, but ran out of epoxy to do the port side. Houa ground out the many screw holes in Ocelot's flanks and filled them with epoxy mud before putting a glass patch over them. Both port and starboard sugar‑scoops got 3 layers of biaxial glass laid over their walls, the last sheet going all the way under the transoms. The steps also got a final layer of fiberglass to join them together. Port side was cut back and shaped to match starboard and then the cuts were glassed over and a final sheet of structural glass was wrapped over the swim‑platform and under the transom. Finally, we cut away the shelf at the very front of the starboard fo'c's'l to allow access to where the pad‑eye for our new prod will go. We cut out the inner skin of glass and ground out the foam and old gelcoat so the area is now ready to be reinforced to handle the loads that pad‑eye will see.
Monday, September 17:
A wet start to the week, with rain from the sky and a few tears in the eyes as we bade Amanda and
her friends Monica and Liz farewell - they started their month‑long exploration of the jungles of Thailand
(natural and concrete) this morning.
 Golf wet-sanding the targa-bar |
 Baw prepping the helm area for gelcoating |
Luckily many things can happen under our wonderful big white circus tent even when it rains. Up in the cockpit, Golf spent most of the day hand sanding the gelcoat on the targa bar. He was using 320 grit wet and dry sand paper and a water sprayer. He'll be following that with 400, 600, 800, and 1200 grit to give us a really fine polish. Sounds pretty labor intensive to us!
While Golf was perched up high, Baw worked around the helm station which had been removed back in March and glassed back into place in late July. He sanded the glass smooth, then applied gelcoat filler all over it to smooth it all out. We see a white helm station in our near future!
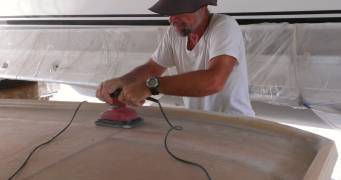 Jon sanding down the fiberglass layup from Friday |
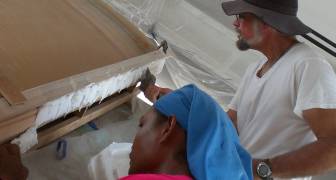 Houa & Jon mudding the front to give it a better shape |
Jon sanded out the rough edges on the bimini from all our glassing last Friday, a process that always follows any fiberglass layup. Once Sue had dried the cockpit above our work area from the weekend's rain and resealed the cockpit drain holes, we attacked the front rim of the bimini. This 4 layer high rim at the front of the bimini has a complex curve to it, but we wanted to make it a bit straighter in front, rather than having it indented in the middle. Houa helped us set up a plastic coated wooden frame so we could apply the epoxy mud in just the right shape. The front of the bimini is now mudded, and once it's cured, Jon can sand it into the right shape.
While the epoxy cured, Jon and Sue both spent some hand‑numbing time with the orbital sander working on getting the mast all smoothed out and ready for final polishing. There's still a long way to go on this, as the guys used a grinder to take off the mast paint and primer and we now have hundreds of small half circle indents in the aluminum which we'd like to get rid of before we apply the clear Nyalic coating.
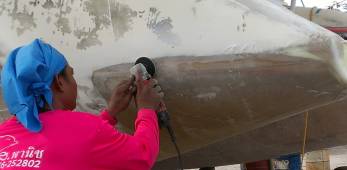 Houa reshaping the port transom near the waterline |
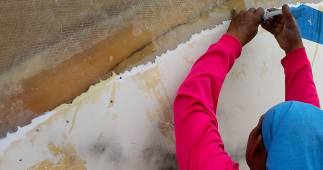 Houa using an epoxy-filled syringe to fill old screw holes |
Houa sought out and marked the multitude of screw holes in Ocelot's hull around the old transom area. These had been put there by the previous carpenter, Meng, when he attacked Ocelot with his screw‑gun in the first (aborted) attempt to extend our sugar‑scoops, way back in early November. Houa used a syringe filled with epoxy mud to fill each hole. He'll follow this up with a check from the inside, then sanding and applying fiberglass cloth to cover the small holes. These little holes have been there for 10 months, and it is disconcerting to think of pin holes in our hull, but we're happy with the way they are being fixed. Houa finished the day by putting his carpentry and artist skills to good use to make sure the two transoms are shaped exactly right, and that they match! He cut a sliver from the inside of the port swim platform to match the shape of starboard and he worked more on the outside of the port transom. Over the weekend he'd ground back the ridge at the waterline and glassed it over, but it needs a bit more shaping.
Tuesday, September 18: The Great Unveiling!
A beautiful sunny day, and ironically, a day when we didn't have any epoxy or fiberglass projects
going. Jon started off working on the front of the bimini, fairing down the epoxy filler that we'd
spread there yesterday. He sanded it down smooth and then made pencil marks along the whole front and long‑boarded until
the pencil marks were gone. That is HARD work!
After lunch we lifted the bimini frame up at the back and Jon climbed underneath to cut all the tie‑wraps (cable‑ties) holding the bimini to the frame. WOOT! The Great Unveiling! We carried the bimini, sans frame, out to the sandy yard and Voila! We got the fun of walking and sitting on it without its support. It's got a bit more flex than we expected, but then again, we don't have all the fiberglass layers on it yet. We flipped it over and carried it back to our work area where Jon began the dusty job of sanding down the underside to prepare it for the next fiberglass layers.
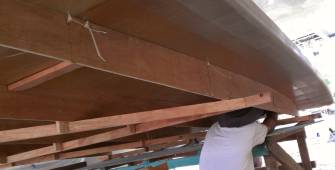 Jon cutting the tie-wraps holding the bimini to its frame |
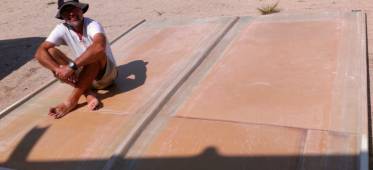 Sitting on the bimini without supports to see how strong it is |
The bimini currently has just a single layer of fiberglass on each side (plus the 4 strengthening ribs and their associated glass). We had hoped to get away with just one more layer of glass on the top, but given the flexibility we saw today, we'll probably need another layer of glass on the underside as well. The good news is that we didn't get any cracking as we flexed the bimini by walking on it. We'd heard some cracks earlier, as we'd stood on the bimini to work on it, but when Jon went under the bimini to cut it free from its frame, several of the tie‑wraps that tied the bimini to the frame were already broken, so we suspect that the cracks we heard were more between the bimini and its frame than within the bimini itself.
Up in the cockpit, Baw sanded the helm station and its new white gelcoat filler. He also sanded the back of the cockpit seat and the engine hatches to prepare them for gelcoat.
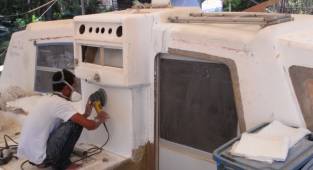 Baw sanding the new gelcoat at the helm station |
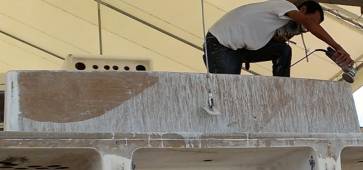 Bow sanding the cockpit seat to prepare it for new gelcoat |
Houa spent the day on the fiddly job of filling more old bolt holes under the aft deck, and also sanding and preparing the little screw holes made during the first (aborted) attempt at a transom extension. Houa, Jon and Golf discussed the transoms and determined that they are as final as they can be. We'll put some structural glass on them and any further minor shaping will be done with gelcoat filler. Better to have the shape too "skinny" and need to fill it after the glass is on than to have the shape too "fat" and have to grind down through the glass. We are, once again, out of epoxy, so these jobs are awaiting the 'morow.
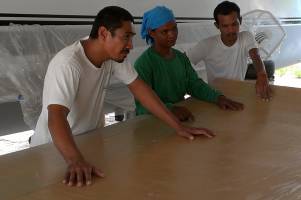 Golf, Houa & Baw examining the bimini's underside |
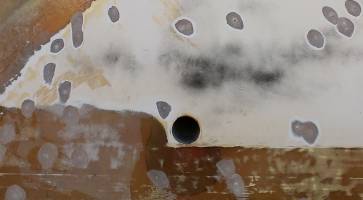 Screw holes in Ocelot's flank being repaired |
Sue spent all morning and much of the afternoon at the apartment on the computer, trying to make sense of all our receipts, payments, and quotes. It was definitely a day to wear the 30 year old (and somewhat faded) "business administrator's" hat. Last time she played that role was in the late 1970's. Bet a lot of you didn't know that! Sure is nice to have Excel Spreadsheets now. Gads! We used to do bookkeeping by hand!
Wednesday, September 19:
A lovely sunny day, but a bit unproductive for Team Hacking. Not only is Amanda out
gallivanting around Thailand but Golf didn't get any more epoxy until the afternoon, which set us
back about half a day.
Golf's team made good strides today, despite most of them working on a power boat across the track from us for much of the day. Baw cut several sheets of fiberglass and sanded the outside of the port sugar‑scoop until it was smooth. By late afternoon Baw and Houa were ready to lay some glass on the wall coming down to the port extension. Yes, this was glassed before, but then we decided to raise the swim‑platform about 3" (7cm), and that necessitated raising the wall a similar amount, which started a whole cascade of related projects, none of them very big in their own right, but cumulatively a lot of work.
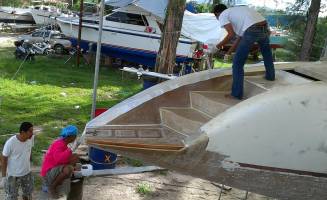 Golf, Houa & Bow put the first sheet on the port wall |
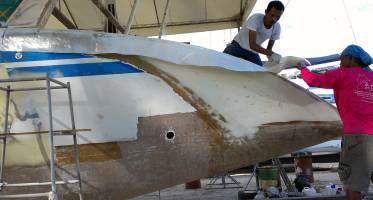 The second sheet of biaxial glass goes on, overlapping the first |
So today they finally covered the port wall (hopefully for the last time!) They put 2 layers of biaxial on top of the wall, and a 3rd sheet covering not only the top of the wall but going down the outside and wrapping around the bottom of the transom. Tomorrow they'll put another 3 layers of biaxial glass on the inside of the port swim‑platform to cover the exposed foam there (brownish‑red in the left photo above, where Houa trimmed it to match starboard). There will be more cosmetic work needed, but this should finish the structural aspects of the port sugar‑scoop.
We had hoped to do a little work on the bimini while it was upside down, let the epoxy cure over lunch, and then flip the bimini over and glass the front, but the lack of epoxy stymied us. Jon sanded much of the underside, and then used a long‑board to round some of the edges of the bimini up forward. Hard work, but using a long‑board insures that the edges get rounded as uniformly as possible along their entire length.
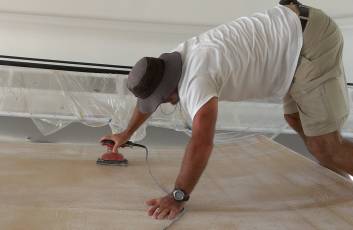 Jon trying to sand the middle of the underside of the bimini |
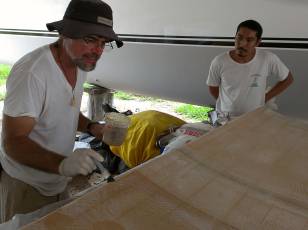 Jon touching up some minor blemishes with epoxy |
But there were a few blemishes that Jon wanted to fill with epoxy before we flipped the bimini over to glass the front. When Golf returned with some epoxy in the afternoon we fixed up the small blemishes but the epoxy didn't cure in time for us to do anything else except to cut the glass for the front. So we'll tackle that job tomorrow.
Thursday, September 20:
An interesting day, with a large but ultimately necessary side‑step.
In the morning we flipped the bimini over so it was right side up, sanded a nicely rounded edge that we couldn't sand when it was on its back, and epoxied 2 layers of biaxial glass over the forward rib. This effectively closed in all exposed foam (although we'll be exposing some more foam at the back tomorrow). Baw was very helpful, not only mixing epoxy for us but getting the glass to lie down nicely on the tricky and complex corners, and then cutting more glass (on his own initiative) to reinforce those corners and make them look nice and professionally done.
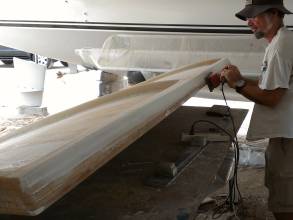 Final sanding on the front of the bimini |
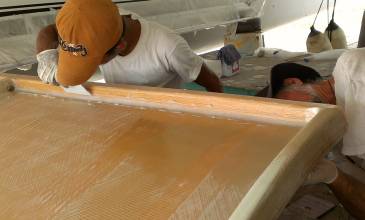 Smearing on sticky epoxy mud & making filets in the corners |
After lunch, Baw and Houa laid what we hope is the last structural glass on the port sugar‑scoop. First was a big sheet of biaxial down all of the steps inside the sugar‑scoop. We hadn't thought this was really necessary, but it does tie the steps all together much better than they were before. Then they laid a quick couple of glass strips along the inside of the swim‑platform, where Houa had trimmed the foam away to make it the same as starboard. Finally, they laid another big sheet of glass over the entire swim‑platform and around the bottom of the sugar‑scoop. They didn't try to push the glass into the slots where the swim‑ladders lie - they just laid the glass over the slots and then cut that glass away after the epoxy had cured a bit.
Then Houa immediately started preparing the starboard sugar‑scoop for similar treatment, sanding it all down thoroughly.
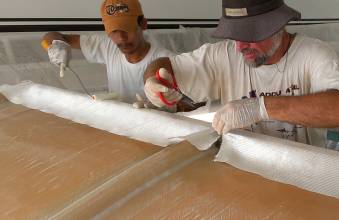 Baw & Jon wrap the first sheet of glass around the front |
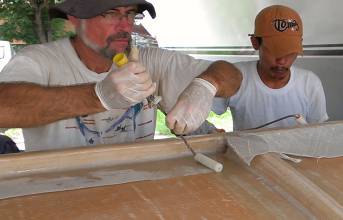 ... and then the second sheet of glass goes on top |
Today we had hoped to lay 2 long sheets of glass on top of the bimini, to strengthen it. The bimini currently has only 1 sheet of biaxial glass on each side, and another sheet between the 2 layers of foam. But Jon's been concerned that the bimini is more bendable than he thought it should be. Now, Jon's an Electrical Engineer, not a Structural Engineer, but his father made sure he knew the basics and, more importantly, had a feel for things. We don't have formulas to tell us how strong the bimini should be, but Jon feels it should be stronger than it is. The only reason that the bimini might be so flexible would be if one of the layers wasn't well attached. The 2 outer layers of glass are still translucent, and we can see the foam under them, so we know they're well attached. That only leaves the joint between the 2 layers of foam as the potential problem.
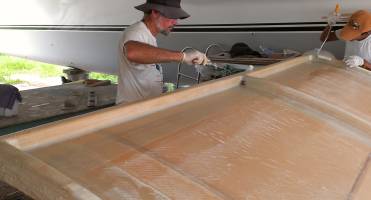 The (almost) finished layup - looking good! |
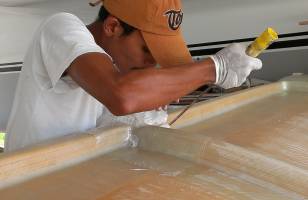 Baw added nice final touches to the middle & corners |
Unfortunately, that joint is impossible to see and difficult to repair, but Jon's been scratching his head over the problem ever since we pulled the bimini off its frame and discovered its flexibility. So while we were waiting for the epoxy on the front of the bimini to cure, he drilled a series of about 100 tiny 2mm test holes through the top of the bimini and down to the layer of glass between the 2 sheets of foam. Then he put a small plastic syringe into each hole and tried to suck up air by pulling on the plunger. If the plunger stuck, that indicated a good bond with no air‑gap. But if the plunger came up easily, that showed there was an air‑gap in the middle, that the upper sheet of foam did not adhere well to the lower sheet of foam at that point, so we drew a circle around those holes.
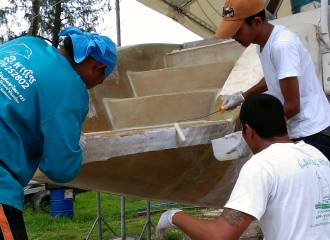 Houa, Baw, & Golf laying a strip after glassing the steps |
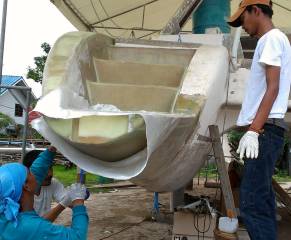 Wrapping a final sheet around the swim-platform |
When we finished, the poor bimini had a bad case of pox. Over half the holes we drilled showed an air gap between the layers of foam. We had to repair that, or the bimini would never be as strong as we needed it to be.
So we decided to inject epoxy down all of the test holes that showed an air‑gap, using plastic syringes. This should bond the foam layers together securely and make the whole bimini much stiffer. The syringes hold about 50cc (about 2 fluid ounces). We thought we'd only need a few syringe loads, as we knew any air‑gap couldn't be very big. How wrong we were...
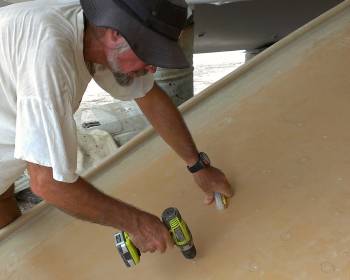 Drilling about 100 tiny holes through the top layer of foam |
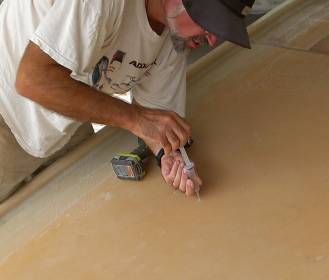 Testing each hole to see if there's an air gap below |
With Baw helping us we began injecting epoxy through our test holes and into the middle of the bimini, starting at the highest point of the bimini. We injected so much, with nothing coming out any of the other holes, that we were constantly looking under the bimini to see if epoxy was leaking out down below somewhere. We could feel how far the epoxy had spread because it was getting hot and we could feel the heat through the (highly insulating) foam! We must have injected almost 2 liters of epoxy before any of it started coming out of the other holes we'd drilled. When that happened, Sue would wipe off the epoxy with an acetone rag and slap a duct‑tape patch over the hole, so no more epoxy would escape there.
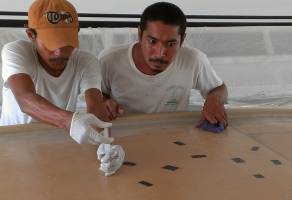 Injecting epoxy via syringe - finally seeing results |
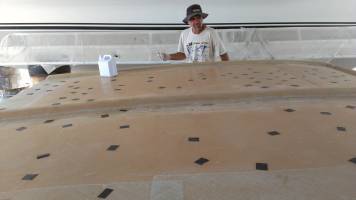 Poor bimini - all the holes where we injected epoxy |
By the time we'd finished, almost 3 hours later, we'd injected about 3 liters of epoxy into the bimini. We were all bone tired and it was well after quitting time for Baw. Definitely a night to go OUT for dinner. A major side‑step for us, but probably a good one. We'll see in the morning if the bimini got any stronger.
Friday, September 21:
Our big plans for the day were aborted by lunchtime rain, rain, and more rain but we shifted gears so as
to not lose the whole afternoon!
The morning was spent on prep work for the day's two big fiberglassing projects. Sue peeled the small duct tape pieces she'd put on the bimini to cover all the fill holes, then attacked the water in the cockpit above us so it wouldn't drip down on the new fiberglass. Jon, Houa, Sue and E‑U then carried the bimini out into the yard to see if we had gained some rigidity after yesterday's epoxy injections. Jon walked on it and declared it stronger, but it still needs those extra sheets of glass on the top and maybe the bottom. With the bimini back on its frame and up on the tables, Jon used both the orbital sander with #60 grit, and the grinder with the sanding disk to take back all the 100 or so spots of epoxy from yesterday's syringe filling.
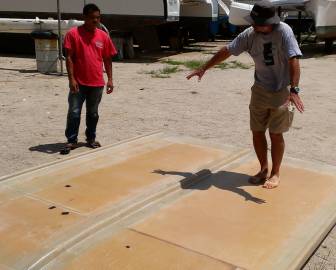 Dancing on the strengthened bimini - E-U is not impressed |
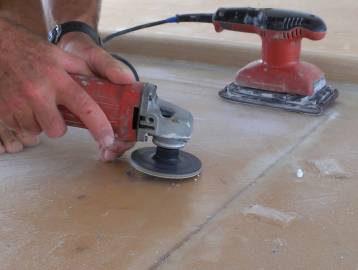 Grinding off epoxy bumps, then sanding the entire bimini top |
Houa spent the morning with the other sander, getting the starboard transom steps and wall ready for their final glassing. Then it was lunch time, and the heavens opened. We finished our 1 hour lunch‑break under Ocelot's big tent and lamented the fact that the big fiberglass projects, on both the bimini and starboard transom, just weren't going to happen today. Welcome to Thailand's wet season!
But we did find other ways to keep ourselves off the streets and out of trouble, mostly in the very forward part of starboard fo'c's'l. Houa donned his white suit and mask, set up the big evacuator/blower, and cut out the forward most part of the fo'c's'l shelf. There seems to be a bit of delamination between the fiberglass and the plywood, but the wood is dry, thank goodness, and better than what we'd found on the port side. We should be able to epoxy the glass back onto the wood pretty easily. The bit of shelf had to come out so we could access where the port pad‑eye will attach on the inner hull, as it actually comes below that shelf, which makes it virtually impossible to get at with the shelf there.
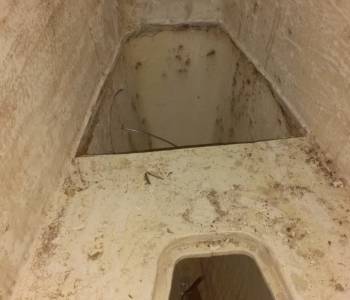 Fwd end of fo'c's'l after Houa cut away shelf to access hole |
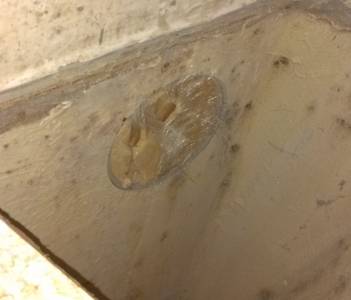 Hole after Jon attacked it with a 5" hole saw on a grinder |
With the shelf out, it was Jon's turn to get white. He used a grinder with a special new chuck attachment to allow him to put the 5" (13cm) hole‑saw on and cut through the first thick layer of fiberglass. This was a bit dangerous, as the grinder goes MUCH faster than a drill, but a drill won't fit in that space. It went so fast that Jon had sparks flying (and he probably ruined the hole‑saw blade)! Then he used hammer and chisel to remove the fiberglass inner wall from the foam underneath (Ocelot's hull is a glass/foam/glass sandwich construction). Then Jon got another grotty job, grinding the foam back into a smoothly tapered big circle, and grinding off the gelcoat around that circle so we can bond directly to the fiberglass.
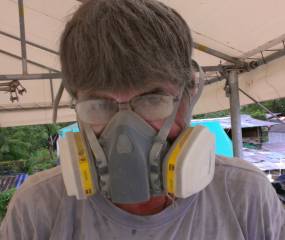 Dustman Jon emerges from The Pit (stbd fo'c's'l) |
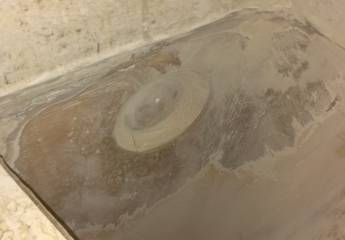 But the pad-eye mounting point is ready to be built up |
The hole will be smeared with epoxy mud, and then filled with biaxial cloth and many layers of chopped strand and epoxy to create a strong bolt point for the new pad‑eyes that hold down the prod. Once the hole is filled with solid fiberglass, we'll put a steel backing plate behind it as well, and then cover that in fiberglass so it can't leak.
As for the bit of fo'c's'l shelf that Houa cut out, Houa will repair the delamination and then make us a new, small shelf replacement once we've finished with all the pad‑eye work.
Saturday, September 22:
Bit of a frustrating day for Team Hacking, but Golf's guys made reasonable progress, especially
considering that Golf himself was spraying another boat for part of the day.
It started out with Jon explaining to Golf how he'd like the hinges for the swim‑ladders sunk down so they're flush with the top of the swim‑platform. This was always in the plan, but we want at least 1 and ideally 2 layers of glass under the hinges, to tie them to the swim‑platform. Otherwise, there's a high likelihood of a crack developing between the foam and where the hinges bolt down. Golf then explained what Jon wanted to Houa, but Houa had his own ideas. A somewhat heated discussion (in Thai) went on for a few minutes, and then Houa got out his router and countersunk the area where the hinges need to go - doing a very poor job. Perhaps we should have realized by now that if Houa doesn't agree with something, he's likely to do a poor job, as we've seen it with Houa before. Jon should have gotten into the discussion and either explained to Houa why he wanted it done that way, or (probably better) just taken the router and done it himself. <sigh>
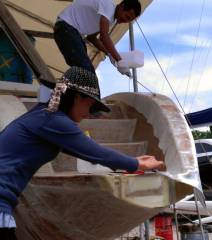 Laying the first sheet on the wall |
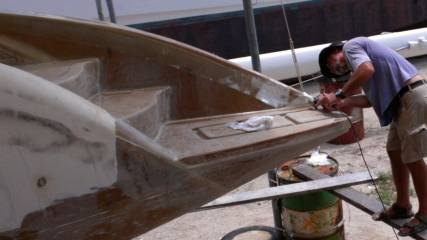 Jon trying to repair Houa's poor routing job at the ladder mounting points |
Things got a bit better after that. The starboard wall coming down to the swim‑platform had to be raised when we raised the swim‑platform, so the top of the wall is mostly naked foam. Today the guys laid 3 sheets of biaxial glass on top of that wall, the last one being full width and wrapping around under the transom, tying the whole wall securely into Ocelot's hull.
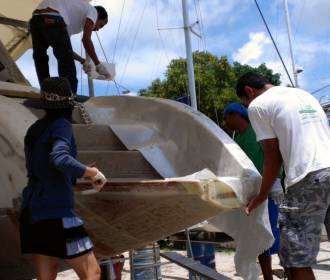 The third and largest sheet goes on the stbd wall |
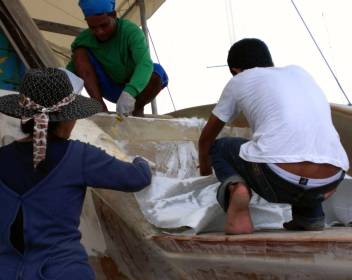 Mai, Houa, & Baw glassing the stbd sugar-scoop steps |
After lunch, when the glass on the wall was no longer tacky, they laid another sheet of glass down the steps in the starboard sugar‑scoop, just as they'd done to the portside steps earlier in the week. They still need to wrap a sheet of glass over the swim‑platform and around the bottom of the transom, but that job will have to wait for next week.
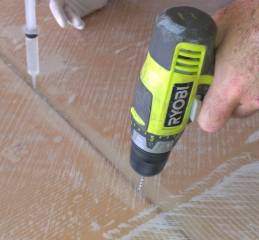 Injecting epoxy to fill small voids |
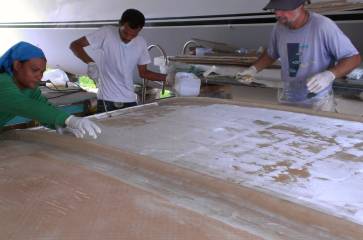 Houa, Baw, & Jon laying a single sheet on the bimini stbd side |
We took the frame out from underneath the bimini so we could get under the front. We wanted to lay a sheet of glass on each side of the top, and those sheets would wrap around the front and go underneath for a foot (30cm) or so. But once we got the glass cut and everything sanded and ready to go, the sky had clouded up and looked threatening. So we waited until after lunch and after the rain had cleared. But by then Golf was running low on epoxy. We managed (just) to get one sheet of glass laid down on the starboard side of the bimini, but the port side will have to wait until Monday when Golf can get some more epoxy.
Thai Refit:
Ocelot Pages:
Top Level: Home | Destinations | Cruising Info | Underwater | Boat Guests | Ocelot | Sue | Jon | Amanda | Chris | Site Map | Make a Comment
|
If our information is useful, you can help by making a donation |
Copyright © 2000‑ Contact: Jon and Sue Hacking -- HackingFamily.com, svOcelot.com. All rights reserved.