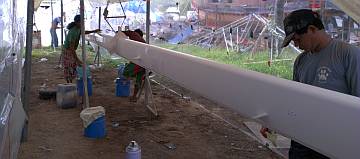
Several men sanded the mast all day for tomorrow's spray
107 Anchor Platform
Summary: The threat of rain delayed many things this week, even though the heavy rain didn't materialize until Saturday. But we still made progress on several fronts. Accomplishments this week include:
|
 Several men sanded the mast all day for tomorrow's spray |
Monday, November 18:
Starting another week, and everyone's charging ahead.
Things moved rapidly on the mast today. Baw apparently had a "stomach accident" so he and Ben didn't arrive until after lunch, but Pla and the 3 Indonesians knew what to do. Sand, sand, sand. The mast is now ready to receive its second topcoat spray tomorrow morning.
Baw wants to spray the satin varnish in the salon soon, so he worked on the complicated salon masking. Unfortunately, when clearing out the galley area, we realized that the big teak shelf behind the stove and oven had never been sanded or upgraded with gloss. Luckily the old varnish was in good shape, so it was just a matter of sanding, cleaning, and brushing on polyurethane gloss, which Lek did in the afternoon. Lek also got polyurethane gloss inside the "trash" locker in the galley. Two forgotten areas now attended to, but they'll each need another sanding and some more polyurethane.
|
Jon installing the last of the waterline vents |
Jon hit some small jobs today. In the morning he bought stainless steel hose clamps for several projects. He got the drain hoses in the battery lockers clamped and attached. He drilled an additional pair of holes in the aft bracket for the anchor platform so now it is ready for Houa to build the platform under it. Then he worked on installing the remaining 4 vents (for heads and fuel) and got them mounted with silicone and screws, but no internal connections yet. So we're vented, but not invented, and we're closing up the holes that can let water into Ocelot.
Mike and the machinists from AME came by mid‑morning to check what we'd hoped would be the final assembly of the bimini legs. They are looking very interesting now, with their (water catch) hose barbs, circular braces, and intricate shapes. Unfortunately, each time some welding happens, things can and do warp because of the intense heat involved. The starboard leg looked great down on the deck end, but the bracket up top that bolts to the bimini protruded too far and left a 1/6" (4mm) gap. This can be easily fixed with some hammering and nudging, which Booglia did right away, under Ocelot.
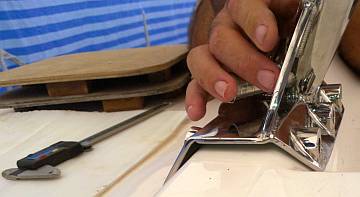 The portside bimini leg no longer sits down correctly... |
The warping on the port side was more of a problem. The top bimini bracket is great, but the "foot" of steel that sits on a channel on top of the salon didn't sit flat. The back was raised by almost ¼" (5mm). This will take more serious cutting and re‑welding of the brace between the foot and the tubular leg. Sigh. One more day passes, and the job is not done, and all our stainless steel pieces still have not left for Bangkok for electro‑polishing. We hope to see the machinists out at Ocelot again tomorrow.
Sue had a pretty successful day. She spent 2 hours in the morning (between running errands for the men) making paper templates for the bunk mattresses. She used huge art paper and tape to piece together a flat facsimile of the somewhat odd‑shaped mattresses. The forward bunks taper towards the front (foot) end, and the aft bunks are skewed rectangles with a wiggle on one side. After a fast lunch she scootered up to near Boat Lagoon to Chamnasin Upholstery, where she and Mr. Peh went over the templates with straight edge and tape measure. We are getting very firm (and strong) foam 4" (10cm) thick. He will cut the exact shapes from the template, but no doubt we'll have to do some minor cutting to adjust for the headliners (which aren't in place but form the walls for the sleeping areas).
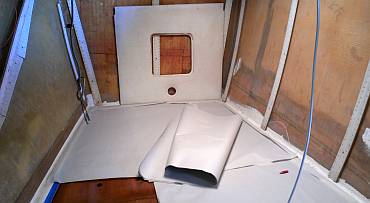 Sue made paper mattress templates for the cabins |
Sue has pretty much decided to sew the mattress covers herself, making good use of the big, clean, cool tile floor in our apartment. Her next stop was an awesome fabric shop in Phuket town where she picked up 20 meters (yards) of cotton/polyester blend, tight woven fabric in light blue and cranberry red.
Back on Ocelot in the late afternoon Sue found Houa making a template for the interior teak trim for the entryway door. We also had a discussion with Houa and Baw about how to finish the interior door sill. It used to be fiberglass and gelcoat, and we may return to that, with Baw's help to make it nice.
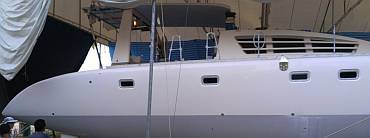 What stripage (if any) should we put on Ocelot? Say here. |
Houa also worked with Bo again, teaching her how to pump Thai epoxy and mix it very well. She put plastic on the bunks and got epoxy brushed onto the "at‑risk" plywood strips that hold up the headliners. She finished 3 cabins, then hit the port aft bunk where Jon had carefully laid out all his tools and bits and pieces for different projects. Oops. Chaos! Looks like Sue will be sorting out projects and tools again in the morning.
After work, we had a discussion with Baw about stripes on the sides of the hulls. Ocelot used to have 2 broad blue stripes over the 4 port‑lights in each side. There was also a boot‑stripe once upon a time, just above the waterline, that was painted over when we moved on board. But we're still not decided on what (if any) decorations we want on the sides. We will certainly put Ocelot's name on each bow, with a stylized cat‑print for the initial O, and we'll put Ocelot's name on our mainsail cover. Any thoughts or suggestions would be welcome...
We're a bit concerned about our possible launch date in just 1 month. Jon has a list of 60 special jobs that only he can do. Two per day? Unlikely. <sigh> Stay tuned.
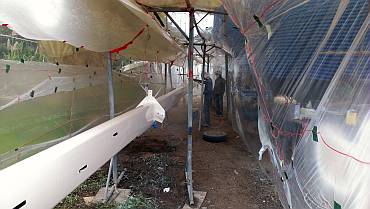 Baw and Heru sprayed another coat (2 layers) on the mast |
Tuesday, November 19:
Another busy day in Paradise with the evening rains settling the dust, but sunny skies all day.
We arrived at the yard to find that the fridge had defrosted all by itself, which was definitely a
Bad Sign. The circuit breaker was on, the thermostat was set correctly, but the fridge wasn't
fridging, or even drawing power. Oh dear. But then Jon found that the power leads to the
fridge had worked their way loose. He tightened the connectors and pushed them back on and
everything started working again. Whew! Another crisis averted...
The big morning push was to get the second topcoat of Interthane 990 (tinted Ocelot White) onto the mast. Heru, Pla, Ben, Baw and Chambron were all inside the plastic spray‑tent from the minute they arrived. A couple men used the blower to wuffle the plastic overhead to get rid of any remaining water drops. Clever. Others re‑wrapped the spinlocks, winchs, rollers, and step in blue tape. Sue was sent for gasoline (which is sold in local tiny shops in whiskey bottles for about $1.30/fifth) and for another 2kg of rags from the second hand store up the road (she buys old sheets that have been washed, but maybe got a cigarette burn or a stain, so the hotels ditch them). By 10am Baw was all suited up, as was Heru (with his long hair inside a hunk of rag with tied‑off ends) with Chambron outside the tent manning the compressor. Baw sprayed for about an hour and got 2 more coats on the mast. Only one more spray to go!
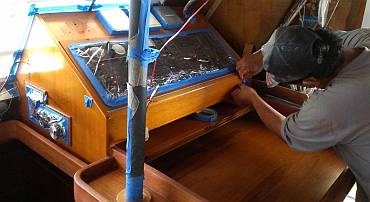 Pla masks the electrical panel above the nav-station |
Lek worked in the salon sanding yesterday's polyurethane behind the galley stove and inside the trash locker. He got a second layer on before lunch. Then Chambron sanded that in the mid‑afternoon, and Lek got a third coat of polyurethane on before quitting time. We set the men on the last remaining area to be varnished: the electrical panel area above the nav‑table. There was lots of blue taping to be done, and careful sanding around instruments and the switches. Pla worked on this all afternoon, so maybe in the morning we'll see a first coat of polyurethane on the old varnish. By the way, we seem to be having success putting 2‑part polyurethane over old (very cured/hardened) 1‑part varnish with no signs of lifting or wrinkling or softening. Let's hear it for modern varnishes!
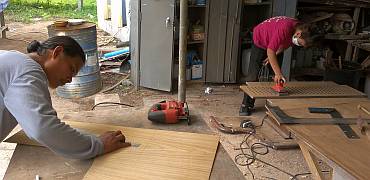 Houa had Bo sand the grate where he could keep an eye on her |
Ben worked with Pla on sanding the big strip of raw teak that's under the aft deck. They got up to 120 grit sandpaper and we decided it looked fine. One more task checked off.
Inside, Bo finished cleaning and brushing Thai epoxy on all the vulnerable headliner supports. Check off another task. Then Houa set her up in his workshop where he taught her to use the orbital ("dancing") sander on the teak grate that lives just inside the entryway. After she got both sides sanded, Houa gave her a piece of square wood covered in sandpaper which she used to sand the insides of each square of the grate.
Houa worked in his workshop near Bo to be able to keep an eye on her work, as she is very inexperienced. His first job was to cut and fit the odd‑shaped plywood/teak veneer that goes inside the teak door frame. Once cut, he epoxied its backside to waterproof it. Tomorrow Lek will put polyurethane on the veneer and Houa can mount it to the frame.
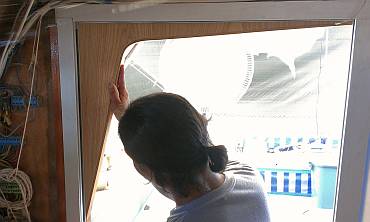 Houa fits teak trim to the inside of the entryway door frame |
Houa then turned his attention to the rubber cushion that lies between the floorboards and their supports. This used to be 1/8" (3mm) rubber, but much of it has disintegrated over the years. We are replacing it with 3mm neoprene, bought from a wholesale wetsuit manufacturer just up the road. When Houa went to lay it out and cut it to Sue's carefully calculated diagram, we found that the shop had given us 69" (1.75m) not the 71" (1.8m) we'd paid for (the length of the salon floor supports). Grrrr. Sue hopped on Scooter to see what they could do for us, but wasn't very hopeful of anything short of buying more material. It had been over 2 months since she'd bought it but the guy remembered her and apologized for the inaccurate cutting, and cut her a new piece 20"x75" (.5x1.9m). Free! Free? Service, he said with a smile. Welcome to a German‑owned shop in Thailand.
So Houa got some of the stringer rubber strips cut, then did an experiment using Dunlop rubber cement to see if the neoprene will stick to the wood well enough. The quick afternoon test says "yes" but we'll see how it is in the morning.
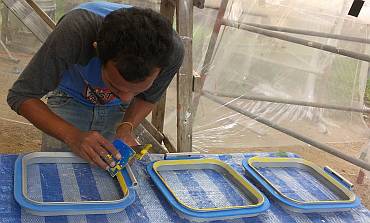 Baw putting body-filler on the corrosion pitted hatches |
One big project that is glaringly in front of us everyday is the installation of the deck hatches. Jon had begun to assemble them with their new hinges, but some of the surfaces that the gaskets push against are badly pitted from corrosion. The painters sand‑blasted them before powder‑coating them, but didn't fill the corrosion pits. Talking it over with Baw we decided to try filling the pits with car filler, sanding them smooth, and repainting just the bearing surfaces in a 2‑part polyurethane. The powder‑coating should have a pretty good grip on the aluminum so we don't want to sand through it or we'll have to start the whole primer/mid‑coat/topcoat business again.
So Baw and a couple of the guys started on this project this afternoon. It's not an ideal solution, as the filler is 2‑part car body‑putty, and the paint will be 2K car paint to match the metallic powder‑coating, but it's the best solution we could come up with. Baw will get the 2K paint in the morning and we'll try it on a few hatches to see how it all works.
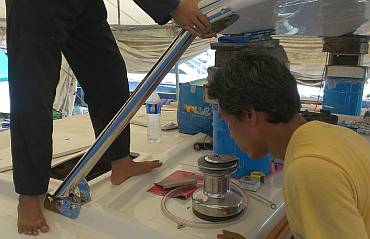 Booglia checks the fit of the bottom of the portside bimini leg |
Jon got to check off some items on the task list, too. He got all 8 of the water/fuel vents that he installed yesterday connected on the inside. Since much of that work was in the engine rooms, he decided to also mount the engine room hatch‑handles so he could get in and out easier. That involved reassembling the hatch‑handles, which needed some rework before they went together correctly. Some fiddly little chores, but now they're done and we can move on.
The machinists from AME arrived in the late afternoon to finalize our bimini legs. The starboard leg had been very close to a good fit yesterday, and it fit like a glove today. The portside leg that was 5mm too high had been cut and re‑welded into a better shape but still needed work. So the men set up on the ground behind Ocelot to hammer and bend and finally they produced a leg that still has a 3mm gap, but otherwise fits reasonably well. Jon got to say yay or nay, and the verdict was "Ship it!" Literally. Now the legs, plus all the other new stainless parts (swim ladders, hinges, grab‑rails, seat‑back, etc) will all be shipped together to Bangkok for electro‑polishing.
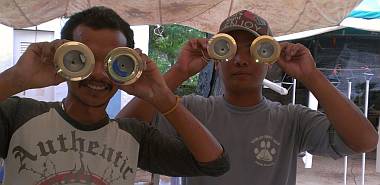 Baw & Heru having fun with the polished brass(!) cabin lights |
Wednesday, November 20:
A cool and overcast day, with the threat of big rain coming, so we decided to change our jobs somewhat.
Originally, after yesterday's mast spray, we'd planned for the men to sand the mast in preparation for the third and final spray. But the weather forecast shows a huge low pressure system south of us, heading NW with heavy rain that is due to start this evening and get wetter tomorrow and Friday, so there was no point in preparing to spray. Instead the men concentrated on 2 projects that can be done in the rain: refurbishing the 28 overhead light fixtures and the 10 deck hatches. Our recessed light fixtures are 19 years old and the white paint is chipped, scratched and the underlying metal is corroded. Baw wasn't sure what he could do until he sanded some. First thought: sand the paint until smooth, then apply primer and repaint in white. But what a surprise to find a glint of brass/gold under the white! Further sanding showed that the light bezels are actually brass and they polish up really well! To keep that nice yellow/gold color we can spray them with a clear 2K topcoat.
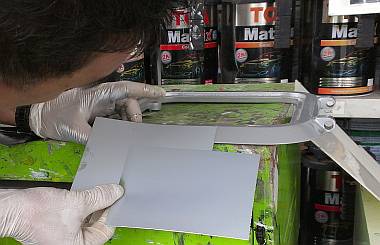 The TOA technician, matching 2K paint to our hatches |
As for the hatches, Baw successfully sanded the sharp rims that contact the gasket, applied a 2‑part automotive filler to fill in the corrosion pits, and sanded things smooth again. This should help the gasket seal well to keep the water out. To make them look nice again, Baw suggested automotive 2K paint tinted to match the metallic silver of the powder coating. So Sue scootered off to the big TOA paint shop where she and the color expert who spoke some English figured out what to do. She ended up with a liter of primer (thinking we were going to put it on the lights, but she didn't know about the brass yet), a half liter of carefully color matched metallic silver 2K, and a liter of clear overcoat for the lights and the hatches. Apparently you can't just leave the metallic paint as the top coat: it needs a clear overcoat. Back at the yard she realized she'd not been offered, or told about thinner for the paint. She would have gone back, but we started getting light rain and Baw decided it was too humid to paint, anyway.
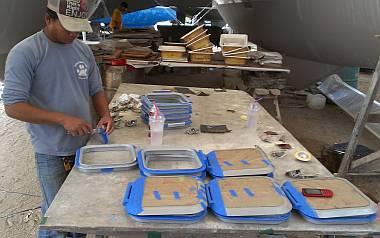 Heru prepared several hatches for an eventual 2K spray |
Jon decided that testing the diesel engines would be a good thing to do, to be sure we're going to be able to motor away from the yard someday. But first he had to check the quantity and quality of the diesel in the tanks, so he visited the tank access panels on both port and starboard, and thus began a whole day's project for both Sue and Jon. Jon removed the stainless access panels and the fuel level sender units for Sue to clean up. At first Sue thought one of the units was broken as it rattled, but Jon pointed out that the rattle was the floating disk that travels up and down inside the tube to indicate the diesel level. So it was the quiet one that was misbehaving. No worries. Sue doused it in a pot of diesel, bumped and thumped it. Poured diesel in and shook it, dug out debris and gunk, and finally, thunk! We had another working sender unit. The tops for the senders were a bit rusty so Sue sanded them and the men painted on some 2‑part epoxy anti‑rust paint.
We had left‑over paint so Sue hopped into starboard engine room and set to work sanding the fist rusty thing she saw. Turns out it was an old bilge pump that Jon plans to replace. Oh well. It will look better now, in the recycling bin! She also sanded and painted the air filter which is not being tossed!
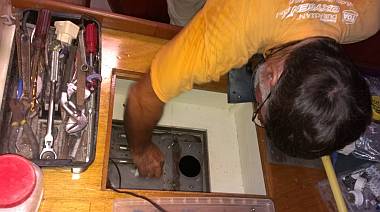 Jon groveled with the fuel tanks, under each aft cabin bed |
Jon, meanwhile, had probed the diesel tanks, which are 26" (66cm) deep, and found that we had about 1" (3cm) of reasonable looking diesel in each tank. Certainly not enough to take us anywhere once we're afloat, so he'll scooter out with a 20 liter drum and get some diesel. But probably not in tomorrow's heavy rain! To re‑assemble the access ports he needed to make new gaskets. He found a good appropriate material at the local hardware shop, and made new gaskets for the starboard side sender unit and stainless access panel. Once the rust‑protected, newly painted sender units are dry, he can put everything back together.
Inside, Lek squatted on the nav‑desk and sanded the teak surrounding the instrument panel. He got one polyurethane coat on in the late morning, sanded it mid‑afternoon, and got a second coat on before 5pm. Only one more to do, and the whole salon/galley/nav‑area is ready for its final satin finish. Now we just need the weather to cooperate.
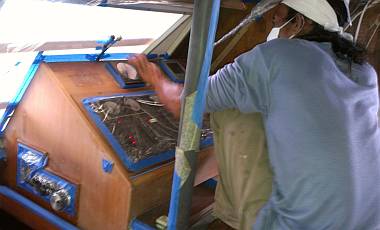 Lek perched on the nav-desk while he sanded and painted |
The weather looks ghastly for tomorrow and there was lots of teasing going on about it. We asked the men to all come to work, even if they have to swim. They promised to show up even if there's a tsunami. Heaven forbid!
Speaking of showing up, we lost our young female worker, Bo. Houa had to ask her to leave because yesterday there was very heavy banter and teasing going on, mostly lead by her. Not that we understood any of it, but she was right in the middle of it, and very loud. Houa's assessment was that the men were not working well as a team with her there, and we concurred. So Houa is on his own again. He only worked half a day for us (he has several other small jobs with other boats) and he got the last floor stringers for the cabin passageways epoxied before the day turned too damp. Tomorrow we hope to have him work on the spacer that will hold the anchor support on the foredeck. This is a fitting and cutting job so it can be done in the rain.
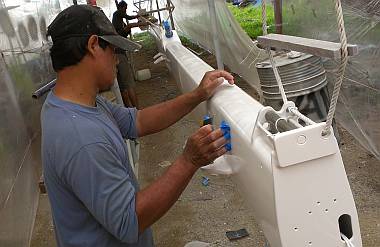 The mast got sanded despite the impending storm |
Thursday, November 21:
A strange day for Phuket's dry season. It drizzled all day making us concentrate on jobs
that don't mind high humidity.
For Baw, Ben and Pla that meant sanding the second coat of polyurethane paint on the mast. Ever the optimist, perhaps Baw hoped this would let them spray tomorrow. But the weather actually looks worse for the next few days. They finished the sanding, but now will let it be until just before they can spray.
Lek was alone in the salon, perched once again on the nav‑table working with the teak around the electronics panel. He got it all sanded and cleaned up and got 1 more layer of polyurethane on the whole area. Unless we've lost count, this should be the end of all the undercoats in the salon, and once the weather permits, Baw can get in there and do a final top coat spray of Epifanes satin varnish.
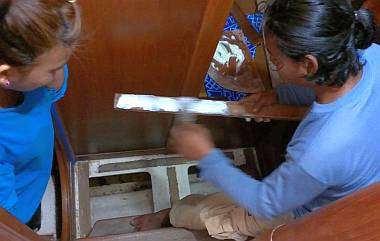 Bo and Houa epoxied down the starboard side floor supports |
But the varnish project isn't finished down in the hulls. Baw still needs to sand lightly and re‑spray satin on some areas that are rough. Also, the 2 non‑removable steps below the emergency hatches have not been sanded or coated yet. We directed Lek to the port set this afternoon, and were glad to hear that his and Baw's assessment is that the old varnish need not be stripped. So he'll just sand and coat in polyurethane. Like the floor boards, these steps will get a satin topcoat so they're not so slippery.
We were surprised to see Bo back again today, but she wore music ear‑buds all morning so she worked quietly. Houa set her up in his workshop sanding the grate for the entryway, which she finished by mid‑afternoon. Then she prepared the starboard passageway at the bottom of the steps and Houa was able to lay the plywood floor supports in place with epoxy glue in the afternoon.
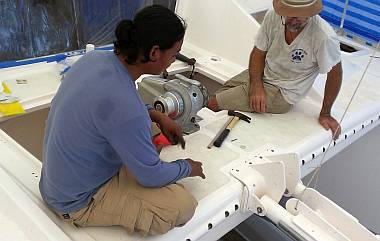 Houa & Jon discussing the anchor support bracket spacer |
Houa's big job of the morning was to create the spacer for the anchor support bracket. He made it out of 2 pieces of ½" thick starboard, a high density polyethylene, planed down to make a plate 7/8" (22mm) thick. He screwed the 2 pieces together with stainless hardware, then rounded the edges. It fit nicely against the inside curve of the bracket. Jon took it up on deck and he and Sue spent time fitting the new bracket, creating bolt holes (the old ones don't work), and fitting the bolts, pins and split pins in place. This was a trial run. Once we're sure it will all go together relatively easily, we can mount it with silicone. Jon has more bolt holes to drill and bolts to fit. Houa needs to round off the outside upper corners so they don't catch our feet on the way to step onto the trampolines.
Chambron, Yando and Heru had a quiet day working on the 26 brass lights. The faceplates were hand sanded with 400 grit paper, and once the white paint was gone they sanded with 600 until they could see only the brass. The faceplates are solid so we weren't worried about over‑sanding. Each light was carefully polished with the big polishing wheel that we use for the hulls.
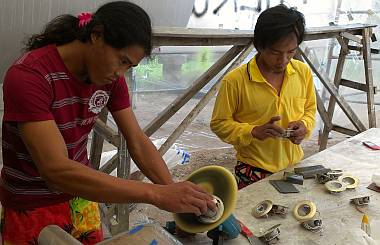 Chambron & Yando polished up all 26 of our brass ceiling lights |
Heru worked on the lights until Jon gave him our 6 water and diesel deck fill fittings to polish. These are stainless steel, so they need a tougher polish than what we use on gelcoat (or brass). So Sue scootered out and got a denim stitched wheel attachment for the drill, and a big bar of blue rouge. Heru did a great job on the tops of the 6 deck fills. Then he and Sue walked to the store room to retrieve the 2 stainless pushpits to polish. These are complex tubular structures and take a lot more concentration than the flat‑topped deck‑fills.
Jon got the diesel senders installed in both the port and starboard tanks. Then we decided to add diesel to the tanks, which meant sending someone out to scooter back with 6 gallons (23 liters) in our big yellow jug. Jon just couldn't find a way to carry it himself and still be safe. In the end, Pla and Baw rode together, with Baw holding the fuel jug between them. If we could have borrowed a truck for a half an hour we could have taken 10 jugs and really filled up. It still grates to realize how our contractor, Golf, must have stolen all the diesel from our tanks to fill his truck.
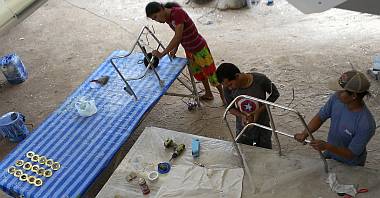 Polishing up the 2 stainless steel pushpits |
Sue's main task is still the photography and playing project manager. Today she created a To‑Do list especially for Baw, listing all the paint, varnish and gelcoat spray jobs he still needs to do. She is enjoying ducking into the storage room to find the bits and bobs needed to put Ocelot back together again. Her successful inventory adventure today was being able to walk into the room, open 1 big box and pull out the diesel "Baja" filter in just moments. Not bad after things have been stored for 2 years!
One month until the last high tide before Christmas. Will we make it? Or should we rent the apartment for the month of January as well?
Friday, November 22:
A Seattle-esque drizzly day, albeit a bit warmer! But the big rains and high winds never
materialized so we can't complain.
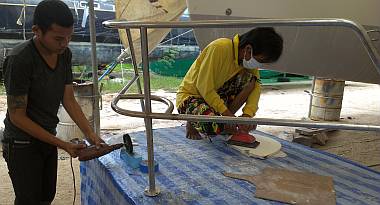 Ben polishing the pulpit while Yando sands the pulpit seat |
The drizzle and high humidity meant another day without spray painting or gelcoat repairs or varnish or epoxy work. But we kept everyone productive on a number of small jobs. With the 2 pushpits all polished, we gathered the two (larger) pulpits from the storage room and the men rotated all day working with the grinder and polishing pad or hand polishing with a paste and rag. The stainless has never looked so good! We also removed the starboard oval seats from the pulpits and Yando and Chambron sanded the undersides where the screws had rusted and stained them.
Baw lead a team of 4 sanding the port topsides with 2000 grit sandpaper. Apparently they had only ever sanded to 1500 grit before, and it's been on Baw's mind for months that they need to finish with 2000 before our final big polishing just before we launch.
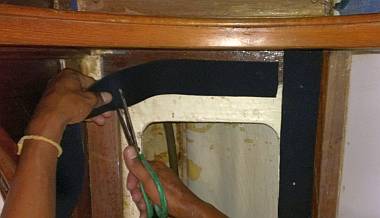 Cutting neoprene strips to glue to the floorboard supports |
The men got blue tape put back on the mast fittings and a bit more sanding done on the off‑chance they can spray tomorrow. We're not holding our breath. The weather forecast still looks miserable (although it also has a history of being hopelessly inaccurate).
Houa cut the 1/8" (3mm) neoprene Sue bought from the wetsuit shop into 2.5" (6cm) wide strips for Baw and Heru to glue to the floorboard supports in the starboard hull. Tomorrow we'll put those floorboards back to see how much cushioning the neoprene provides. Eventually all of the floorboard supports will have neoprene glued to their tops.
Lek and Pla worked inside much of the day. Lek, once again up on the nav‑table sanding the third polyurethane coat smooth enough to receive a satin varnish spray. Pla sanded the 2 fixed steps beneath both port and starboard emergency hatches. In an effort to save us from buying more polyurethane, Baw suggested we put Epifanes gloss on the steps. It's a nice (and somewhat unexpected) sentiment, but the steps are super high‑wear areas, so we'll bite the bullet and buy more polyurethane for its hardness and scuff resistance.
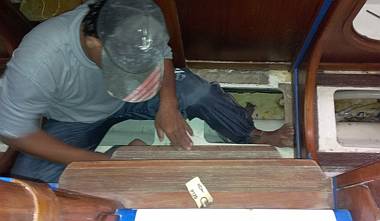 Pla sanded the steps down to the cabins |
Sue spent a couple hours in the port engine room, scrubbing and de‑greasing with strong chemicals. It appears that the gelcoat surface may clean up just fine, removing the need to paint the engine rooms. An almost‑white gelcoat might look better in a few years than a peeling paint. The jury's still out on this. Sue may dive back in tomorrow.
Jon got 4 of our newly polished deck fills mounted: 2 diesel fills back by the engine hatches, and 2 water fills on the outer foredeck. He left the 2 fills for the new tanks until later as it's going to be very difficult to get the hoses connected underneath them.
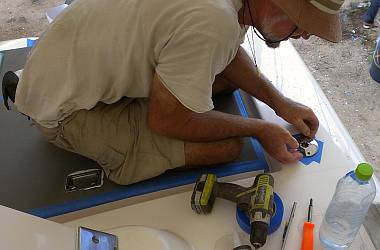 Jon mounting the portside aft diesel fill |
Jon spent some time with the anchor support bracket. He got the 4 horizontal bolt holes drilled, as well as the 4 vertical holes, but the 4 diagonal holes are going to be interesting, especially since the bracket has moved forward 7/8" (22mm). Since the old bolts are too short, Jon scootered to Boat Lagoon for new bolts and to pick up several bits that have been waiting for us at AME, including saildrive anodes and newly machined raw water valves for the engines.
Houa rounded the corners on the anchor support bracket spacer plate and is anxious to check how his teak grate fits on top. Houa had Bo sand the edges of the big teak grate. And Houa himself routed the square corners of the inside companionway grate. He also re‑assembled the galley sink locker and its shelf, which had been out for varnishing.
At 5pm we met with Baw to discuss all the possibilities for tomorrow's work if it's still raining. Despite the feeling that we're winding down on work for the big team of men, we keep coming up with things for them to do. Anyway, no one wants to miss tomorrow. It's pay day!
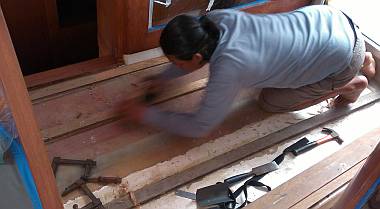 Houa enjoyed having the salon to himself to work on floor suports |
Saturday, November 23:
The weather folks finally got it right. The big storm that was supposed to arrive on Wednesday
finally arrived today, blowing our wet and soggy workers into the yard. Everyone huddled under
Ocelot looking at the wild coconut trees bending in the wind. The men chose to get their wages
and go home.
So we ended up with Jon, Sue and Houa at the yard, plus a few soggy yard dogs. Houa probably reveled in having the boat interior to himself. His goal for the day was to be sure the stringers under the salon floor are level and let the teak floorboards sit flat. He worried mostly about the two starboard‑most stringers that support one floorboard about 14" wide. These stringers (and the sub‑floor under them) had been completely re‑built by Max about 18 months ago. Max had replaced the plywood with glass and foam, then created new stringers on top. It's always looked great but today Houa was mumbling about how (ex‑contractor) Golf was always saying "Hurry up, Max. Work quick. Make it quick." Consequently, the floor levels had not been checked. Houa planed the stringers down, and will have to put double rubber insulation on some parts to offset the wavy profile.
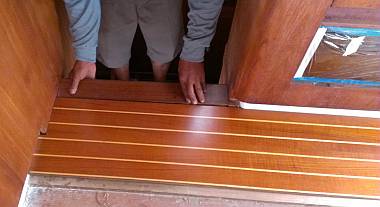 The top of the starboard step needs a small strip of teak added |
In the same area, Houa also worked on the teak "sill" that borders the salon floor above the starboard steps. This, too was removed by Max, but had not been replaced. The sill itself was fine and fit well, but there was a 1/4" gap that Houa will fill with a teak strip to let the sill nestle perfectly into its position. Houa got the new strip planed and shaped, and got epoxy on both new stringers. On Monday they can be sanded and have their rubber strips attached.
It was a relatively cool day, and would have been perfect for Sue to jump back in the engine rooms, but the wind and rain pelted first the starboard steps (and engine hatch), then the port side. She decided not to let the rain in! Instead she was hijacked into working with Jon on mounting the anchor support and its bracket. Hijacked, because, had we had some men around she could have begged off the job and gotten Heru or someone else with men-strong hands to hold the screw driver while Jon ratcheted home the 12 bolts. It was not Sue's favorite 1.5 hours of boat work. She ended up in tears from the pain in her hands, and the frustration of not being strong enough to do the job well. Jon offered to switch jobs but it didn't work to lie in the chain locker with the socket wrench, as that involved using muscles she's not sure are in the female body.
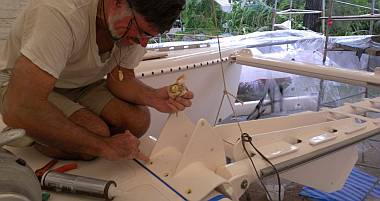 A dab of Duralac before lowering the anchor platform into position |
But all of that aside, Jon was the king of the day, drilling the 12 mounting holes, masking the area with blue‑tape, and organizing the bits and procedures. He and Sue drove home the big pins and washers that hold the anchor platform to the bracket, he shot a generous layer of silicone under the aluminum where it met the horizontal hull, then began the job of bedding the 12 bolts. Each got a rim of Duralac to insulate the stainless bolt from the aluminum bracket, and a squirt of silicone in the bolt hole. Jon worked in the chain lockers as Sue tried to hold the opposing screwdriver up on deck. We worked though lunch time to get it all mounted, then took a much‑needed break.
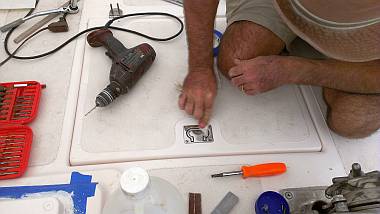 OK, chain locker hatch pulls installed, now for the hinges... |
After lunch Sue groveled in the bags of ropes and lines in the storage unit looking for the trampoline ropes. Conclusion: they are inaccessible to mere mortals, and require more hands (and strong arms) to heft sail bags out of the way. She found more small stainless steel items to be polished on Monday, and some rope locks that need a bit of white paint over the aluminum, but she couldn't find the eye‑bolts that support one corner of each trampoline.
Jon continued the foredeck work and got the new handles mounted on the 2 chain locker hatches. He got the 4 hinges positioned and ready to mount, but found the old (welded on) studs were too long, since they no longer have to go through 1/2" of teak. Off to the yard's machine shop to hack saw his way though stainless steel bolts. Hours of work, since the hacksaw blades here aren't worth a hoot.
Thai Refit:
Ocelot Pages:
Top Level: Home | Destinations | Cruising Info | Underwater | Boat Guests | Ocelot | Sue | Jon | Amanda | Chris | Site Map | Make a Comment
|
If our information is useful, you can help by making a donation |
Copyright © 2000‑ Contact: Jon and Sue Hacking -- HackingFamily.com, svOcelot.com. All rights reserved.