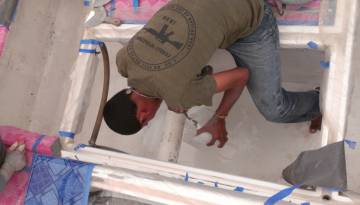
Baw putting more filler on the floor of the cockpit lockers
78 Cut Teak Blocks
 Baw putting more filler on the floor of the cockpit lockers |
Summary: Work focused on 3 areas this short, Labour Day week: our new teak, the cockpit, and the nonskid for the deck. Houa bought $2,000 of big teak blocks and spent the week making expensive sawdust - cutting the teak into strips for the teak floor in the cockpit, planing the strips flat, and routing a groove in the edges. He ended the week with 75 nicely planed and prepared teak boards ready to cut down to size. Baw, Pla, and Lek spent much of the week in the cockpit, preparing it for Houa's teak, measuring the edging and building it up where necessary, filling the bottom so it's flat and the right height, and sealing the filler with waterproof epoxy resin, all to Houa's exacting specifications. They also cleaned out the dive and rope locker, and epoxy sealed the frames that hold the shelves up in there. Jon and Amanda laid out exactly where many of the nonskid panels will go on the deck, and made careful templates of the first 32 areas, almost half of the 75 templates we'll need. This is a frustrating job, as they need to plot where the deck hardware will go, and they've got to show how all the nonskid diamonds need to line up, when Ocelot has very few straight lines. Baw's brother Ben spent most of the week in the port fo'c's'le, sanding and cleaning it to paint. Sue, our photographer, split her time between taking pictures and polishing the forebeam supports, the anchor beam support, and the forebeam itself, which she was able to Nyalic on Sunday.
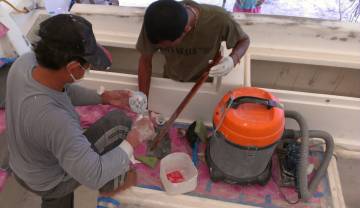 Baw, standing in our aft lockers, epoxying shelf brackets |
Monday, April 29:
Ah, Monday. Everyone trying to gear up for another week of work. Windguru predicted rain
today but in fact is was a gloriously beautiful day, with puffy clouds and gentle breezes.
Lek and Ben both continued sanding and painting the many miscellaneous hatches and shelves. The 2 internal hatches in the port fo'c's'le were completely remade in foam and fiberglass several months ago, but the starboard hatches are still plywood so they had to be sealed in epoxy first. By the end of the day they were very nearly done, so we'll be finding other work for them soon, like painting the insides of the fo'c's'les.
Pla cleaned out the cockpit locker to prepare it for another layer of epoxy filler. This time they need to build us a small hill in the middle so that the water drains to the drain holes on the sides. We think (hope) that we got the idea across. By afternoon the new epoxy and filler was in place and curing. Tomorrow's rinse with the hose will reveal all!
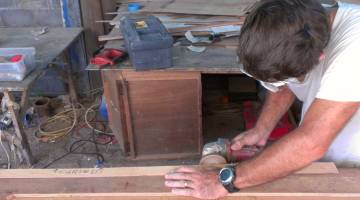 Jon shaping a curve into a template board for our nonskid |
Baw worked on the narrow and deep aft‑most locker in the cockpit, under the aft cockpit seats. This locker has the steering gear in the bottom, so when we first bought Ocelot in 2001, Jon built some shelves just above the steering gear so we could use the locker for storing ropes and scuba‑diving gear.
First it needed a scrubbing out, and we were happy to see that the hidden drains that exit the boat in the "wave breakers" under the bridge‑deck DO work and were not clogged up by debris or a bird's nest or anything. So Baw unscrewed the wooden shelf brackets that Jon had installed so long ago and sanded them smooth while the locker was drying after its soapy bath. Pla cleaned the locker with acetone, then Baw rolled epoxy onto the brackets, smeared on some epoxy mud, and screwed them back in place. Tomorrow we'll removed the screws and fill the holes with epoxy. This will (hopefully) give us nice water resistant shelves to put our ropes and dive gear on.
Sue played with sandpaper and the grinder again today. After all the days of rain, it was nice to attack a familiar project again. The goal today was the 400 grit sanding of half of the forebeam. This involved some fine grinding/polishing first, and after a few hours of that, and work with the foam block and wet/dry sandpaper, we have a nice looking forebeam. Which means there will probably be another Nyalic Sunday coming up.
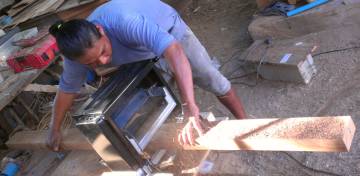 Houa planing a nice face on one of his big teak boards |
Jon and Amanda spent most of the day on the deck. The biggest job was deciding how close we could bring the nonskid to the inner sloping "wall" from the cabin top. They finally got a decision (and line!) made, and so could then begin the detail work of laying out the templates. Of course, nothing is straightforward -- there were other decisions to make concerning whether the nonskid lays parallel to the hatch coamings or to the toe rail. It's so very nearly the same it may not matter. With tricky decisions and markings out of the way, they managed to finish five more portside templates by the end of the day.
We also took in the new Colligo Marine thimbles that will be used as terminators for our synthetic rope Dyneema Dux mast diamonds. Jon used those to get some critical measurements so that the mast rigging can get started.
Houa didn't arrive until lunchtime because he was out buying $2,000 of teak for the cockpit. It was delivered just after lunch, and wow! It's beautiful! Houa hand selected the boards, which are a variety of lengths, from 4.5‑7' (1.4‑2m), and widths of 4‑8" (10‑20cm). The price came in a bit above his estimate - he had wanted to buy fewer and wider boards, but the ones in those dimensions were "Not beautiful." So we paid a bit more, but he is very pleased with the quality, and it's all lovely "golden teak," meaning it has a gold sheen, and is fairly uniform in color. It was great to see Houa running the boards through the planer today! Real carpentry! A landmark job begun!
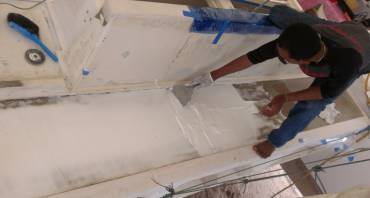 Baw does a superb job smoothing filler on Ocelot's aft deck |
Tuesday, April 30:
Another Day in Paradise ... well, the Tropics, anyway. No one can claim a boat yard is a
paradise!
The big imperative event of the day was Houa's inspection of the cockpit floor onto which he has to put his teak. Seems that in the haste to "get the cockpit done" many many months ago, no one bothered to check exactly how high the edges were, or how flat the flooring, i.e. the substrate for the teak. Houa declared it NOT ready and asked for lots of filler. So Pla and Baw donned white Tyvek suits and hit the fiberglass on the aft deck and a couple of the cockpit floor sections with sanding discs. Then they cleaned it all up with acetone, mixed up batches and batches of epoxy and filler and played "spread the filler like white cake icing" until they had nice smooth floors. This went on all day, and by end of day we had the aft deck, the starboard side and the central cockpit floors all fillered up. It actually looks quite good. But there's still an area behind the aft deck where the edging needs to be built up a bit.
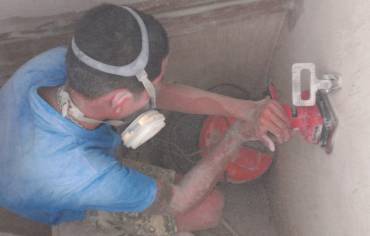 Hot and dusty Ben, sanding in the port fo'c's'le (pit of despair) |
Ben had the misfortune of being the youngest on the totem pole, and got the job of sanding the port fo'c's'le in preparation to paint it. He wore a filter mask and had the extraction fan going but it was still a hot and dusty job. No complaints, though. Which is good, because we're sure it's not finished yet, and then there's the whole starboard side to do as well.
Lek could be found either under the boat, or under the neighbor's boat, where he retreated to from the fiberglass dust. He was sanding and re‑painting the hatches.... still. We just didn't have time to figure out why these few items have taken so long. On quick examination, the paint was quite rough, so something may have gone wrong in the mixing and he had to sand back and re‑paint.
Sue could be found flitting from job to job, checking on progress, taking pictures, and relaying hardware store needs from the men to Amanda (who is our current gopher on the scooter). Between all of that, she got more coarse sanding done on both the forebeam and the bracket that holds the anchor support to the boat. But she and Ben were in competition for the power extension cord at the bow of the boat, so the grinding was cut short. No worries. Lots of finger sanding and paint‑picking to be done in the nooks and crannies of the forebeam and boom.
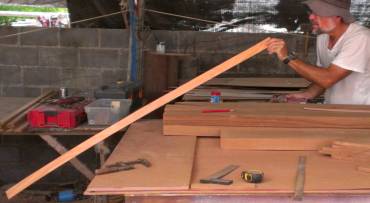 Jon checking a curve he's just sanded into a strip of template |
Jon and Amanda continued their awesome job of creating the templates for the nonskid. They got another 6 made today, moving from the stern forward on the starboard deck. We're finding that making decisions can take a lot of time. How close together should the pieces of nonskid be? How close should the nonskid be to the hatches? What size radius should we put on this corner? It also takes a long time to figure out the curves, and then drawing them and sanding/cutting the plywood to the exact curve. Jon was often down in the wood workshop with the power sander while Amanda was up on deck marking the curves for the next piece.
Houa was in carpenter's heaven, with all his lovely teak. He had to use the hand plane and
his new circular saw to smooth the edge and then cut strips from the 8" planks because the new
machine planer only does 5". The smaller planks could be fed through the planer, and
transformed into beautiful strips. These strips he then laid in the sun to allow them to darken to a
uniform color. Not sure how long this is supposed to take, but he put them out for several
hours, then put them away for the night, and will sun them again tomorrow. (Jon gave Houa a
hard time, telling him he's simply turning all our expensive teak into
sawdust! ![]() )
)
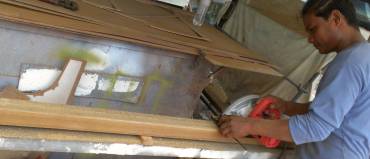 Houa ripping the teak into neat strips for the deck |
Tomorrow is Labour Day here in Thailand, and if we were to ask our guys to come to work we'd have to pay them 2 or 3 times their normal wage. With translation help and advice from the yard manager, Cris, we decided to give them the opportunity to come in or not. Most will take the day off, but we believe Houa will be at the yard, happily playing with his teak.
Wednesday, May 1:
Happy May Day and Thai Labour Day! True to our expectations, it was only Team Hacking and
Houa who were at the boat today labouring.
Houa spent the day in his workshop cutting up teak boards into nicely planed teak strips. Then he laid them all out in the sun to ... get a suntan? Actually, newly cut teak is pale, and with sun it darkens to a uniform and more familiar dark golden color.
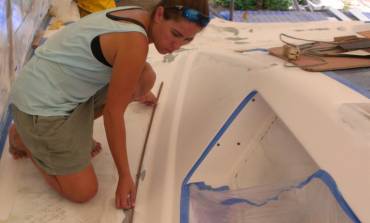 Using a batten to get a smooth curve next to Ocelot's cabin |
Jon was also in Houa's workshop now and then. He and Amanda were once again attacking the geometrical challenges of creating the templates for the nonskid on Ocelot's sometimes curvy bits of deck. Often Amanda did the pencil layout, scribing on a strip of template how a curved bit needs to look, and then sent the template strips down so Jon could cut and sand the curves into them. They eventually got 3 more templates made up and a couple more drawn out.
They also worked on laying out the lines on top of the salon (cabin‑top). This is a relatively big area, with curves in all directions and no real lines to get a good handle on. They eventually made a tool to push against the big ridges that run down either side of the cabin‑top. This allowed them to draw a line a known distance from those ridges, despite the big curves at the bottoms of those ridges. Assuming those (factory) ridges are relatively symmetric, this allowed them to determine the center‑line for the cabin‑top, and also let them draw in the 1/3 and 2/3 lines, which will become the gutters between pieces of nonskid (we need 3 panels across between the ridges).
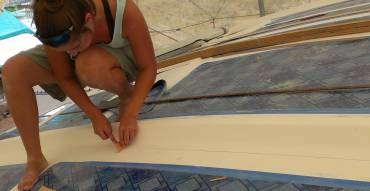 Using a custom tool to draw a line next to a cabin-top ridge |
Yes, assuming symmetry is a fairly large assumption with Ocelot, but the cabin‑top is far enough from other areas that those panels really only need to line up with themselves. But we double‑checked the center‑line by measuring all the way out to the big side windows, and everything agreed to within 1.5mm (about 1/16") which was a pleasant surprise, so we're fairly confident. The center‑line is essential for making sure that the diamond pattern of the nonskid runs true and lines up correctly from piece to piece. It's been great having Amanda here to do this with Jon, as they work really well together on these sorts of applied math and geometry challenges.
Sue took advantage of having no workers in the cockpit and spent a few sweaty, dripping, dirty hours cleaning up the salon. It has slowly gotten way out of control in terms of stuff, and then add to all the stuff a liberal sprinkling of gelcoat dust and gelcoat chips (from the deck repairs) and YUCK. Now, to keep the dust from returning...we will have to be vigilant to be sure the guys really mask the companionway off when they work on the cockpit again.
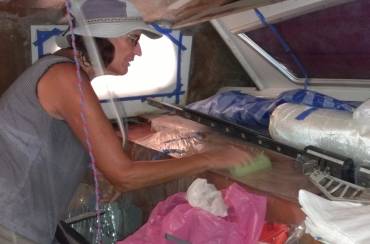 Sue trying to clean up some of the mess inside Ocelot |
Sue also put in lots of time with the grinder and coarse plastic polishing wheel. She got all the big corrosion marks and pits out of the forebeam (well, the half that faces up) and started on a forebeam bracket that goes in front of the anchor winch. The brackets are particularly tricky as you can't lose attention for an instant or the grinder snags and jerks away or the disk flies apart with a blast. Tricky stuff, and exhausting.
We gave Houa a small bonus for coming in on a holiday. Fun side note - when the kids were little,
we spoke French when we didn't want them to understand something, like deciding if we'd stop for
ice cream during a long road trip. Even before the kids learned French themselves, they
learned that when their parents spoke French, something good was probably about to happen.
Today, since Jon was on Ocelot and Sue was on the ground, and since Houa understands some English,
we used French to decide how much of a bonus we'd give him. When Amanda heard the French,
she immediately thought to herself, "Oh, cool, ice‑cream!" And started laughing
at her Pavlovian response...![]()
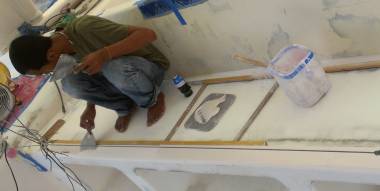 Baw raising the back wall to fit the teak that will go in |
Thursday, May 2:
A hot and sweltering day at the yard, with lots of activity!
Sue spent most of the day getting well acquainted with all the little corrosion spots (and some big ones) on the forebeam and its brackets. This involved coarse grinding, fine polishing, then wet‑sanding with 400 grit. Then -- doing it all over again in some places because only after the 400 grit sanding do the little dit dot corrosion spots show up. And we complain about the Thai workers doing things over and over? Seems to be somewhat inherent in working with metallic/fiberglass substances.
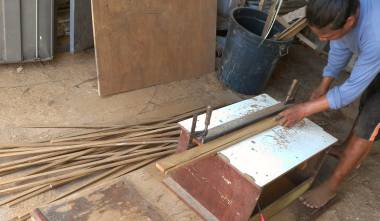 Houa using his makeshift table saw to cut teak strips |
Baw and Pla made great progress in the cockpit. They got the port side floor (where the teak will go) all sanded, cleaned, and then gooped up with epoxy filler to level it out. They checked the straightness of the rim lines, and found that the aft deck border needed to be not only raised a bit but straightened. No sooner seen than done. Baw wrapped shiny brown packing tape (as a release) around a straight stick, super glued it to the floor where the teak will go, then built up the wall by spreading polyester filler against the stick. By afternoon it was cured enough to sand. We have assigned Houa the responsibility of checking Baw and Pla's work and having the authority to say do this, change that, or Finished! After all, it's Houa who has to lay his lovely teak inside the frames made by Baw and Pla.
Speaking of Mr. Houa, he was once again ensconced in his woodshop with his table saw, circular saw, and planer all going (not simultaneously) all day. He laid out some of the 50mm (2") planks for their daily sun tanning, then bundled everything up into like sizes and lengths ready for the next cutting. He requested a new router tip (to replace the one that got dull on our fiberglass on the sterns) so he can cut the 2mm grooves down the sides of the boards. He is creating a huge pile of teak sawdust, some of which we'll save for any future teak touch up work where we need to mix teak dust and epoxy.
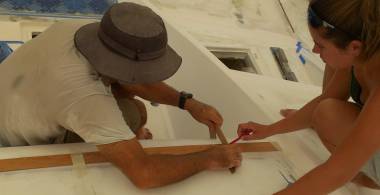 Using Jon's custom tool to mark a difficult line on a template |
Amanda and Jon were up on the deck all day, mostly working on the cabin‑top. Amanda marked the rims around the hatches as well as drawing 50mm gutters around the lines they'd drawn yesterday. Then they tackled the athwartships gutter. It turns out that the salon hatches aren't mounted straight to the boat or each other (but really, what else did we expect?) but they managed to find a good center and project it across the entire cabin‑top.
The curve above the front window of the salon, at the front of the cabin‑top, was a bit more difficult, as it is quite large and it bends forward in the middle, so there are really no reference lines they could use. After scratching their heads for some time, Jon eventually came up with a custom tool for drawing a line across the front of the cabin‑top. With a bit of luck, they may even be able to use the same tool for making lines around Ocelot's complex bows, which also have a large (and changing) curve down as well as curving to the side.
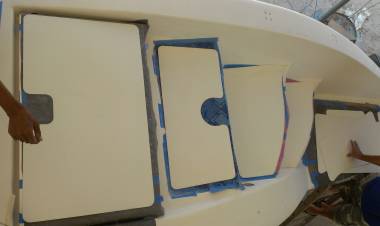 Mike delivered our first 10 nonskid panels this afternoon |
Another accomplishment was finding alignment lines for 6 of the 10 nonskid panels on the cabin‑top. We'll be looking along these diamonds quite a lot, so it's important that we get the diamonds all aligned in the same direction from panel to panel. We do this by providing Mike with an alignment line through every template that we give him. When he uses the templates to cut out the nonskid, he uses the alignment line to make sure that the diamonds line up correctly. But this means that we have to find (project) an alignment line through EVERY area that will get nonskid, and that's not easy, especially when the cabin‑top has a significant crown. We still have no idea how we'll project alignment lines out to the 4 panels next to the sail‑tracks, on the outer edges of the cabin‑top.
Around 4pm, Mike from AME stopped by with our first 10 antiskid panels. Beautiful! They need to be covered and protected, but can be stored flat on Ocelot until we have our first epic day of installing antiskid. Mike took away the 14 new templates we made recently. Only 50 more to make!
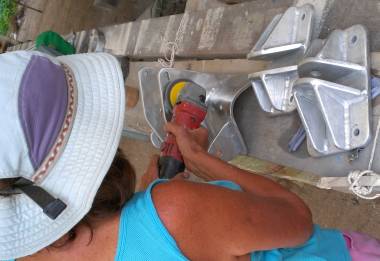 Sue working on the anchor support bracket & forebeam supports |
Friday, May 3:
Friday sure crept up on us! Second to last day of the work week, with sporadic cool rain
showers throughout the morning and early afternoon. Not that it affected us under our
wonderful tent - just made it a bit cooler.
We had Ben back today, and we basically didn't see him at all, except for his quick appearances in and out of the port fo'c's'le where he continues to sand and prep the walls and shelf for epoxy paint.
Baw had both Lek and Pla with him in the cockpit today. Pla worked on sanding the aft deck which is coated in a couple layers of epoxy resin which will be the substrate under the new teak. He had to long board the white epoxy or polyester frames to be sure they are straight. Lek did the same sort of work on the port floor area.
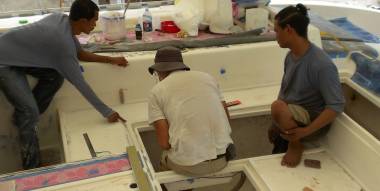 Baw, Jon & Houa discussing the best way to handle the cockpit |
Baw took the lead job of checking the frames and floors to be sure they are straight, the right height, and parallel. By end of the day he asked for a consultation with Jon, who called in Houa for translation. The three of them, with help from Amanda, were looking at the forward‑most part of the cockpit floor, by the entryway, and how it currently dips down. We all decided that we want that forward teak at least level with the following teak so that water will run aft, not forward towards the companionway (although there is a huge drain there, so it wouldn't ever go inside the boat).
Although it was after 4pm when the discussion was held, Baw moved right in with his bits of planed straight boards, fishing line as height guides, and started working on making the forward‑most frame higher by about ¼" or 6mm. He wrapped the framing boards in shiny brown tape (as a release) then super‑glued them in place. He cut up biaxial fiberglass to mix with a bit of epoxy mud, then filled the frames with epoxy, glass and the mud to create a really strong frame for the teak. This frame is one that gets lots of abuse, as it is directly in front of the companionway and is stepped on all the time. Baw and Pla were still working on this area at 5pm, when we left the boat.
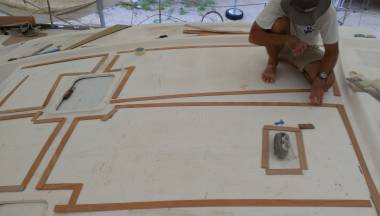 Template pieces cut out and ready to be super-glued together |
Jon and Amanda made good headway on the cabin‑top templates, building all six of the big ones over the salon. Then in the afternoon they began designing the shape of the 4 that will be on the outer sides of the cabin‑top. These, like many others, are tricky in that they have not only a big soft curve, but they have several bits of hardware to deal with: sail‑track, dead‑eyes, spinlocks, etc. We do have photos of what the nonskid looked like before, but we will change things a bit now because we don't want to mount any hardware to run over nonskid.
Sue was a bit blinky with lack of sleep, so she avoided the power grinder in the morning. Instead she used our old dental pick to work the last of the paint and primer from the weld lines and crevices of the forebeam bracket. After lunch (and a power nap) she used the grinder to polish the last of the forebeam supports and the anchor support bracket.
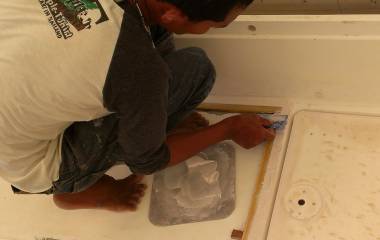 Baw building up a wall so it will match the teak in the cockpit |
Houa was a (noisy) hermit in his woodshop again. He sharpened his planer and created lots of beautiful teak floor boards! Of course, it's what he's been doing all week, but each day he trims the boards to a new, and more exact dimension. It's really exciting to see all the pieces laid out. By the end of the day he had routered out a 2mm notch on each side of several of the boards. When pushed together they'll make the 4mm black Sikaflex line between the teak strips. Now we just need the cockpit trim finished, and for Mike to spray the gelcoat on the cockpit edges.
Saturday, May 4:
Wow. Saturday already. Where has the week gone? It was super hot in the morning, with
not a breath of breeze, so Jon's shirt was absolutely soaked in sweat up on deck. But a nice breeze came
up in the afternoon which helped things move along.
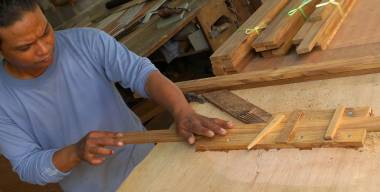 Houa with his makeshift router table & (dark) teak spring |
Houa pulled off a fun coup in his workshop. He needed to router out the grooves along the edges of the teak. The grooves will be filled with black Sikaflex once the boards are stuck down, to give the floor that distinctive striped look of a teak deck. Since Houa didn't have a "router table" he built one! And since he didn't have a second person to push the teak planks against the router blade while he fed the boards through, he made a spring ‑ entirely out of teak! He took a teak board, cut several slots in it, like the tines of a comb, and mounted it so the teak fingers pushed against any board pushed into the router‑table. Ingenious! With his teak spring pushing the boards against the router, he happily fed several dozen (75?) boards through his router table, giving them all nice, even grooves on both sides.
It was a good ending to the week with a full crew, plus one new guy, Dui, who helped out in the cockpit with Baw, Pla and Lek in the morning.
The cockpit work is going well. The guys got a last coat of clear epoxy resin on the aft‑deck, which makes it nice and waterproof for under the teak. They also finished 2 other cockpit areas where teak will go: the port‑side floor and under the cockpit table. The big project of the day was the starboard side floor, the one that goes from the aft deck all the way to the companionway steps. This is the one that had to be built up so that it slopes aft uniformly. The guys put down epoxy resin, then filler, then covered that in fiberglass cloth and more filler. On Monday, assuming the epoxy cures well, they will sand it flat and give it a final coat of resin.
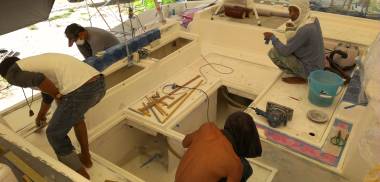 The organized pandemonium of the cockpit preparations |
The other detail on the cockpit floor is the trim, the gelcoat that goes around the teak. It has to all be the correct width and height for the future teak. Baw put some polyester filler along the strip under the helm seat and also built up the trim in front of the companionway. Houa was up consulting with Baw and the guys to be sure the whole project is done to his exacting carpenter's satisfaction.
Amanda and Jon had several rather frustrating attempts to find a valid fore/aft line for the nonskid that will go on the outer edges of the cabin‑top. This area curves down towards the front, and is also tilted down towards the outside. To add to their frustration, this area has many bits of hardware that have to be accounted for - sail tracks, dead‑eyes, spinlocks, winches, etc. Since the mounting holes have all been de‑cored and filled with epoxy, we don't even have firm locations for many of the bits, and since this area still needs its final coats of gelcoat, we can't drill the holes to mount the hardware yet. <sigh>
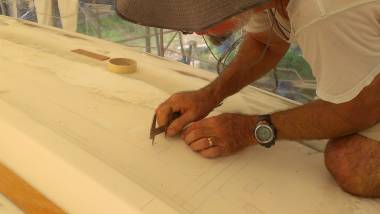 Trying to mark exactly where the hardware & nonskid needs to go |
Luckily, the hardware doesn't have to be exactly positioned, as each piece will have at least a 3cm (1.2") gutter around it with no antiskid. So Jon and Amanda drew in approximate locations, drew in where the nonskid will go around that, and started looking for an appropriate alignment line for the nonskid diamonds. After trying several options, squinting along lines and scratching their heads, they eventually realized that there's no way that a pattern can be laid down on this sort of shape with the pattern continuing in straight lines, fore/aft or otherwise! The fact that the surface is both tilted and curved means that the nonskid diamonds can't line up with anything. Which is actually a bit of a relief, in a way, as they could then choose a close but fairly arbitrary line.
By the end of the day they'd laid out the lines for the 4 big sections of nonskid that go on the outsides of the cabin‑top, and actually assembled the template for one of them.
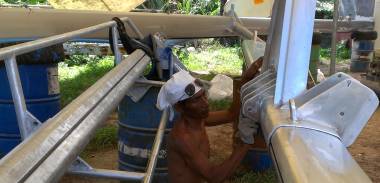 New worker Dui, working on the fiddly bits of Ocelot's forebeam |
Sue had set herself a (she thought) reasonable goal of getting the "up" side of the forebeam ready for Nyalic on Sunday. Problem was, as she sanded she saw more little places where the corrosion dots popped through, so she had to re‑polish and sand with 400 grit paper again, and again. Then there were the little nooks and crannies where the sanding block won't go, but fingers will. She finally enlisted the help of our new guy, Dui, to leave the cockpit and join her at the forebeam. After a couple hours he had lots of those little hard to reach places all nicely sanded. Sue may still try for Nyalic tomorrow (weather permitting) but leave some of the tangs and awkward fittings for later.
Sunday, May 5:
The early morning looked a bit damp, but it soon cleared and turned into another hot, beautiful day,
so Sue headed into the boatyard. She armed herself with 1,000 grit sandpaper, water, cleaning
alcohol, and Nyalic, and attacked the forebeam while there was no activity around her that might
kick up dust. She'd soon sanded and cleaned it thoroughly with water and alcohol, and allowed
it to dry in the tropical heat. She wrapped a brush in cloth to prevent lose bristles from
getting into her work and quickly spread a layer of Nyalic on most of the forebeam that's facing up.
Since that went pretty quickly, she went back to the mast and got a second coat of Nyalic on the
area that was repaired last week, where the Nyalic had sat against the tires. Job done, she
called for a pickup and we all went out for brunch at our favorite
bakery...![]()
Thai Refit:
Ocelot Pages:
Top Level: Home | Destinations | Cruising Info | Underwater | Boat Guests | Ocelot | Sue | Jon | Amanda | Chris | Site Map | Make a Comment
|
If our information is useful, you can help by making a donation |
Copyright © 2000‑ Contact: Jon and Sue Hacking -- HackingFamily.com, svOcelot.com. All rights reserved.