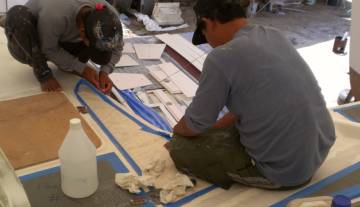
Heru and Pla cleaning up a newly laid nonskid panel
86 Bow & Stern Molds
Summary: An absolutely beautiful week weather‑wise, as we had no rain at all. This week we:
|
 Heru and Pla cleaning up a newly laid nonskid panel |
Monday, June 24:
A bright sunny day, which was nice since we started the day with a 1 hour scooter ride from Ao Po,
in north‑eastern Phuket, returning from another wonderfully relaxing weekend with friends. Sue is now truly a
motorcycle (well, scooter) mama, as she loves riding through Phuket's forested hills. Too bad
we live at the more populated end of the island.
We had no plans to lay more nonskid today, so we got to settle into several smaller projects. Baw dove right into the epoxy and glassing project for the chain stripper up on the foredeck. By the time Jon arrived, Baw had cut 6 squares of biaxial glass, and was ready to lay it into the depression that Jon created on Saturday. Baw had even created a plastic plate, a bit bigger than the chain stripper plate, and covered it in brown release tape.
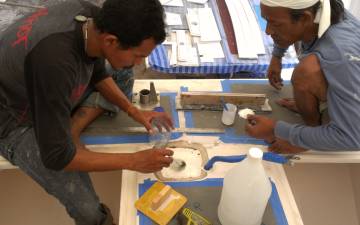 Baw and Lek glassing where the chain-stripper will go |
Jon and Baw worked together to lay the glass, which was good, because Jon was there to be sure that the top few pieces were big enough to actually reach the glass of the deck, thereby tying them together and adding strength. They placed the plastic plate in the glass with a weight on top to squeeze the excess epoxy out of the glass, and Baw laid little strips of glass around the plate. By day's end, they could removed the plastic template and place the real chain stripper in the square depression. Nicely roomy (so that the bolts can be aligned once the windlass in down) but a bit low. Tomorrow we'll have to add another few layers of glass to build it up.
Heru and Pla worked on cleaning up the newest nonskid edges and then covering the new panels with vinyl, the normal chores after laying nonskid. This vinyl we keep referring to is basically a thin flooring plastic, with a bright pattern on the smooth side, and a black sort of nonskid feel on the back. We tend to put the textured bottom facing up to walk on and leave the smooth colored side down as it's dangerously slippery if it gets wet.
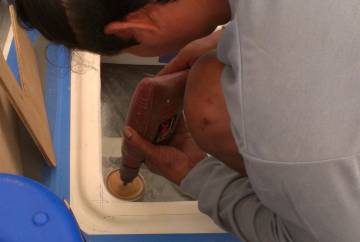 Houa sanding back a forward hatch rim so the trim will fit |
Houa finalized the fitting of the trim for the Lewmar hatches in the 2 forward cabins. Since he'd had to sand through the fiberglass on the inside of the hatch mounting rims to make enough room for the trim, the next job was to remove the foam coring that was exposed when he sanded glass. He dug out the foam to a depth of about 1" (25mm) and then Lek mixed epoxy mud with micro‑balloons and silica and pressed it into the slot where the foam was. This will protect the foam from water incursion and give the hatch rim back some of the strength it lost when the glass was cut.
Sue was dismayed to see Baw mixing up some polyester filler. We thought we were finished with the infamous Thai filler but Baw had found that all along the old handrail on the portside cabin top, the soft filler had been sanded deeper than the surrounding gelcoated areas, creating a noticeable ripple. So he sanded and cleaned with acetone, and smeared on a careful layer of filler. After lunch he sanded the area and put on more filler. Sue teased him about making sure it was all clean underneath. "Clean enough to eat dinner on!" We have nightmares of the poor preparation of filler or the deck that resulted in our having to scrape back the deck a few months ago.
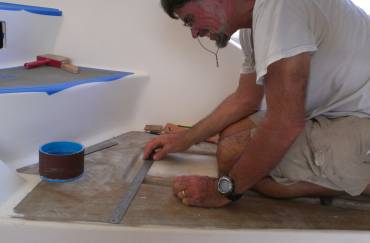 Jon laying out nonskid lines on the starboard swim platform |
Jon concentrated on the starboard swim platform. The swim platforms are the last places where we have not yet made templates for the nonskid. Now that it's been well sanded and we're pretty sure the shape is the way it's going to stay (not perfect, but probably good enough) he tried out some ideas for nonskid sizes. One tricky part is that the sides of the swim platform are not straight (they're not supposed to be!) so drawing lines a uniform distance away from the walls is difficult. Another factor is that the edges of the ladder grooves are not perfectly straight, and they fall away with different radii. So the trick is to draw in the (straight) nonskid lines where they won't accentuate the curviness of the ladder grooves. The normal way to do this is to keep the straight sided nonskid far away from the ladder grooves, so the eye doesn't pick up the discrepancies, but this would create a large area of slippery footing on the swim platform. We may just give up some aesthetics in favor of safety back there, and let the nonskid come close to the ladder grooves.
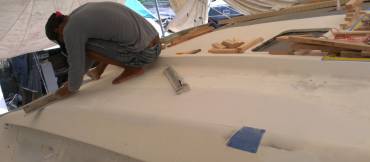 Heru smoothing off the new filler on the starboard cabin-top |
Tuesday, June 25:
Bit of a slow, odd day, as Sue stayed all morning in the (air‑conditioned!) apartment to work on
accounting and such. Jon held the fort at the boat, but we were missing both Baw (his sore leg
is acting up) and Pla (no known reason).
Lek and Heru found enough things to keep themselves busy and productive all day. They had more nonskid edges to clean up, and more vinyl to put down. They also added filler to the starboard cabin top (the counterpart of where Baw put filler on Monday), let it harden, and then sanded it smooth. The final say as to whether it's ready for nonskid or not will come from Baw when he gets back to work.
The men also put some filler on the very aft deck, right beside where the vertical dinghy davit supports will be mounted. This is an area that will not be accessible for sanding or polishing once the davit poles are up, so they need to be finished now. After the areas were cleaned and sanded, Lek put on a thin layer of filler, waited for it to harden, and sanded and shaped the curved walls. In the late afternoon Lek mixed up some gelcoat and smeared it over both areas with a plastic spatula. If he got the gelcoat on thick enough then tomorrow both sides can be polished with increasingly finer sandpaper all the way up to 2000. Then we'll be able to finally re-mount the davits, slide the solar panels back off the targa‑bar, and the guys can start polishing the targa‑bar!
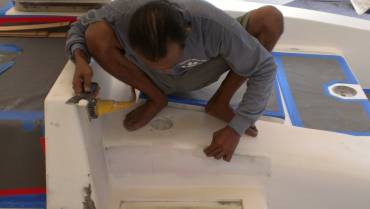 Lek adding filler near where the davit supports will go |
Jon cut 4 more small squares of biaxial glass and epoxied them into the square hole where the chain stripper will go, using Baw's plastic plate to push the glass flat. We pried the plate out when the epoxy had cured and it looks like it's now the right height, with the top of the chain stripper plate level with the rest of the deck. Now we can drill the mounting holes for the anchor winch, which will tell us where the chain stripper needs to be positioned and mounted.
Jon also worked on the swim platform areas again. After much consultation, including a lovely Skype call with Amanda in Seattle so we could show her the pictures, we settled on a nonskid size that maximizes safety by bringing the nonskid pretty close to the ladder grooves. Jon got a template made for the 4 little square "chocolate boxes" on the 2 swim platforms. Not sure yet which way we'll position the diamond pattern, as we're not sure which way it's more important not to skid!
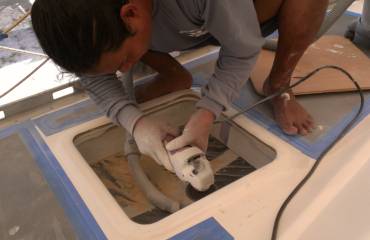 Grinding out the foam (replaced by filler) after the glass was cut |
Mike came by to consult on the stainless steel bumper trim we plan to put on both bows and all around the new swim platforms. The sterns are especially vulnerable to dinghies crashing into them, and we hope to protect the relatively more fragile gelcoat and fiberglass with solid strips of 1/16" (1.8mm) stainless steel. Our new bows also need some protection, as they're now somewhat finer so better through the water, but also somewhat more delicate. We are very aware of the hazards of floating logs and unlit fishing junk in SE Asian waters, and we'd be really unhappy bumping some big water‑logged stump off Borneo and crunching our new bows! Stainless steel "shoes" here we come. Mike will be by tomorrow to splash a mold off the bows so the machine shop guys can make an exact‑fitting stainless shoe, which we can then glue to our bows with 5200 polysulfide adhesive.
Houa got some exciting work done today. He took his fancy new interior hatch trim and placed it on top of the old headliner for the forward port cabin. After consulting with us on the positioning, he cut away the old headliner, took it inside and mounted it, together with the new trim and the real hatch overhead. Woot! It looks very nice! One of the light fixtures will have to be moved but the old hole will be entirely swallowed up by the trim. Houa's working with the old headliners to keep the new ones pristine. But of course, once he's made the template from the old headliners he will have to bring the new ones to the workshop and cut them. We'll then send the newly cut ones back to TMT to re‑attach the white vinyl coverings around the new hatch openings on the plywood headliners.
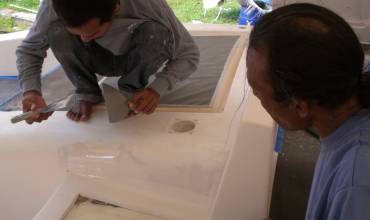 Baw & Lek spreading on gelcoat - still not thick enough at right |
Wednesday, June 26:
More sun, more work. Another good day at the boat yard with all our workers back on site.
Baw was back and productive, although his back and leg (sciatica?) still bothered him. And Pla laughed with embarrassment when we asked where he was yesterday. "Drink too much. No sleep. Sleep yesterday." Gosh, these party guys!
The men basically spent the day sanding. They sanded the filler on the cabin top on the port side, then concentrated on the aft deck. There was gelcoat to sand near the vertical davit supports, and then Baw added more, smearing it on pretty heavily so it's completely opaque. By afternoon the guys were polishing it, so we hope to be able to put up the davits soon. Other work on the aft deck involved wet sanding the whole aft seat and its back wall with 800 grit.
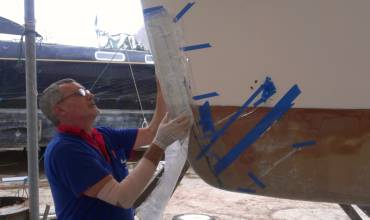 Mike making a "splash" mold of Ocelot's starboard bow |
We want to protect all this work we're putting into Ocelot, so we've asked Mike to build us some protective stainless steel around the edge of our swim platforms (to protect us from errant dinghies). We also want some stainless steel "shoes" for the bows, to protect them both above and below the waterline from all the junk in the water.
Mike came by at noon along with the AME machinist, who came in the truck bringing all of the newly cut nonskid panels, all of our nonskid templates (including the one Mike said he couldn't find) and all of the spare off‑cuts of nonskid. Since the AME machine shop is so far away, Mike thought it would be best if he made a mold of our bows so the machine shop could fit our bow shoes exactly without having to traipse out to Ocelot all the time. Mike and the machinist discussed where else they needed molds for the stainless steel bumper trim, then Mike was left alone to implement them. Sue and Mike worked at taping cling wrap (vinyl) plastic to the bows, and soon needed the help of 2 more workers to control the thin plastic while taping it. Then Mike smeared (highly toxic) polymer release stuff on the plastic. While he waited for it to set, he and Heru cut the biaxial glass that will create the fiberglass mold. Our guys were very interested to see the "pizza wheel" cutter that Mike uses to cut fiberglass. Sure is easier than dull, clunky scissors!
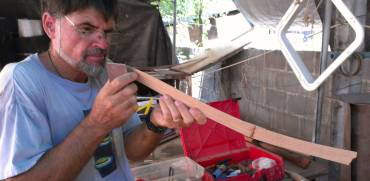 Checking a curved bit of template for uniformity & smoothness |
Mike managed to get 3, no 4, layers of glass on the starboard bow, but he's concerned about how the thin vinyl sheeting is holding up underneath. We sure hope it didn't dissolve and give us polyester resin and glass all over our beautiful bows! Mike made the mold in polyester instead of the more expensive epoxy, but the chemicals in polyester are more corrosive, and the vinyl he put over our bows is more reactive than polyethylene. Mike will be back tomorrow to do the second bow mold and the 2 stern molds on the swim platforms. We might try heating some polyethylene sheeting and stretching it over our bows (and/or sterns) instead of using thin vinyl - then we wouldn't even need the polymer release agent.
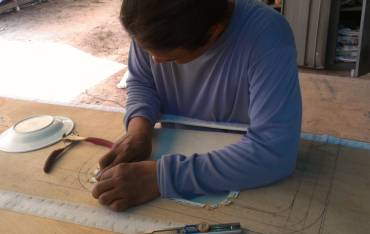 Marking where the new hatch trim goes on the new headliner |
Jon got some good work done on the swim platforms. He finished making the wild looking template for the starboard swim platform, and he marked out the lines for the nonskid on the port swim platform. This work is part geometry and part art, and takes a fair bit of thought and planning. We will probably cut these odd pieces right here at the yard rather than having Mike cut them at the workshop, as we're down to only the last few pieces.
Houa brought the 2 new starboard forward cabin headliners back from the store room to his workshop. After very carefully checking the positioning of the headliners and the new Lewmar hatch, he cut the headliners to fit his new piece of trim. This involved removing the staples put in by TMT for the Velcro and vinyl covering, and then cutting a new, bigger opening. He then installed it in the cabin and got Jon's approval. Voila! Beautiful new hatches for us to look out of, and for lots of air to come into!
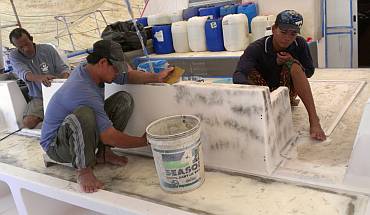 Lek, Pla and Heru got the cockpit seat sanded up to 1,500! |
Sue pulled out the long‑neglected emergency hatches and began attacking the layers of salt, corrosion, and grunge that had accumulated on them when they lived so close to the seawater for all those years. We will probably not reinstall them (we'll use a solid sheet of thick polycarbonate instead) but we'd like to rebuild the emergency hatches so they're available if necessary. If we ever decide to sell Ocelot, some countries insist that catamarans have escape hatches (despite our experience that they're actually liabilities) and these hatches are very expensive. We're about to put in an order for spare hatch parts to Goiot, and it would be a good time to get any parts they need.
Thursday, June 27:
Wow. A fun day, with lots of new things happening.
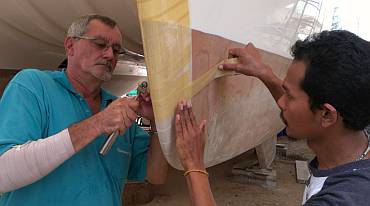 Release system, take 2: packaging tape over masking tape |
Mike was with us all day working on the molds for both bows and the 2 swim platforms at the backs of the sugar scoops. These are areas where we want some stainless steel, to protect our fiberglass. Mike wants to make molds of those areas of Ocelot, so his machinists can make their parts entirely in their workshop.
The day started with a bit of discouragement as we removed yesterday's fiberglass mold from starboard bow. It came off easily enough, but the residue it left behind, of sort of melted thin plastic, was sticky and a real pain to remove. Lots of fingernail scratching to get a loose edge, acetone rubbing, and all at an awkward angle for Sue‑of‑the‑still‑sore‑ribs.
We declared the mold a qualified success (it bulges a bit below the waterline) but the release system needed improvement. Jon wanted to try a heavier plastic, and polyethylene instead of thin vinyl. So he borrowed the yard's heat gun and with Baw and Mike and Sue stretching and pulling, Jon heated the polyethylene tautly around the port bow. it worked great on the outside of the hull. But on the inside, the plastic stretched too much, tore a bit, or stretched into wrinkles. We gave that one up as "interesting but not quite ready for prime‑time."
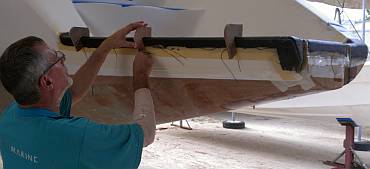 Mike checking wood stiffeners on the swim-platform carbon |
We knew that shiny brown packaging tape was a good release agent, but the local stuff is so thin it basically dissolves onto the boat. We'd already tried applying it on the starboard stern, and had to use gasoline to remove it! So we tried a double tape method: wrap the bow in wide white masking tape (would have used expensive blue‑tape if we were leaving the mold on more than a day). Then cover the white tape with brown packaging tape as the release agent, so the polyester resin won't adhere to the boat. Baw did a great job of wrapping the bow, and then used a small heavy roller to smooth out any wrinkles.
We did everything else the same as yesterday, building up 4 layers of fiberglass over the release tape. But Mike was worried about the mold twisting into the wrong shape as it cured. Scrounging in his car, he came up with some scraps of carbon fiber cloth, too small for any other job. Carbon fiber is lighter, stronger, and much more expensive than fiberglass - it's usually only used on racing boats. So we ended up with a carbon fiber bow! Well, a mold of it, anyway!
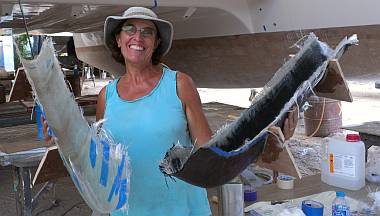 Sue holds the 2 bow molds, port with carbon, starboard without |
To further prevent twist, Mike asked Houa to make small plywood frames to mount over the finished mold for both port and starboard. Port, of course, was made after it cured, but the starboard one they glued and glassed in situ while the polyester was still wet. These plywood frames give the mold a lateral stability, so the molds can't sag outward and distort.
After lunch Mike and Baw attacked the swim platform edges at the back of Ocelot. Here they used the same tape over tape method for release, and used up the last of Mike's bits of carbon fiber for structural stability. These areas involve making 3 separate molds on each side. A long one from the stern to the slope of the hull on the insides of the swim‑platforms, with an odd shape at the aft end where the swim ladder drops down. Then a much smaller middle piece, straight across the back between the swim‑ladder hinges. And a third piece on the outer side of the swim‑platform, at the bottom of the wall that comes down to the swim‑platform.
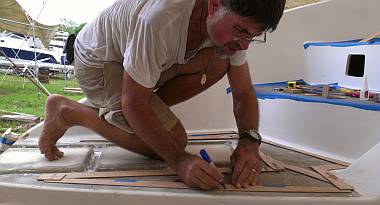 Assembling the complex swim-platform nonskid template |
Sue spent the day assisting Mike and Baw with their work, enjoying the banter, part in Thai, part in English. Mike was so pleased to work with someone (Baw) who knew just what to do, without a lot of direction. Mike joked that he was actually Baw's helper, since Baw did most of the preparation and the layup work. Baw seemed to be enjoying doing something different for a change, too!
When Houa wasn't making support plywood pieces for Mike, he built new teak edges for the lattice work floor board that sits just outside the entryway. This wood took a lot of abuse, as we used to shower right there every evening. Some years ago Jon had built up the mounting surfaces on the underside with epoxy. Houa removed this epoxy and replaced it with solid teak trim. Now we need to check the size and shape of the lattice, in situ, as things may have changed when we rebuilt the area around the companionway.
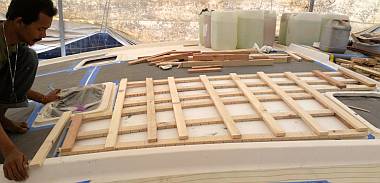 Baw creating the wood lattice for the water jugs to sit on |
Jon 's main attention today was directed at the nonskid templates. First thing in the morning he sorted out over 50 templates, double checking that we had all the nonskid pieces for each one, or that they were on the deck already. We hadn't realized that Mike has not yet remade the 2 big faulty pieces that go on the outer sides of the cabin top. We actually need those pretty quickly, as they're the next pieces to go down. Jon devoted much of the day to making the complicated template for the port swim platform. Then he started building the tiny templates for the new areas just next to where the davit support poles come down.
On the slightly more ho‑hum side, we had our Team of Three, Lek, Pla and Heru busy all day wet sanding the aft cockpit and the aft seat. They got all the way up to 1500 grit, so the shiny end is in sight!
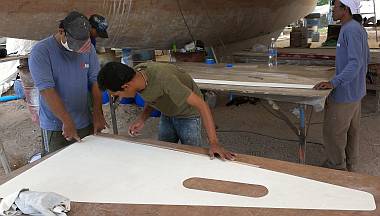 Pla and Baw checking the edges of the port bow nonskid |
Friday, June 28:
Another sunny day in Paradise, which is good, as Jon was gone all day on the scooter. He had
eye and dental appointments at Bangkok Hospital in Phuket Town all morning, then errands to run in town
(getting the scooter inspected and registered, retrieving our swim ladders from the stainless steel
shop, etc).
Sue held down the fort, running scooter errands for the guys ("Madam, we need white tape"; "Madam we need Dunlop glue" ...) and generally supervising things.
Sue spent some time trying to renovate the emergency (escape) hatches, but we may just give it a miss. We planned to cover the escape hatch holes with sheets of strong polycarbonate, bought in the US the last time we were there, and then renovate the hatches in case some eventual future buyer wanted to reinstall them (France requires them, despite evidence that they're more of a liability than an asset). But the hatches are really corroded and it will take a fair amount of time, effort, and money to renovate them. Buying new ones is an option, but they would be (relatively) cheap Chinese hatches, not ($2,600) Goiot escape hatches, and we didn't even like having the expensive Goiot hatches right at our waterline. So we'll probably just toss the old hatches...
 |
 Before & after shots of the gelcoat dit-dot repairs, before sanding |
The guys basically spent the day preparing for the Next Great Nonskid Gluing Event, which we hope will be tomorrow afternoon. The port bow triangular nonskid piece got fitted, and the edges taped and the little blocks super‑glued to the tape. Heru sanded the interior of that space, and we'll do a final acetone wipe just before putting the nonskid down. The area is now dangerously covered in slippery plastic, so we hope no one climbs the scaffolding to access the deck from there.
Lek and Baw worked on several of the actual nonskid pieces. They had to sand the bottoms, check the edges for even curves and straight edges, then sand and trim as necessary. Then they cleaned and taped around the rims, and put a layer of clear plastic covering over the center.
Heru and Pla used the little drills to open up the tiny gelcoat holes in the cockpit, mostly around the aft seat. They then filled those holes with dots of gelcoat. By afternoon the little places were all sanded down, and we are very close to calling the cockpit gelcoat finished.
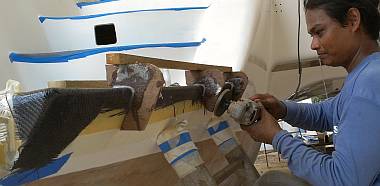 Houa strengthening the swim platform molds before removal |
Houa worked on a number of small jobs. He continued sanding the shower grate, the one that is right in front of the companionway. He smeared Hartford epoxy glue over the top of the lattice, pushing the glue into the joints. After it cured, he sanded the top, which left the teak beautiful and the joins for each lattice pieces nicely sealed from water. AME made us 25 new aluminum mast steps (of the same bracket shape as old stainless steel/bronze steps), and we'll be putting teak pads on each step. So Houa began renovating the 14 old one teak pads, and cutting and routing the grooves in 11 new ones.
Mike was due to come by and remove the new molds he made yesterday for the stainless steel "shoes" on the sterns. He called ahead to ask Houa to attach 2 wooden strips to each long mold section, so that they don't twist and distort after removing from the boat. The molds came off quite easily, and are now on their way to the AME machine shop where a male mold will be made from each, and then the stainless steel sheeting formed around the 8 molds.
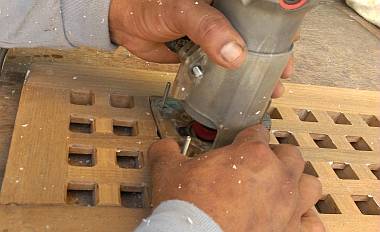 Houa beveling the edge of each tiny square of our teak grate |
Baw wants to spray gelcoat on the small areas by the vertical davits as he's not happy with his hand‑smearing of gelcoat. But that needs a spray gun and we've returned Mike's big nozzle gun, and don't want to intrude on boatyard politics by borrowing or renting from E‑U. So Baw asked if we could buy him one, and he'll pay for it each week out of his salary. We agreed, and even offered to pay for half of the gun, which he was thrilled with. So Jon and Baw scootered off at 4:30 to the hardware store where Baw chose a nice $170, 1.8mm spray gun. We hope Baw will follow through and spray the little davit area with gelcoat tomorrow. That should set us up for Houa to begin the cockpit teak on Monday!? Fingers crossed...
Saturday, June 29:
Last day of a productive week, and it didn't disappoint!
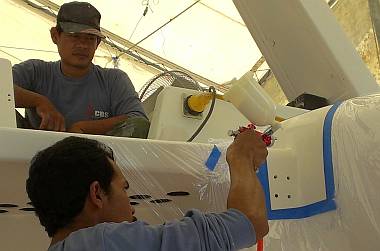 Baw spraying the area near the base of the vertical davit supports |
We started putting Ocelot back together today, which certainly feels good! In the morning the guys returned to their tasks in the cockpit and on deck: wet sanding the gelcoat, and cleaning areas for nonskid. It might have kept on that way except that Baw suggested we should mount the dinghy davits so the solar panels wouldn't shake over the weekend if we got lots of wind. To do that, we needed the gelcoat under and around the bottoms of the vertical davit supports all finished, which it wasn't.
We knew Baw wanted to try out his new spray gun, and spraying gelcoat near the bottoms of the davit supports would be a good opportunity to test the gun. So Lek and Baw masked off very small areas around each pole base, and set up the whole gelcoat operation down on the table behind Ocelot. It seemed like a big deal for such small areas, but not having it done was holding things up. Turns out, with the small gun, Baw can spray with very little air, so he didn't even need to run the compressor - he just used the latent pressure from yesterday's test run. A quiet 10 minute gelcoat spray! Amazing! The small gun really concentrated the gelcoat and there was virtually no overspray. Very cool. We were happy to see him clean his new gun by spraying acetone and mono‑styrene through it and then stripping it down.
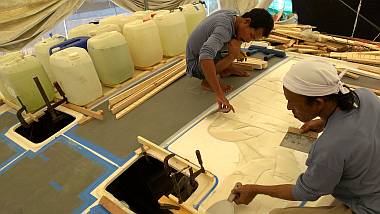 Baw & Lek smearing on glue with the first panel under jugs on left |
Mike came just after lunch, all ready to consult (he's not doing any "real" work these
days ![]() )
on the laying of the next big nonskid panels on the cabin top. Unfortunately, our guys were
not as ready as we thought. They still had not cut all the wood (which needed to curve over
the cabin‑top) or created the wooden dam to hold the water jugs in place on the slope. After 45 minutes of
concentrated work they were ready. Houa did the glue mixing, as before, while Heru and Pla
smeared glue on the panels and Lek and Baw attended the deck surface itself. Within
an hour we had 2 big new panels down and weighted on the cabin top. Woot! These 2 are
probably the most difficult panels left, and the rest should go pretty easily. The only places
left to do on the cabin‑top are the 2 outer‑most sides, aft. These are pieces that were faulty, and
Mike has been waiting for more gelcoat to arrive so he could remake those sheets. The gelcoat arrived
today, so Mike is hoping to make more sheets on Monday and Tuesday. We actually need a total of
4 more sheets: 3 for the bimini and we're hoping to squeeze the 2 cabin‑top pieces
out of a single sheet.
)
on the laying of the next big nonskid panels on the cabin top. Unfortunately, our guys were
not as ready as we thought. They still had not cut all the wood (which needed to curve over
the cabin‑top) or created the wooden dam to hold the water jugs in place on the slope. After 45 minutes of
concentrated work they were ready. Houa did the glue mixing, as before, while Heru and Pla
smeared glue on the panels and Lek and Baw attended the deck surface itself. Within
an hour we had 2 big new panels down and weighted on the cabin top. Woot! These 2 are
probably the most difficult panels left, and the rest should go pretty easily. The only places
left to do on the cabin‑top are the 2 outer‑most sides, aft. These are pieces that were faulty, and
Mike has been waiting for more gelcoat to arrive so he could remake those sheets. The gelcoat arrived
today, so Mike is hoping to make more sheets on Monday and Tuesday. We actually need a total of
4 more sheets: 3 for the bimini and we're hoping to squeeze the 2 cabin‑top pieces
out of a single sheet.
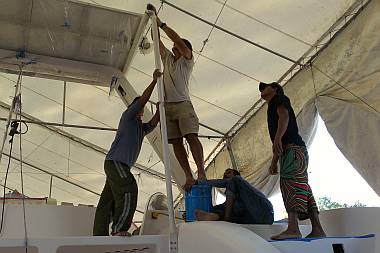 Jon perched miles up in the air reconnecting the davit supports |
When not mixing polyester resin, Houa worked on the teak grate that goes just outside the entryway. He beveled all the (many!) edges so they're not so sharp on the feet, and then he tried fitting it where it's supposed to go. That area got fairly extensively rebuilt, so the dimensions have changed a bit and Houa had to cut the grate down slightly to get it to fit.
Sue alternated the day with finding and fetching things for the guys and working on the long‑forgotten aluminum pieces for the forebeam and boom, things that need Nyalic. Since tomorrow will be the only Sunday we're in town for a few weeks, she will be going to the yard again on Sunday to work on the Nyalic project some more. But it won't be as lonely as usual ‑ Baw and Heru will both be working on Sunday as they both would like the extra pay.
Jon got some good work done on the swim platform templates. He finished the new one near the base of our port davit supports and also the aft‑most one on the port swim platform, but didn't get a chance to see if either one will work on starboard. Oh, our non‑symmetrical boat!
The most noticeable and exciting event of the day was the mounting of the vertical davit support poles! After Baw's morning spray, the gelcoat hardened enough that the guys could polish those areas that will be inaccessible once the poles are in place. After the polishing, Baw climbed into the engine room, and with Jon working outside they got the 2 vertical davit support poles bolted in place and sealed with 5200, a white polysulfide sealant. Then Jon climbed on top of an old gelcoat can, and with Baw holding it in place and Pla, Heru and Lek all assisting, they got the vertical davit supports joined to the horizontal davit poles under the solar panels. YAY! We are beginning to look like Ocelot again! Of course, with the beautiful newly powder‑coated poles in place, we asked the guys to immediately wrap them in plastic so they don't get destroyed with a gazillion grubby hands holding on as people swing past them into the cockpit!
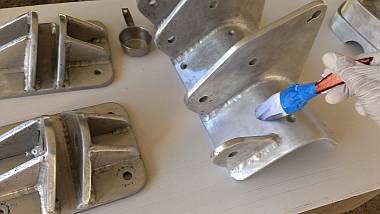 Sue putting Nyalic on the forebeam brackets |
Sunday, June 30:
No planned getaways this weekend and no rain, so Sue put in some time at the yard.
We had expected Baw and Heru to work today as they wanted to earn more money, but they never showed up. At least not between 9 and 2, which is when Sue was there, working on the forebeam. Most of the preparation work for putting Nyalic on the forebeam had been done weeks ago, but what with rain, outings and a cracked rib it's been left untouched until today.
It's sort of fun being at the yard alone on Sunday. Quiet, dust‑free, peaceful. Just Sue and her boat! She got a second coat of Nyalic on much of the forebeam, and a first layer on the seagull striker (tall triangle coming up from the forebeam) and on all the odd brackets that hold the forebeam to the hulls. Looking good! More to do, but it's nice to be moving along.
Thai Refit:
Ocelot Pages:
Top Level: Home | Destinations | Cruising Info | Underwater | Boat Guests | Ocelot | Sue | Jon | Amanda | Chris | Site Map | Make a Comment
|
If our information is useful, you can help by making a donation |
Copyright © 2000‑ Contact: Jon and Sue Hacking -- HackingFamily.com, svOcelot.com. All rights reserved.