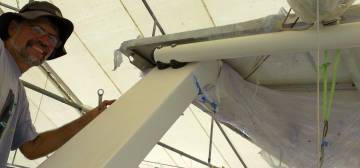
Jon after mounting the portside horizontal davit support
85 Laying Nonskid
Summary: A good week, as we glued down a lot of the nonskid. Even the weather cooperated, with little rain in this, the rainy SW monsoon season. This week we:
|
 Jon after mounting the portside horizontal davit support |
Monday, June 17:
A good day on Ocelot, as we continue to make progress on the deck work! Even the weather
cooperated - it was cool and windy, with only a brief morning shower.
Baw arrived with a young man on his scooter when we were expecting a woman. Okay, language problems. They didn't know the word for "husband", so when Baw said his sister was coming to work, and then hummed the wedding march, we might have twigged. Our new worker is Heru, Baw's sister's husband. It's all so clear after the fact. Anyway, Heru turns out to be from the Philippines, a good worker, attentive, cheerful, and seems, if not competent, at least he knows when to stand back and learn instead of jumping in and trying to help. He also understands some English, which is good.
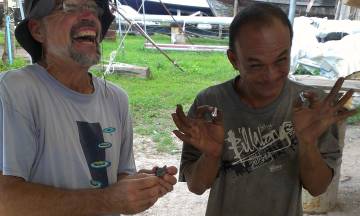 Our machinist, Lop, & his aluminum inserts for our hatches |
The men began the morning cleaning up the deck and covering the finished gelcoat areas in thick vinyl for protection. Baw tackled the intricate pattern of wood strips that are to be used to hold down the nonskid on the outer salon deck, the part that slopes steeply forward. Lek and Pla and Heru spent some time wet sanding the aft cockpit seat before joining the preparations.
The main job of the morning was to be sure we were ready to lay more nonskid when Mike arrived in the early afternoon. To that end, Lek cleaned up several pieces and checked their edges and corners for smooth curves and straight lines. Then he cleaned the pieces with acetone and taped around the edges. Finally, he covered each piece with clear polyethylene to protect the nonskid gelcoat itself.
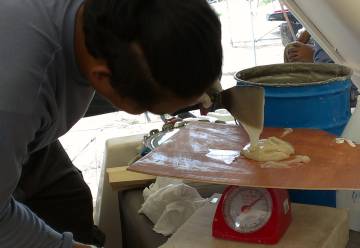 Houa weighing the glue to know how much catalyst to use |
The high winds caused the tent to bounce around quite a bit, which caused the solar panels to bounce as well, since they're currently suspended from the tent. So Jon decided to replace the newly powder‑coated horizontal davit bars, which are what the solar panels usually sit on. Port side went pretty easily, but when Baw smeared gelcoat on the starboard shoulder of the targa‑bar, he covered the bolt‑holes. Jon had to use a sharp spike from inside the targa‑bar to poke through the (hard!) gelcoat so he could see where the hole was from the outside. Then he used his Chinese copy of a Dremmel to open the holes up.
Our machinist delivered the 25 little aluminum inserts for our Goiot hatch handles. These are not difficult to make, but Goiot wants $11 each for them, plus shipping and a long lead time, IF you can find them at all. Our machinist (actually, his dad) turned them out for us for $3.50 each in 2 days. Sweet!
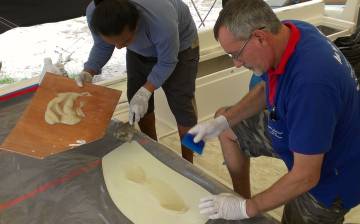 Mike gets half the glue for the back of the nonskid |
Houa continued working on the interior trim for the forward hatches. One is assembled but needs to be sanded and finished. Today he put release tape around the hatch base and epoxied more fiberglass strips around the base. When this cures it will be epoxied to the second piece of trim, ensuring a good fit around the base of the hatch.
Up on deck the guys did a final hand sanding around the perimeters and used the dancing (orbital) sander on the center of each space we hoped to lay nonskid. Heru worked on the port sugar‑scoop steps. Baw worked on the salon cabin top, over the starboard eyebrow.
Mike arrived after lunch, a bit later than he had hoped, so it was close to 2:30 before the first nonskid was laid. We started on the lowest step of the port sugar‑scoop, then the middle step. Then, because the working area was getting too small and awkward, we moved to the cabin top to lay the very tricky long piece that slopes down over the salon port light, or the "eyebrow" as we call it. Since this last piece didn't use as many water jugs as we'd thought, we had enough to go back to the port sugar‑scoop to finish the top step. This made a total of 4 pieces laid in just over 2 hours.
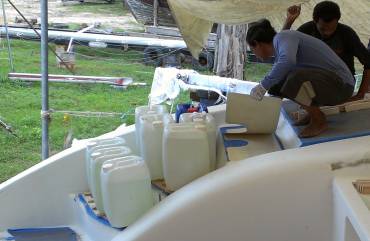 Houa laying a nonskid panel on the top sugar-scoop step |
Our team worked very happily and efficiently with Mike. Houa weighed and mixed the polyester glue and Mike smeared it on the back of the nonskid, then Baw and Lek smeared the remaining glue onto the deck itself. Then the nonskid was carefully positioned, butting up against the little pre‑placed blocks of wood. Lek and Baw then used the rubber rollers to squeeze the glue from the center to the outer edges, where it was finger wiped off by Pla and Heru. The final step is the laying of the pre‑cut wood strips and the placement of the water jugs, while Pla cleaned the rollers for the next piece. Each area has to be babysat for about 30 minutes as the glue continues to ooze out and needs to be wiped away, and the corners checked to be sure they are down hard on the deck.
Tuesday, June 18:
Another beautiful day in Paradise, with things chugging along nicely.
In anticipation of Mike arriving after lunch to help lay more nonskid, the guys spent the morning getting ready. Our goal was to get the sloped and curved piece on the salon roof, port side put on first. Baw and Heru practiced arranging the pieces of wood that will support the water jugs, then they built another Rube Goldberg‑esque wooden structure that is designed to support the jugs and keep the nonskid panel from sliding around on its slippery glue. This involved braces and ropes and clamps and lots of strange thinking. They also practiced laying out the wooden strips that will go on top of the flat (thank goodness!) strips along the sides of the cockpit.
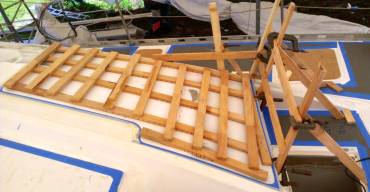 Rube Goldberg-esque wood to keep the nonskid from sliding |
The other guys prepared the panels themselves - checking that the edges and curves are correct and sanding where necessary, masking off the edges with blue‑tape, and masking off the nonskid surface with thin plastic.
Meanwhile, Jon and Sue were busy finding the correct nonskid pieces, cleaning their backs with acetone, and making sure all was getting organized. Once the 4 pieces for the deck were ready, everyone moved down to work under Ocelot, preparing some of the hatches for their nonskid. The top of the chain locker hatches needed sanding and cleaning, so Pla worked on that. Lek did a great job of blue‑taping the edges of the aft seat hatches, and covering them in clear plastic. Both Pla and Heru spent time sanding the engine hatch and the aft seat hatches.
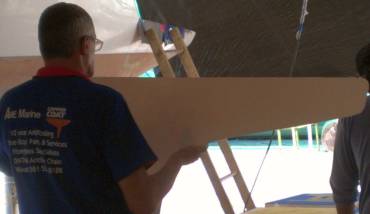 Mike examining a flawed piece of nonskid that he will remake |
Mike arrived just after lunch, and even though we were ready to begin laying nonskid up on deck we got sidetracked into talking about some flaws we've noticed in the latest batches of nonskid. When held up to the light, they have either spots or streaks of places where the gelcoat is either very thin, or in a few place, missing entirely. Sue had originally suggested that maybe there wasn't enough gelcoat sprayed onto the mold, or that it wasn't evenly applied, but Mike denied that, saying they mix the same amount for each 4x8 foot panel, and his technique, which insures an even distribution, has not changed.
After much cogitation, Mike decided that the culprit was the rain and that his guys were pressing down too heavily when they rolled on the subsequent layers, after the gelcoat. It's been so rainy and humid recently that the gelcoat has been taking longer to cure. When making these nonskid panels, they spray the gelcoat onto the mold and then wait a few hours until it has started to cure, so it's a bit stiff instead of runny. Then they lay the filler and fiberglass on, and wet the glass out with resin.
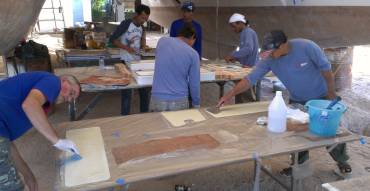 Mike, Baw, Houa, Heru, Lek & Pla all working under Ocelot |
But when the air is so humid, the gelcoat takes longer to cure, and this has upset their timing. So recently they may have tried to put the fiberglass on too early, before the gelcoat has started to stiffen up. If the gelcoat is still a bit runny in places, then when they wet out the fiberglass backing with rollers, the rollers can push the gelcoat away and make it thinner in places, which is what we're seeing. Mike decided that this is the most probably cause, because so many of the flaws appeared as lines, as though from the edge of a roller. Mike even increased the amount of gelcoat catalyst to offset the higher humidity, but the gelcoat is still taking longer to cure. So possibly the men are rolling on the fiberglass backing too soon, thereby causing the gelcoat to slide away from where they're pushing down with their rollers. It sounds plausible to us, but we hope they are able to resolve this, and come up with a procedure that produces a product that is up to the quality of their earlier panels.
Discussion done, we attacked the big, tricky nonskid piece on the port side of the salon top, over the port "eyebrow." All went well, with our team working well together, just as yesterday. We managed to get the 3 side cockpit pieces down, and the tricky one up forward, then took a break for cool drinks from the mobile drinks lady, Madame Yee. Our treat today.
|
Four o'clock saw us all under the boat working at 3 tables. Houa did his mixing magic of glue and catalyst, to Mike's specifications. Then everyone picked up plastic spatulas and spread glue on the back of (newly cleaned) nonskid, and on the hatch surfaces themselves. By day's end we had 3 more pieces done: the 2 aft cockpit seats and the second small diesel hatch up forward. So the score for today was 1 large difficult panel, 3 smaller panels on the sides of the cockpit, and 3 hatches. Moving along!
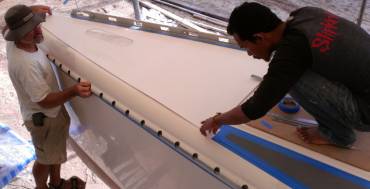 Jon and Baw aligning the starboard bow nonskid section |
Mike pointed out that our earlier table on what panels are still needed should be updated, and he's right. But some of the recent panels are in a bit of limbo. They're obviously flawed, and the gelcoat is thinner (and not present at all in some places) but Mike is concerned that his mold may not hold up for remaking those 2+ sheets.
Wednesday, June 19:
A productive middle of the week sort of day, with the only rain being a surprise 40 knot squall.
Our huge tent flapped but didn't actually lift off, so we don't think we're in Kansas...
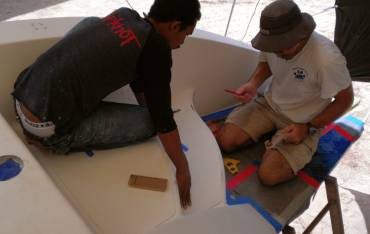 Baw & Jon aligning starboard sugar-scoop nonskid panels |
We weren't sure whether Mike would be coming to Ocelot today or not, so we had to prepare things as though he was. That meant top priority was getting the nonskid piece for the starboard bow (the big triangle) fitted, positioned, and final sanded. We also had to setup some sort of scaffolding so we could reach up there. So Jon set up a small table on top of another table on the inside, and he scavenged a tall but rickety platform from elsewhere in the yard. Then he and Baw got the piece lined up, trimmed and positioned. Then Baw and Pla took turns sanding the deck to have it cleaned and roughed up for the gluing.
At mid-morning Mike confirmed that he wouldn't be coming to Ocelot until Thursday. His good news was that he adjusted his curing time for the nonskid and seems to have solved the problem of the thin spots. He says the sheet he pulled off the mold yesterday afternoon was perfect, and he was manufacturing more nonskid for us this morning.
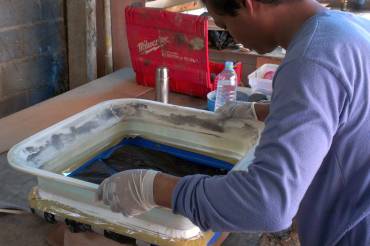 Houa epoxying the top section to the bottom mounting ring |
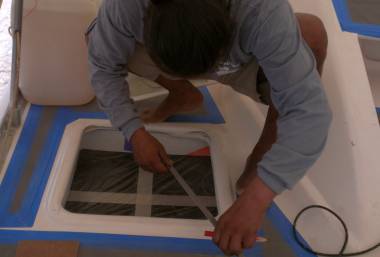
Despite not having an afternoon date with Mike we kept up the pressure to get areas prepared for nonskid. The obvious next area to concentrate on was the starboard sugar‑scoop steps. Again, Jon and Baw worked well together, checking the size, position and trim of the edges. All of these pieces have curved edges, which are tricky to keep a uniform distance from their neighbor. The worst one was the 3rd step up which has a round plastic "viewing port" (inside of which is access to the emergency steering gear). The nonskid was designed to sweep around this fitting, but unfortunately it wasn't cut with an even circular cut‑out, so Jon fiddled with the calipers (as a compass) to draw a better circle. Both Jon and Baw took a swing at getting it evened out and did a great job. Perfectionism has its place, as it's very obvious when supposedly concentric circles aren't concentric. If we'd left it we'd have been annoyed at it every time we climbed the steps!
Our Deck Team, Lek, Pla and new‑hire Heru, moved seamlessly from one part of the deck to the next. They did a variety of jobs, like cleaning the excess glue from around the edges of the nonskid, masking and covering the pieces to be laid after Jon and Baw finished with them, and covering newly laid areas with protective vinyl. Heru is working out well, and seems to speak pretty good English, so we're pleased to have him on board.
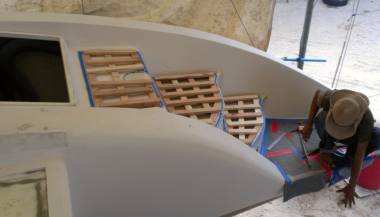 Preparing the starboard sugar-scoop steps for nonskid |
Houa finished assembling the second interior trim for the large new Lewmar hatches and it fits like a glove. There is still more to do - smoothing the inside with filler, grinding down the outside so the glass is thin enough to fit between the hatch and the deck, and some prettying‑up with gelcoat - but that's all easy and straightforward now that the structures themselves are done. Today was the first day all week that Houa could concentrate on this project and not get pulled off to help with the nonskid.
Thursday, June 20:
Oh, wow. Another good day on Ocelot, with lots more done, and only one panic near the end of
the day.
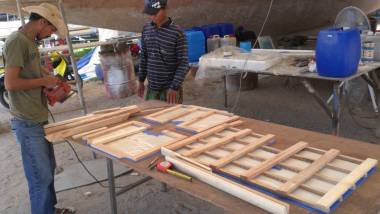 Baw and Heru prepare the slats for the hatches |
With Mike due to arrive in the early afternoon, our guys concentrated on having everything ready for an efficient nonskid gluing session. Baw worked with Lek and Heru to create wooden pieces on the starboard bow that will evenly distribute the weight of the water jugs to the nonskid. Then they did the same for all 3 starboard steps, plus the starboard engine hatch cover. We knew we wouldn't get to all the steps in one day, as it is easier to have a space between things to work around, but it's nice to be prepared, just in case.
Four of the pieces had very rough undersides, an artifact from a hiccup in Mike's manufacturing of a sheet. Mike had promised to clean them up himself so we hadn't cleaned them up earlier, but Mike's been stretched a bit thin lately and we didn't want to use his limited time with us doing cleanup work. So we decided to let Houa attack them with gnarly sandpaper disks on the grinder, and he did a great job. Just as well, as Mike arrived with his arm in a bandage from pulled muscles moving a washing machine.
Pla, Heru and Lek made sure the nonskid pieces were acetone cleaned. Once all the preparations were complete, Lek, Pla and Heru spent the rest of the morning picking glue/resin from the edges of the nonskid pieces that are down.
Houa sanded the thick edges of the Lewmar hatch trim, and even got Baw to help work on the second one. Bit by bit, slowly, slowly, they are coming right.
When Mike arrived at 2:30 we were ready. But the new batch of glue that he brought wasn't. It was too runny, having only 27 instead of 30 cups of silica (Cabosil) in it for thickening. So Houa brought out our bag, and our big corkscrew stirring rod, and mixed the glue to a better consistency. Houa did his careful weighing and measuring of catalyst once again, then divvied out the glue between the panel and its spot on the deck.
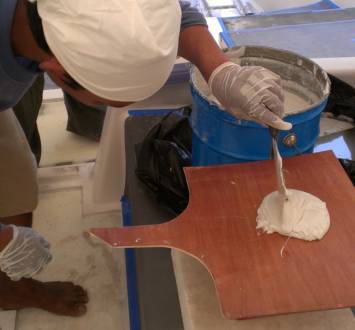 Houa measures out the glue on a scale (under plywood) |
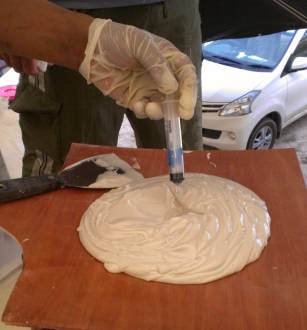 Then he adds 0.6% MEKP catalyst |
We started with the triangular starboard bow piece, and had 3 men working up there -- Lek and Heru standing on tables and scaffolding on the sides of the bow, and Baw on the deck at the base of the triangle. Mike couldn't spread the glue as he usually does, so Houa not only measured out and mixed the glue, but he spread in on the back of the nonskid panel while Baw's team spread the remainder of the glue on the deck. The guys are getting used to what needs to be done so things moved along like clockwork. The panel was moved to the bow, positioned where it needs to go up against the little stopper blocks, and the excess glue was squeezed out with rubber rollers and cleaned off with fingers.
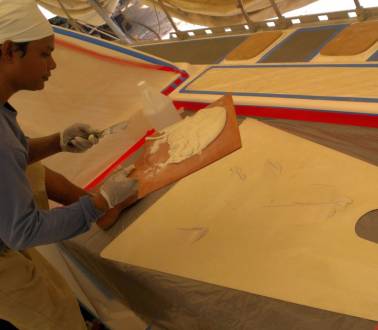 About 25% of the glue goes on the back of the nonskid panel |
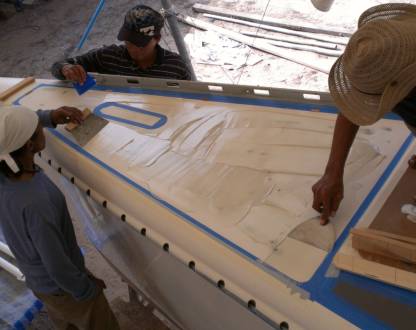 The balance goes on the deck and is spread evenly |
Baw had already built the wood frame for the water jugs, numbered the bits of wood, and put them aside. Once the panel was down correctly he quickly reassembled his wooden grid and started bringing up water jugs. Since Lek and Heru, on the sides of the bow, only had their heads and shoulders above the deck, Baw had worked out an arrangement where they could use a rod through a loop of rope on the tops of the 45 lb (20 kg) water jugs to move them up to the extreme bows and position them correctly. Lovely how Baw thinks of these things. Very clever!
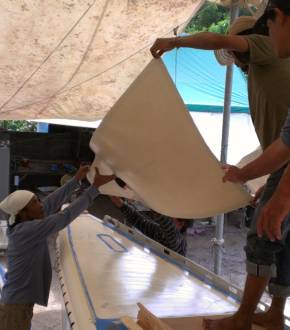 The panel is brought to where it needs to go ... |
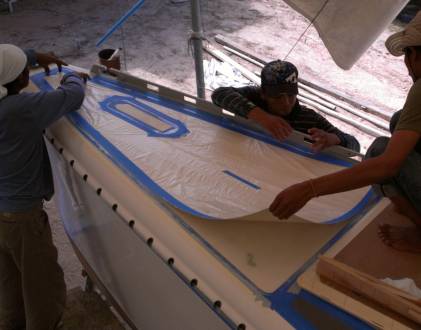 ... and positioned correctly up against the pre-positioned stop-blocks |
Once the bow piece was finished they moved back to the starboard steps, and we got 2 done at once. Baw stood on the swim‑platform of the starboard sugar‑scoop and worked on the step above. Lek perched on the engine hatch and worked on the step below. Houa mixed and distributed glue and Pla and Heru smeared it on the nonskid pieces. Fast, efficient work and voila! We had 2 more pieces in place!
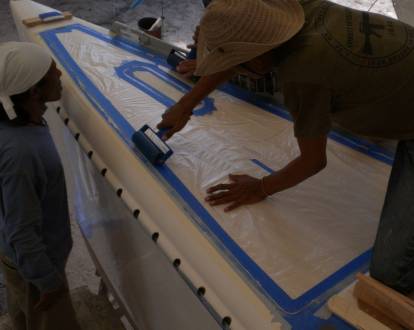 The air and excess glue is pushed out the edge with rubber rollers ... |
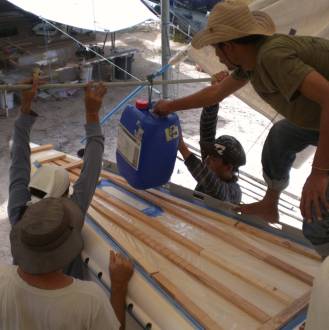 ... then the water jugs are put on to press it down |
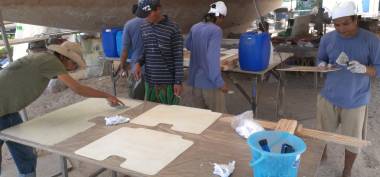 Everyone working on the hatches, under Ocelot |
About this time Sue got a phone call that the new workers' T‑shirts were ready, so she scootered off, thinking that the next phase of the day was the easy part. We had 3 hatches down under Ocelot on the table all laid out and prepared for nonskid, and their nonskid pieces and wooden water jug supports were also prepared. Sue returned 15 minutes later to see a bit of pandemonium. Apparently when the starboard engine hatch itself was handed down, we had lost track of which was its nonskid (port and starboard are very similar). Now we had a piece of nonskid applied to the hatch and Baw pointing out that the lines weren't right. Dang! We'd put the port nonskid on the starboard hatch! Pull it off. Wipe with tons of acetone and rags, and start again. In fact, Jon and Pla worked on sanding and cleaning the port engine hatch so that we could maybe get it down as well, but that was not to be. We probably were within the OK time to re‑apply the glue (i.e. the old stuff hadn't kicked yet) but Baw did not have wood pieces cut to support the water jugs, and he didn't want to rush it. So they went ahead and applied glue to the correct starboard hatch nonskid and we got that put on and weighted. Then they did the 2 chain locker hatches, which are also off the boat and loose. All was finished by 4:30.
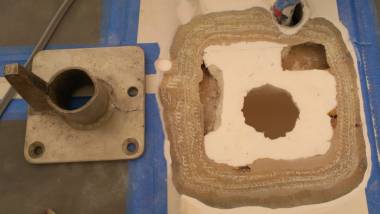 Chain stripper & its hole. Pockets are where balsa was removed. |
Woot! Six new pieces on in 2 hours! We were happy to hand out our cool new grey, long sleeved T‑shirts (with the Ocelot Thai Refit logo) to our 5 workers. They've done a great job, stepping in when Mike had a sore arm, and doing the job that we had contracted with AME to do.
Friday, June 21:
A breezy, sunny, beautiful day, and a bit more laid back as we weren't on a schedule to lay nonskid
today. But both Jon and Houa were grinding fiberglass, so the dust was in the air. Itch, itch.
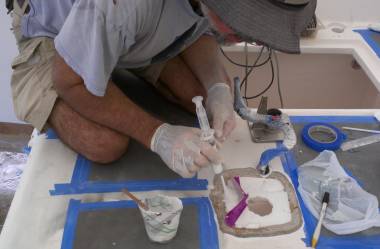 Injecting epoxy & micro-balloons to fill where the balsa was |
We had planned for Jon and Baw to work on positioning 2 big pieces of nonskid today - the big "L" shaped piece up on port bow, and one of the big salon roof pieces - but Baw called in sick, so we had to shift focus. Jon took advantage of having a clear foredeck to attack the windlass area. Our old chain stripper (a stainless steel contraption that helps release the anchor chain from the windlass, and sends it down the haws‑pipe) used to be recessed into the teak under the windlass. With the teak deck gone, we had to choose between cutting the chain stripper base to mount it flush with the edge of the windlass, or recessing it into the deck.
Hindsight is great, and we probably could have gotten away with cutting it, but since we had already routed out the deck, we had to carry on. Jon found last week that much of the deck's strength was in a thick layer of fiberglass that we had cut through, and by routing it out he was down to filler that replaced the old (damaged) balsa. So today he ground back the filler even deeper, and beveled the edges of the fiberglass to make a bowl‑shaped space for the chain stripper. This will allow us to lay several small pieces of fiberglass in there and tie them into the existing glass, restoring the strength of the foredeck and still keeping the chain‑stripper recessed into the deck, under the anchor windlass.
In the process of grinding back the deck some more balsa was discovered, some of it soft from having gotten wet sometime in the past. Sue dug out the remaining bits of (accessible) soft balsa before Jon painted epoxy resin deep into the holes under the glass, to seal the balsa. Then we injected a runny mixture of epoxy resin and micro‑balloons deep into the recesses with a syringe. Doesn't sound like much, but the whole thing took most of the day! Next step will be to sand back the new epoxy mud and coat the bottom of the recess with fiberglass to give the chain stripper a really sold base to hold onto.
 Houa cutting back the hatch frame a bit so his trim will fit |
Another messy fiberglass job going on, right near Jon, was Houa working on the forward cabin hatch openings. When those hatch openings were built, they made them a pretty good fit around the hatches - too close to fit the trim between the hatch and the opening. So Houa had to open up the deck opening to accommodate both the hatch and its new trim. Poor Houa was already blistered from an allergic reaction to several days of sanding fiberglass on the trim itself. And today didn't help. He built a sort of reverse hatch down inside the opening to catch all the glass and gelcoat dust and keep it from getting inside the boat. But even with the vacuum sucking up dust as he went, his sanding wheel still spit out fiberglass dust. He got the starboard hatch opening correctly modified by grinding back the corners and a bit of a couple of the walls. He has to do the same to the port hatch. Then he'll have to re‑protect the exposed foam with epoxy filler, as there's not enough room for more glass.
 Lek, Pla and Heru cleaning up yesterday's nonskid glue jobs |
Mike came by with our 25 new aluminum mast steps to replace the corroded stainless steel/bronze(?) ones. Being aluminum, we'll be able to attach them to the mast with aluminum pop rivets, and thereby decrease corrosion caused by different metals. We will probably have Houa make little teak pads for them, renovating the original 12 and adding 13 new pads. Mike also brought our old aluminum (ex-painted) sail track that holds the slides of the trampolines to the forebeam and the anchor support. They are now all sand‑blasted and powder coated the same aluminum color as the mast steps and the Goiot hatches. Very spiffy. They should blend in nicely on the Nyalic‑ed aluminum spars up front.
We're happy to report that Mike has decided to order more of our "Ocelot white" gelcoat. This will allow him to make a couple more sheets of nonskid to replace the 3 pieces with thin gelcoat that were damaged in manufacturing. But he's worried that his mold might not hold up, as it's apparently deteriorating rather quickly.
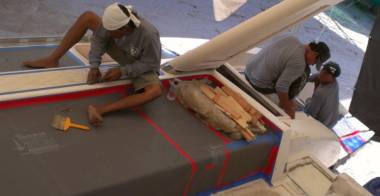
Our Deck Team was busy cleaning up after the nonskid laying event. They peeled back the blue tape to chip out and sand down the polyester glue around the edges of the nonskid, all over the deck and on the loose hatches. Then they covered each piece or area with protective vinyl so that we can walk on the nonskid without messing it up. By day's end, they had finished all the new pieces. So Heru hefted the rake to give us a "clean beach look". Pla sanded the port foredeck where the last 2 pieces of port side nonskid will go. Lek left after half a day - Not sure why.
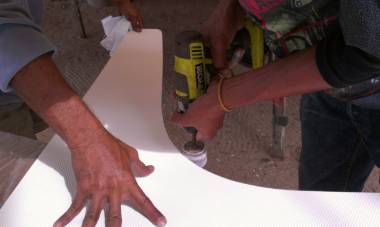 Baw using a rotary sander to smooth out a big curved nonskid |
We're hoping to have our full team back again tomorrow, as Mike will be coming by to lay more nonskid, and there's lots of prep work to be done beforehand. But everyone always shows up on Saturday if they possibly can - that's payday!
Saturday, June 22:
Another blast‑ahead day, with more nonskid put down, and YAY! It's Saturday, so a weekend is
pending.
The workers are really into the swing of things now. Repetition (of the correct kind!) is paying off. We hardly have to say a word about what needs to be done. We arrived to find men sanding and cleaning the cabin‑top, the "boomerang" shaped area on the port bow and the middle step on the starboard sugar‑scoop.
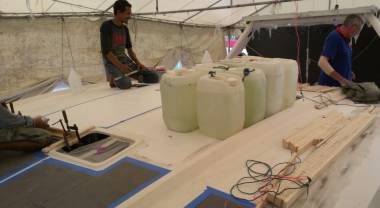 Everything neatly laid out & close at hand for the big center piece |
Baw, Lek and Pla worked at fitting the boomerang piece onto the foredeck, then Lek put down the blue tape and the little wooden blocks which insure the nonskid gets to and stays in the right place. Then the pieces (the boomerang and the big cabin top, center aft) were passed down to the work tables where Baw did his magic sanding to get the edges straight and the curves all nice and uniform. Baw and his men measured and cut more 1x2" wood strips to make a lattice grid over each new nonskid piece, on which to balance the water jugs as weights. The center cabin‑top piece needs to bend in both directions, which it doesn't want to do, so we have to hold it down firmly with sliced wood that also bends.
Jon grabbed the Mactek orbital sander, loaded it with 40 grit and attacked the starboard middle step, the last of the new steps to receive nonskid. He also had to make another template. Mike can't find one of the big cabin‑top templates and rather than point fingers at who lost it, Jon simply made him another one. The lines were already on the deck and we still have several of the wood strips lying around so it went pretty quickly.
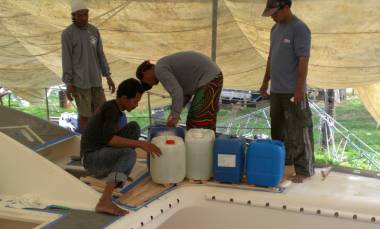 Sticking down the big "boomerang" piece on the port foredeck |
When Mike arrived after lunch, we thought we were 100% ready, but there was a catch. Mike had told us last week that he wanted to be here for the unveiling of the peel ply off the backs of the new nonskid panels, and he wanted to see how it was. So, with Mike there to watch, we removed the peel ply from the big center cabin top piece, only to find that it needed sanding! Not as much as the earlier pieces, but a bit. It had a big, rough, unacceptable overlapped ridge in it from a fiberglass joint. So Houa and Baw and Jon quickly sanded the backs of all 3 panels smooth. Sue thought It was a bit anti‑climactic, as there wasn't really much special about the pieces with peel ply, but they were a little smoother and much cleaner, so they needed less sanding and less cleaning with acetone (but they still needed some).
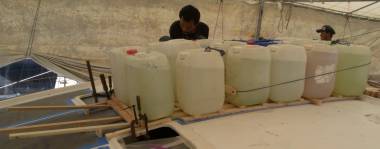 The big, challenging center piece, after the dust settled |
Finally, we were ready to lay. We decided to attack the challenging, big, sloping cabin‑top piece first. Here Baw had played engineer and created a sort of "dam wall" with clamps and a whole wooden structure to be sure the water jugs didn't slide down off the cabin top, taking the new nonskid with them. But the real challenge was squeezing the glue out from underneath the panel and not letting it pop up afterwards, which would allow air under the panel. We ended up squeezing the glue out of the starboard side, then holding that side down temporarily with water jugs as we squeezed the glue out from under the port side with several hands around to make sure it didn't pop up. Then we had to lay the wood strips, all carefully numbered by Baw, and put water jugs on them while still making sure the panel didn't pop up.
The boomerang piece on the port foredeck and the middle step of the starboard sugar‑scoop went very easily after the dramas of the big piece. By day's end we had 3 more nonskid pieces in place. And our happy news is that Mike has agreed to make replacement nonskid for us, for the panels that were ruined in manufacture last week.
Houa had fun doing a mock installation of the starboard Lewmar (forward cabin) hatch. With the sides sanded back he could slip the new interior trim in place, then drop the hatch, perfectly, into that trim It was nice to see Houa looking so happy down in the cabin. Next step: do the same thing to port and see how it looks!
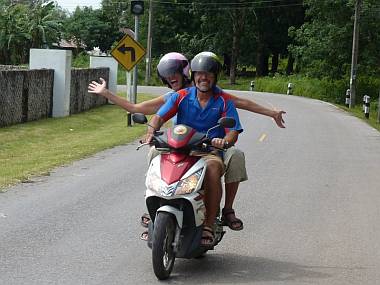 Jon and Sue scootering through the countryside on our weekend |
Sunday, June 23:
We had another lovely "weekend" with our friends at their "Sumptuous Villa" up in Ao Po, about an hour north
of us. We brought a breakfast of bagels, lox, and cream cheese, washed down with mimosas
(Champaign and orange juice) and good coffee, eaten on their deck overlooking Phang Nga Bay.
After a suitable digestive interval we took the scooters out to explore some of the interesting back roads of northern Phuket Island. While the southern half of the island is pretty built up, the northern half has some pretty remote areas. We got some delightful views and had fun poking around some pretty remote areas.
For dinner we wanted to try out a restaurant that has been going up near our friends. At first we were told that they were having a private party that night, but when we inquired further they said it was their grand opening gala and would we please come and tell all our friends! Pier 88 Seafood Terminal is quite an upscale restaurant so we had a delightful dinner with appetizers, a buffet of main courses, and a dessert buffet, with all drinks included. The setting was delightful as they've had a lot of fun with the decorations and the landscaping. A small artificial stream runs down one side of the restaurant, and the setting is just across the road from the bay in a picturesque fishing village.
Thai Refit:
Ocelot Pages:
Top Level: Home | Destinations | Cruising Info | Underwater | Boat Guests | Ocelot | Sue | Jon | Amanda | Chris | Site Map | Make a Comment
|
If our information is useful, you can help by making a donation |
Copyright © 2000‑ Contact: Jon and Sue Hacking -- HackingFamily.com, svOcelot.com. All rights reserved.