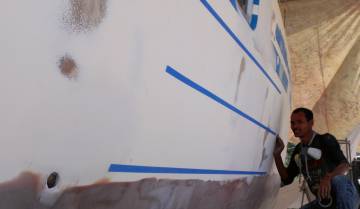
Baw sighting down strips of blue-tape for ripples in the hull
67 Spray Starboard
 Baw sighting down strips of blue-tape for ripples in the hull |
Summary: Both cap‑shroud chain‑plates were removed, along with their backing plates. The silicone around them was cleaned up and then the 3 lower bolt‑holes in each were de‑cored before all of the holes were filled with epoxy mud. Eight water/fuel vents were also de‑cored and filled with epoxy mud. The starboard topsides were filled and faired smooth, then Jon and Amanda shot in a gelcoat line (above the waterline but below the paint line) with the laser. Port topsides needed more work as it had more bad filler to remove as well as the old whale damage repair, then lots of filler was added to make it all smooth again. The waterlines on the inside of starboard hull and the outside of port hull were sanded back and phenolic‑epoxy filler was screed on and sanded smooth. Sue and Amanda put in a lot of time polishing the mast. Houa and K worked on new bits of teak trim for the cabins, and new supports for the cabin floors. The starboard topsides and the port side‑deck were completely masked off with heavy plastic so Mike and the AME team could spray gelcoat on the starboard topsides on Thursday, and the port side‑deck on Friday and Saturday. The guys started sanding the starboard topsides with 320 grit and soapy water but after the gelcoat spraying was finished we put them to preparing port topsides for gelcoat.
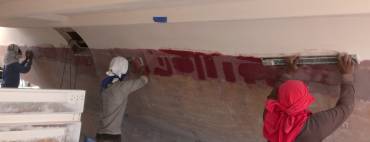 Sanding phenolic filler at the waterline inside starboard hull |
Monday, February 11:
A good start to the week, with things moving along nicely.
Houa and K worked on resetting the steps to the bunks in the port cabins. This is a little job that we hadn't really noticed needed doing, but it's nice to have it done.
Our outside team of 6 spent some of the morning sanding starboard topsides with 120 grit, the finest we want them to go before the gelcoat goes on. Just before lunch Baw laid down 3 strips of blue masking tape to check the hull for bumps and dips. He pronounced it "Beautiful!" Well, and "Nit noi filler, here." The "here" was right at the waterline, so they put on some phenolic filler after lunch. Otherwise, it sounds like the white topsides are basically done! He told us we could ask Mike and his AME team to come on Thursday to spray, so maybe there are tiny touch‑ups still to do. Exciting!
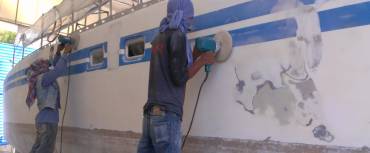 Duk & Baw sanding filler off port topsides - whale repair on right |
After lunch the guys spent time sanding the phenolic on the inner side of starboard hull, and finished the day with little touches of filler here and there. It's all looking and feeling very faired.
Baw and Duk spent the afternoon on port hull, sanding away the old car filler and paint primer that were used on the whale damage repair in South Africa in 2008. It will be nice to know that we have a proper "boat" repair in place, rather than the make‑shift repair done by car panel beaters!
Jon got to visit with some of the new yachts coming out of the water today. It's spring tide time of the month, so there's always some interesting activity at the yard.
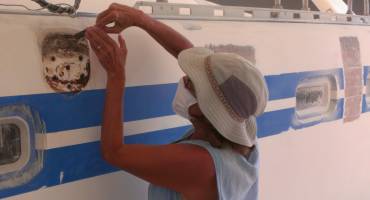 Sue cleaning up the port cap-shroud chain-plate area |
Jon got the port cap‑shroud chain‑plate taken off, then put in several hours cleaning up the big, expensive, stainless steel bolts that hold the chain plates to the hull. He also de‑cored the chain‑plate holes on starboard so they can be filled with epoxy before Mike sprays.
Amanda and Sue had some real quality time with the mast, Amanda doing fine polishing, while Sue worked ahead of her with the bristly disk that takes out the big patches of aluminum corrosion. In general the mast is in great shape, but wherever there were rivets (like under mast steps, and where the two section of mast are joined together) the corrosion is pretty extensive. By polishing it smooth, then washing and Nyalic‑ing it, we hope to stop future corrosion. We'll also make extensive use of Duralac and Tef‑Gel, our corrosion inhibitors of choice, when putting any fittings on the mast or boom.
Tuesday, February 12:
No rain for MONTHS, and as soon as we put on some epoxy today, it rained! But we saved the
epoxy so all was well.
We learned today that Chack prefers that his name be spelled Jack, so we've changed it throughout the site. The day started with Sue removing the silicone from the port chain‑plate area. Baw did a last check of the starboard topsides, then he and Nut and Lek prepared the area for the big masking job that will protect the rest of the boat from the gelcoat spraying on Thursday. Baw strung small ropes like a spider's web from the toe rail to the tent frame above, and on Wednesday afternoon he'll attach polyethylene plastic sheeting so that the whole area will be a big plastic wall to stop the spray.
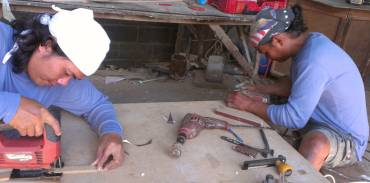 K and Houa making bits of teak trim in their workshop |
Houa and K split their day between sanding and shaping teak trim in the workshop, and working in the hot interior of Ocelot. Because of all the outside sanding, they had to have the port lights closed, so it was pretty stuffy in there. All the bunk steps are now epoxied. And in the starboard aft cabin they fitted a new formica wall panel.
With starboard hull practically finished (in terms of being prepared for gelcoating) Chai and Jack used blowers and big sanding disks to get all of the old epoxy filler off the port outside waterline. In the afternoon all the guys worked together to get 2 layers of phenolic epoxy filler (the red stuff, good for below the waterline) on the whole outer port waterline. Then the rain came, but Jon saved the day by borrowing a heat gun that blasted away the raindrops and helped cure the little bit of phenolic that got wet in the storm.
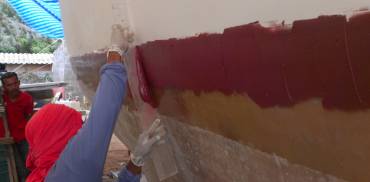 Yoong screeing filler onto the port waterline under Baw's eye |
Because of all the grinding on port hull, Amanda put in time in her (air conditioned!) room to figure out our cockpit teak needs. Looks like just over 7 square meters or so will give us a nicely filled cockpit and aft deck in strips about 40mm (~1.6") wide, with some wider "king" boards around the edges.
Jon de‑cored the portside cap‑shroud chain‑plate holes. Hopefully he'll be able to fill both port and starboard holes with epoxy mud tomorrow. That would mean that the holes won't have to be masked off, just gelcoated over. Jon also helped a single‑handed cruiser take his trimaran out of the water just before noon. Spirit of Ireland is a famous ocean racing trimaran, 60' long by 40' wide (18x12m) built in carbon over honeycomb. Quite a machine!
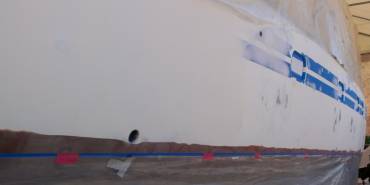 Starboard topsides being masked with plastic top & bottom |
We didn't think many of our workers had computers or internet access, but apparently most of them
do. One of them asked Jon for a boat card and it was immediately handed around and
photographed by all of the workers, so they could get the website and see pictures of themselves
posted online! ![]()
Wednesday, February 13:
Hot and sunny. And a busy day at the yard.
For Team Hacking, the main focus today was getting ready for tomorrow's big gelcoat spray. Amanda and Sue pulled back the thin plastic sheeting over the port hull to get a closer look at the preparation. Except for a couple finger‑sanding places it looks good. They had to cut the inspection short, though, as the guys geared up to sand and long‑board the port hull. Dusty, dusty.
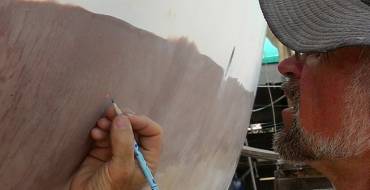 Marking the red laser dot, the lower gelcoat line on the hull |
Amanda and Jon dug out the laser level and used it to mark out where we want the gelcoat line to be on the starboard topsides. We want the gelcoat to end above the waterline but below the top of the antifouling paint (which is supposed to be 3" or 8cm above where we think the waterline will be). So they drew marks 2" (5cm) below the antifouling line and Baw taped it and masked below that line. Now Mike from AME knows where to spray to.
The port hull is coming along nicely, with several layers of polyester filler where needed, and the phenolic waterline looking good. Chai, Lek, Jack and Yoong were the main workers on that area today.
Baw worked with Nut on getting the boat prepped for tomorrow's gelcoat. They added plastic masking above the starboard topsides, and will tape it to the toe‑rail tomorrow morning, first thing. We can't leave up a solid wall of plastic in the night, given the strong winds we've been having.
Ocelot has 8 small vents for the 4 heads, 2 engine water lines, and 2 diesel tanks. They all go through stainless steel fittings that poke through the hull, mostly down by the waterline. But Jon realized that Wauquiez probably didn't de‑core those holes properly and investigation proved him correct - the fittings were just silconed in place and the holes through the hull had naked foam. So Jon spent much of the day de‑coring those 8 holes, using a drill and an allen key to clean out the unwanted foam around each hole. Nut and Baw filled the area where Jon removed the foam with epoxy mud, but Nut added too much silica to his epoxy mud and it got too hot and boiled. We had to quickly dig it out of 3 of the holes, clean those holes up and start over again.
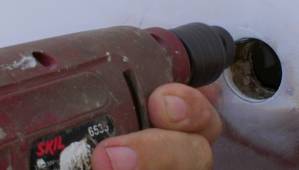 Pulverizing the foam with drill and allen key |
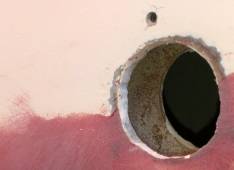 Foam removed between glass layers |
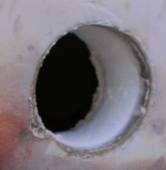 Foam replaced with epoxy |
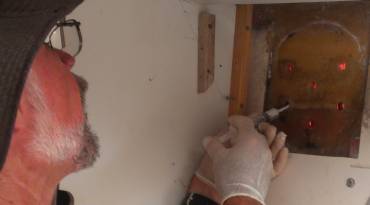 Filling de-cored chain-plate bolt-holes with a syringe & epoxy |
Jon also used a syringe to inject epoxy mud into the 6 cap‑shroud chain‑plate bolt holes on each side of Ocelot, filling the spaces he'd de‑cored yesterday in the process. The bolt‑holes will be drilled out again when it's time to put the chain‑plates back. We might even tap threads into the epoxy to hold the chain‑plates more securely.
Houa and K finished making a long stack of "new plywood" by gluing several ply layers together to create the thickness they need to replace some of our water damaged ply under the floors. K also worked with hammer and chisel in the starboard aft cabin to remove the last bit of rubbery bulkhead liner. It will get replaced with formica.
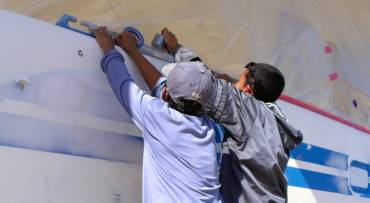 Nut and Baw fastening plastic masking to the toe-rail |
Mike Cherry from AME dropped by at 3:30 to see how we're doing and to finalize the plans for the next 3 days of spraying gelcoat. Tomorrow he plans to spray 3‑4 coats of our gelcoat on the starboard topsides. Then on Friday and Saturday he'll spray the port deck "gutters", leaving the centers clear for nonskid to be put down later. It's going to be exciting!
Thursday, February 14:
A great Valentine's Day!
It was a typical hectic morning before a gelcoat shoot. Baw and Nut joined Sue and Amanda to get the entire starboard side masked for AME's gelcoat spray. They also got plastic sheeting put over our sail‑drive, our keel, and a neighboring boat. The scaffolding was improved to provide Mike with a wider and more stable platform while he's walking back and forth spraying, and the area upwind of our starboard side was hosed down and kept wet to keep the wind‑blown dust down.
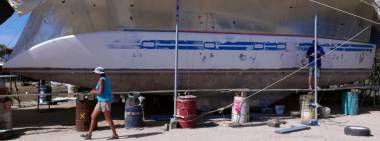 Just before Mike started spraying gelcoat |
Mike and the AME team arrived at 9 and 10am respectively, and set up their mixing and gelcoat work station under the boat. Mike marked off 1 meter lines on the masking plastic all down the hull. This allowed him to keep track of how far he'd sprayed before needing to back up for the next coat.
By 11am Mike was ready for his marathon spray. We found that we could still just see the 2 blue stripes that go down the hull when there were only 2 layers of gelcoat, but they disappeared when the third layer was sprayed on. Since the guys will be sanding some of the gelcoat off when they polish it, we decided to put a forth coat on as well. This ended up putting 26 kgs (57 lbs) of gelcoat on our 18.5 square meters (200 square feet) of topsides. Minimum would have been 1 kg/square meter, so we definitely got more, but not so much that it will crack.
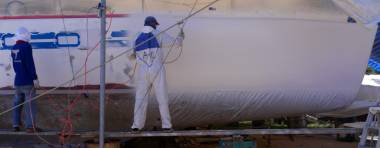 Middle of the shoot - goodbye stripes! |
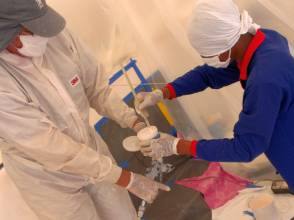
The pot on Mike's big spray‑gun holds about 750g or 1.6 lbs. It took him about 4‑5 minutes to shoot that much, and it took his support team another 1‑2 minutes to refill the gun, giving him about a 6 minute cycle time. When his gun was being reloaded we'd give Mike a drink of water or a bite of lunch or change his gloves or clean his glasses with acetone.
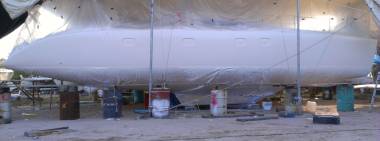 After Mike has sprayed the gelcoat on |
Amanda and Sue broke for an early lunch. They were pretty hot and tired from standing long hours in the sun. When they came back from lunch, Jon departed for the beach for his chicken and chips, but Mike kept on spraying.
Four of our team worked in the morning, long‑boarding our port topsides. But most left at midday, as they didn't want to work on the downwind side of Ocelot during the gelcoating. Baw stayed a few extra hours, then he and K took off. Only Houa stayed behind, working in his shop on bits of teak trim for the aft cabins.
Mike finished up just before 3pm, having shot on 26kg in just under 4 hours, and we all celebrated with a beer. Ocelot's starboard topsides look fantastic, so smooth and white and long and sleek. Tomorrow the guys will be able to start the long polishing process on the topsides.
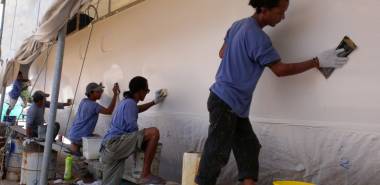 The team happily wet-sanding yesterday's topside spray |
Friday, February 15:
Wow! Another great day at the boat yard, and a very happy Team Hacking.
It was wonderful to arrive at the yard this morning and see that bright white starboard hull! The gelcoat was beautifully hard. We had a team of 6 donning cotton gloves and dipping sandpaper into buckets of soapy water to wet sand the hull. They started out with 400 grit, but said that the hull was "Too strong!" so they asked for 320 grit. By the end of the day we had about 2/3 of the hull smoothed down and lovely. Tomorrow, more 320 grit, then 400, 600, 800, 1000, ... as they move towards the polishing stage of the gelcoat. Even with Mike and the AME team spraying gelcoat up on the port deck, the guys could continue sanding all day, as they were not only upwind, but behind lots of polyethylene sheeting.
Sue and Amanda started the day with a flurry of activity as they checked and finger sanded the areas on the port foredeck to be gelcoated today. Then Amanda laid out the little bits of blue tape that Mike used as guide lines of where to spray the "gutters".
Baw and Nut spent an hour masking the foredeck. It's quite complicated, getting the plastic sheeting in the right places to let in air, but keep the overspray from wrecking other parts of the deck and hull. But they did a great job! AME brought thin plywood that was cut and taped to the deck where the nonskid will go to provide safe footing for Mike.
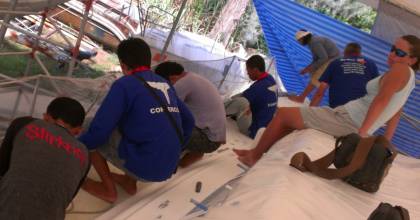 Lots of final masking to try to contain the inevitable over-spray |
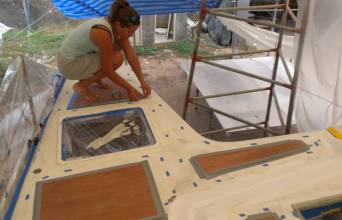 Taping down plywood foot-pads |
Mike and his team from AME bustled around for an hour or so getting the gelcoat mixing station set up, hanging the water trap and planning the actual steps of the spray. With all of Ocelot's curves, ribs, angles, hatches and different slopes it's not so simple to figure out what area to spray first, second, third, always keeping a wet edge. Just before the spray the entire area was thoroughly cleaned with MEK.
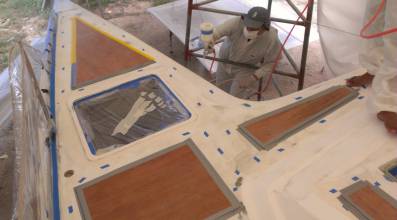 Start of the spray - done while hanging onto the scaffolding |
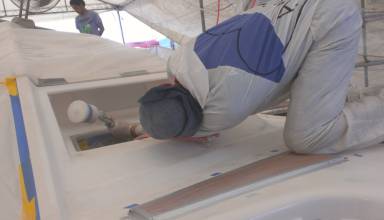 Very difficult to spray under the new "eyebrows" |
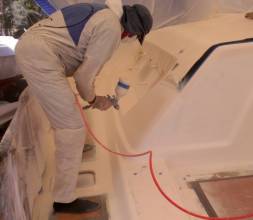
Mike began the spray on the inner edge of the port bow (via scaffolding) then climbed up to the deck and sprayed the actual bow, then the tricky area under the "eyebrow" (the new step above the salon port‑lights). Shooting into a blind hole is always a mess with a spray gun, as the gelcoat (or paint) wants to bounce back and bubble up. Mike adjusted the air pressure and the spray pattern on the HVLP (High Volume, Low Pressure) gun he was using and we're pretty happy with the results. Mike finished his short, half‑day spray at 2pm, having covered the port deck as far back as the first of the small hatches on deck. Just after Mike finished, Baw got a tiny cup of the gelcoat and used a small stick to drip dots into the pin‑holes that had formed, saving us a step later in the process.
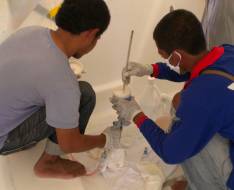 Support team mixing another pot |
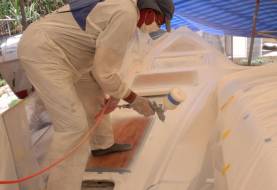 Mike worked his way from the bow aft |
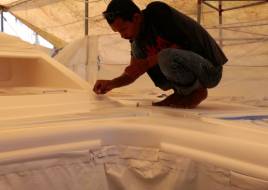 Baw fixing tiny pin-holes after the spray |
Houa and K had a pretty normal day as they can access the boat from the emergency hatches under the bridge deck, meaning they don't have to go up on deck near the spraying or all the masking. They got the thick homemade plywood strips for the floor supports made for the starboard aft cabin, and K glued some down.
The day ended with Baw and K setting up for tomorrow's spray. They created a masterful set of plastic sheets strung this way and that to protect everything but the remaining port deck from overspray. If all goes well tomorrow we may have the entire port deck gutter sprayed, ready for nonskid.
Saturday, February 16:
Awesome end to the week! We are looking very gelcoated!
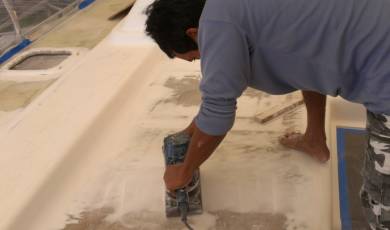 Nut sanding smooth some filler added at the last minute |
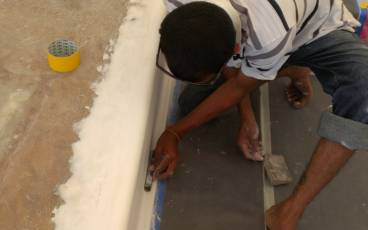 Baw making sure that cockpit curves have a constant radius |
The day began with another flurry of preparation work. Baw and Nut set about sanding down the last‑minute filler they had put on the port cockpit seat last night. It was through no fault of their own that we had this last minute job. When talking about where to mark the "gutters" for the cockpit seat, we realized, yesterday, that the space is too big for one sheet of nonskid. We had not come to a decision as to whether to just lay down as big a piece as possible and let the aft end be shiny/slippery gelcoat (the part under the targa bar where we can't walk anyway), or to divide the area into 2 pieces, with a gutter between the pieces. Since we weren't decided, we asked Baw to prep both the aft end of the seat and another gutter area around 2/3 of the way forward. So, the filler went on yesterday, and the sanding happened this morning. Lots of vacuuming and wiping to clean up the mess in time for the gelcoating.
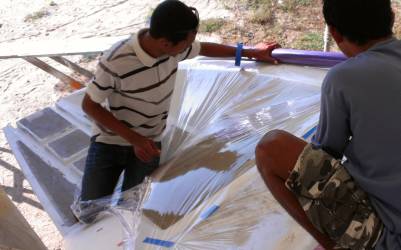 Baw and Nut masking off the port sugar-scoop with cling-wrap vinyl |
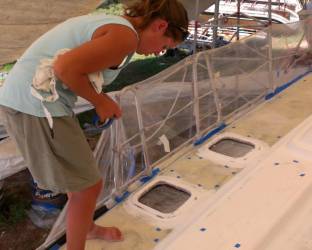 Amanda marking edges of antiskid with blue-tape |
Mike and the AME team arrived in 2 vehicles about 9:30 and got busy with the whole gelcoat set up. They cut more pieces of thin plywood and laid them down as stepping places for Mike and his sticky gelcoat‑covered feet. Amanda laid out the gutter parameters with blue tape, and the whole area was wiped down with MEK.
 Start of Saturday's spray |
 Refilling the gun with more gelcoat |
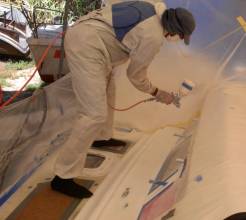
 Mike sprayed from front to back of Ocelot |
Mike only needed to spray for about 2 hours, getting all the way from the second deck hatch back to the targa bar, and over some of the vertical wall by the galley window, plus the gutters for the cockpit seat. It went much faster than he thought, which was encouraging. We now have a better idea of just how many more days will be needed to finish this phase of the gelcoating.
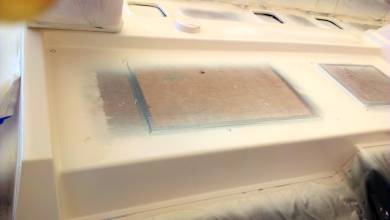 The port side of the cockpit looks pretty good |
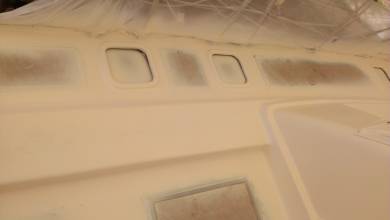 Port side-deck - nonskid will go where plywood is now |
While Mike and his team sprayed, our team of 6 were busy wet sanding on the starboard hull. About 3pm we pulled most of them off that job and sent them over to the port hull. Our goal is to get the port topsides and the starboard deck ready for gelcoating next Thursday, Friday, and Saturday. The guys really like making stuff beautiful, and moving over to work on the port topsides meant leaving the "fun" of wet sanding/polishing the new gelcoat.
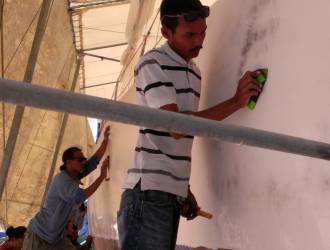 The guys wet-sanded starboard during the spray |
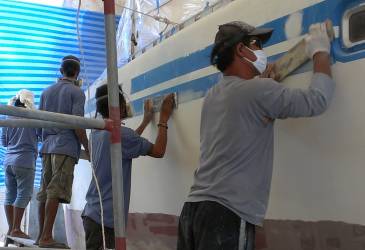 Then they began preparing port topsides for a gelcoat spray |
Houa and K were seen popping in and out of the emergency hatches, and the acrid smell of glues rose from the starboard aft cabin, attesting to more formica and floor board laying.
Thai Refit:
Ocelot Pages:
Top Level: Home | Destinations | Cruising Info | Underwater | Boat Guests | Ocelot | Sue | Jon | Amanda | Chris | Site Map | Make a Comment
|
If our information is useful, you can help by making a donation |
Copyright © 2000‑ Contact: Jon and Sue Hacking -- HackingFamily.com, svOcelot.com. All rights reserved.