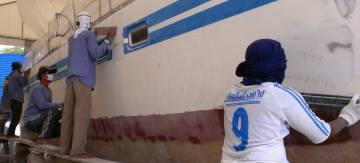
Long-boarding the port topsides - hard work, but in the shade
68 Rudder Bearings
 Long-boarding the port topsides - hard work, but in the shade |
Summary: Most of the effort this week went into filling and long‑boarding the port topsides, getting them ready to be sprayed with gelcoat. Sue, Baw and Nut put in a lot of time preparing the starboard side‑deck for gelcoat, filling areas that need it and sanding out little pin‑holes. Sue and Amanda also put in a lot of time on the mast, and fetching supplies for the men. The vertical walls near the entryway and behind the aft cockpit seat were sealed with epoxy (to prevent some blue paint from showing through) and then sanded rough to prepare them for gelcoat. Jon repaired the charger for our battery‑drill and used a friend's sharpener to sharpen several of our drill bits. Houa worked long hours alone, repairing much of the work that K had done badly (K won't be back). Jon used string and a pair of tapered plugs to find the exact axis of our rudder shafts, and super‑glued strings to the hull as guides for drilling out our old rudder bearings. The yard provided a big drill and with Sue and Amanda acting as spotters, telling Jon which way to point the drill, he drilled out both of our old rudder bearings and enough of our rudder‑tubes to accept our new rudder bearings. This job was much tougher than expected, taking the best part of 4 days. The port inside waterline was sanded and filled with phenolic‑epoxy, and most of the guys started working on the bows, between the hulls, filling and fairing. Jon and Amanda shot in the port gelcoat line with the laser, but Baw felt that port topsides needed more work. It turned out that Mike was too ill to spray gelcoat so that was put off until next week.
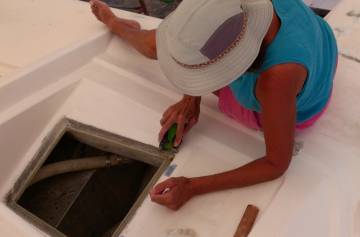 Sue sanding out defects in the starboard filler |
Monday, February 18:
A good start to the week, although we were down 2 workers and, well, Monday Morning is always Monday
Morning, even in Thailand.
Amanda ran the always needed morning errands, buying more 80 grit sandpaper for the guys, and then picking up Jon and getting more superglue for Houa and his carpentry. Then she grabbed the big polishing disk on the grinder and attacked the bottom few feet of the mast. She would have worked farther along, joining up with last week's polishing efforts, but there was too much dust in the air at that end of the mast.
Sue took water, rags, sanding block and a couple different sandpaper grits up to the starboard bow, and began the process of cleaning and checking the deck to see if it's ready for gelcoat. She found many little pinholes in the Thai white gelcoat that Baw had put on weeks ago, so she sanded those out, being careful to keep the areas shaped the same.
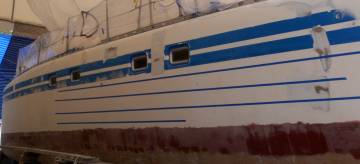 Tape stripes show where the dips and bumps are |
We had 6 guys long‑boarding the port topsides all morning. Baw was out for the day, taking his child to school and getting school fees paid, apparently. But the other guys, Chai, Lek, Nut, Yoong, Jack and Pla kept up the work. Unfortunately, there was a lot of sanding to be done, and they didn't get new filler put on the topsides before lunch. This meant that after lunch they spent an hour mixing and paddling on polyester filler. Then they had to let an hour go by before they could sand those areas. Not a very efficient use of time.
Jon had two electrical projects today. Last week the battery charger for our Ryobi drill died. We suspect that someone plugged it into a 220v outlet, as many of the Thais don't understand that our tools only run on 110v. Thailand has no standardization in its plugs, so many of theirs look like our US plugs. Jon opened up the charger and found that the surge‑suppressor had blown, and taken the fuse with it. No chance of finding another 110v surge‑suppressor, so he cut it out and replaced the internal fuse with some fuse‑wire to get the Ryobi charger working again. This was a huge relief to Houa, who uses that drill as often as if it were his.
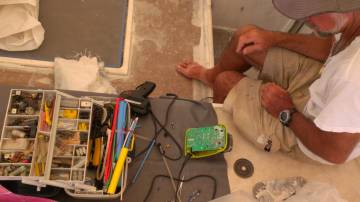 Jon testing the Ryobi battery charger after repairing it |
Then in the afternoon Jon made good use of a drill sharpener that was loaned to us. It's a really cool tool that uses a diamond grinding wheel to put exactly the right shape back onto a drill tip. It only takes about a minute per drill. He spent a few hours sharpening some of our drills (at least 2 sets are still deep in storage) and sharpened a few of Houa's drills as well.
Jon also put 2 tapered "centering" blocks in the top and bottom bearings of our port rudder. Then he ran a string through the exact middle of the 2 blocks and tied it to an old wheel on the ground. This string defines the center axis of our port rudder, the line that we'll have to follow when we drill out the old lower rudder bearing so we can fit the new bigger one. Now we have to find a way to attach markers to the hull with pointers parallel to the string, so we can use spotters to make sure the drill is aimed correctly. Jon showed Houa what he'd done and what he wants, so Houa is also thinking of a solution.
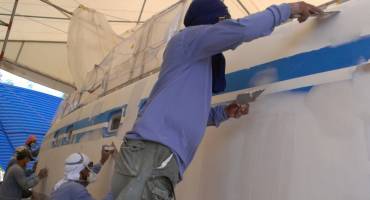 Yoong applying filler while others long-board port topsides |
Houa worked alone all day, as K was not here. He sanded, routered, shaped, and repaired several teak trim bits that frame the bulkheads in the starboard aft cabin. He was still working when the other guys left at 5pm. When Jon asked why, he replied, "Oh, I come late today - no promplem!" We love that kind of enthusiasm.
Tuesday, February 19:
Yikers, what a day. So much going on.
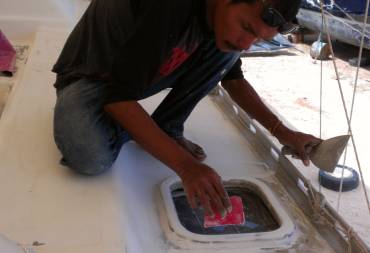 Baw making sure the starboard deck is ready for gelcoat |
We had Baw back today, so Sue asked him to work on the starboard deck to fix all the little pinholes and defects before gelcoat gets sprayed later this week. Sue continued to clean and sand the deck, all the way to the top of the sugar‑scoop, which made it lots easier for Baw (and her) to see the pinholes. Strangely, it seems that Baw would have been happy to let the new gelcoat cover the pinholes, and then fix them up afterwards. Doesn't make sense to us. If there's an indent and it's not properly sanded and cleaned, then sprayed, the new gelcoat won't stick. So we were happy to see Baw getting right in there with a small drill bit (to rough up the pinhole edges), sand paper, acetone and polyester filler. He spent the afternoon sanding the areas he had filled in the morning.
One unfortunate event with gelcoat is that Amanda found an area on port deck where the new gelcoat lifted off really easily. We pointed it out to Baw and he scraped it back. It will need more prep work and a bit of re‑spraying. The uncomfortable bit for us is that there may be other places where it's only lightly attached, and we might not find them right away.
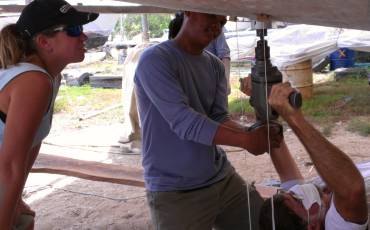 Lining up the drill with strings to remove the lower rudder bearing |
We had our Team of Six out on the port topsides again all day. Today they did get polyester filler put on before lunch, and again after lunch. Lots of sanding and filling and dust‑making all day. Nut and Jack worked on shaping the bow.
Houa was working alone again today. Not sure what happened to K. Sometimes these men just feel like they've made enough money for awhile, so they don't come to work. Anyway, Houa shaped and fitted the curved teak trim bits. We feel like a broken record saying Houa worked on teak trim bits, again, but there are in fact many teak trim bits. Things go a lot slower with only 1 carpenter.
Amanda got re‑acquainted with the mast mid‑section and it's coming along nicely. Then Jon commandeered her for his rudder bearing project.
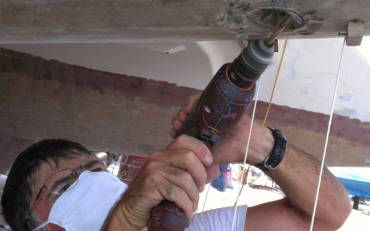 Tearing the rudder bearing holder apart with many holes |
To replace the lower rudder bearings, we first have to remove the old bearings, along with their aluminum bearing holders. We bought a big hole‑saw for that, but we want to make sure that we drill exactly along the axis of the rudder‑shafts. So we made a pair of tapered wooden plugs and centered them on the old bearings. We ran a string from the center of the top plug through the hole in the bottom plug and tied it to an old wheel on the ground. Then we positioned the wheel so the string was centered in the hole of the lower plug. The string was now exactly lined up with the rudder‑shaft.
But we couldn't drill with that string in place. So we cut 2 more strings, tied them to the wheel as well, and tied their other ends to wooden blocks. We positioned the blocks on the hull so that their strings were exactly parallel with our center string. Then we fastened the blocks to the hull with super‑glue. These parallel strings became our guides for drilling out the old bearing.
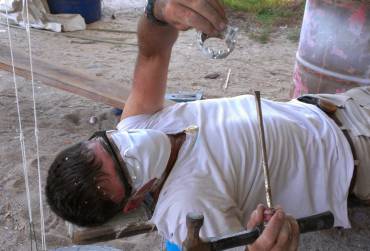 Jon finally removed the top half of the rudder bearing holder |
Jon built himself a platform to lie on under the rudder bearing, but high enough that he could control the big drill. We removed the center string, placed the center of our big hole‑saw in the lower plug, and made sure the drill was exactly parallel to both strings before we started drilling. Sue and Amanda made sure the drill was parallel to their strings, and Houa helped Jon push the drill up. Unfortunately, our hole‑saw wasn't deep enough to remove the entire old bearing holder, so we had to drill as deep as we could and then cut the old bearing holder into pieces. The jig‑saws couldn't do it so we had to drill many closely spaced holes and then chisel out small pieces - a messy and time consuming job.
When we finally got the old bearing holder out, we found that there's an aluminum tube above it that goes to the upper rudder‑bearing. We have to cut that tube at 4" (10cm) up so we can fit our new bearings in. That will be a difficult job when we're reaching up inside a 2" (5cm) wide hole. Hmmm... Maybe we'll make a trip up to Bangkok Hardware in the morning to see if they have a tool that can do that. Maybe a cutter for our Dremmel...
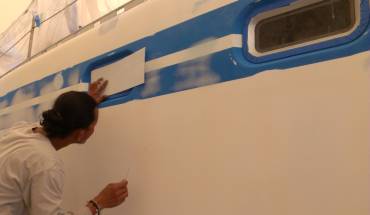 Jack masking our portside port-lights with "future-board" |
Wednesday, February 20:
Midweek, and it feels like we're in fast forward. We were originally pushing the guys to finish up
in time for Mike to spray tomorrow, but it turns out that Mike is a bit under the weather and would prefer
to spray on Saturday, then again on Monday. So we have a bit of time in hand, which is a nice feeling.
Our Team of Six put a lot of effort into port topsides today. They finished up their sanding and fairing with 120 grit sandpaper. Then some of them worked on last minute smoothing of the phenolic at the waterline. Others worked on pulling the old blue tape from the toe‑rail in preparation for new masking. Lek and Yoong got new white future board put into the port lights and masked in place. Tomorrow Jon and Amanda will be marking off the gelcoat line, getting it ready for the big spray on Friday.
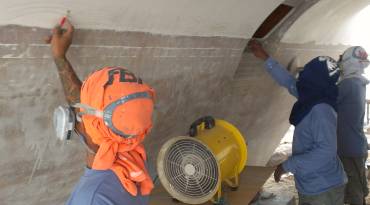 Several men moved to start preparing the bridge-deck area |
Baw and Nut put in a hard day's work on the starboard deck. They both hand‑sanded and machine sanded the starboard cockpit big seat area which has been used for months as a sort of work table, and really needed cleaning up. They sanded all the deck edges where we'll be spraying gelcoat in a couple days, and Nut worked on smoothing out the inner edges near the targa bar.
Baw attacked the vertical walls near the companionway that had been filled and shaped, but on which someone had left blue spray paint between filler layers. We don't want that paint to come showing through the gelcoat in a few years, so we asked him to seal those areas with epoxy. After a good cleaning and sanding, Baw rolled epoxy resin onto both sides of the companionway, and the back of the aft cockpit aft seat that had the same blue. The next step, when the epoxy is cured, is to wash the amines away and sand the surface until it's dull and rough so that it will take gelcoat.
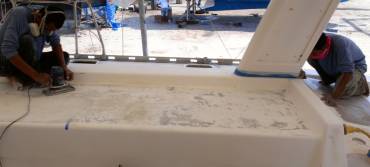 Baw and Nut preparing the starboard deck for gelcoat |
Amanda put in more than 3 hours on the mast again. What a long project! But so satisfying!
Houa is still without a co‑worker, so he is moving slowly along on the cabin trim. We also pulled him from his job several times a day to help Jon with the rudder bearing project.
Jon's first task was a scooter ride to Bangkok Hardware, in Phuket Town to look for small cutting disks that he can use to cut back the aluminum casing up in the rudder bearing shaft. He bought several small but expensive cutting disks for our (imitation) Dremel, but it really doesn't have the power to cut through the aluminum pipe that Wauquiez put in the rudder‑shaft housing. So Jon went out again and bought several normal 4" (10cm) cutting disks. These had to be cut down to 2" (5cm) so they'd fit up inside the aluminum pipe. Jon also made a mandrel that would fit into a standard drill to hold the cutting disks.
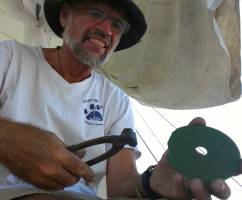 Start with nips & a 4" (10cm) cutting disk |
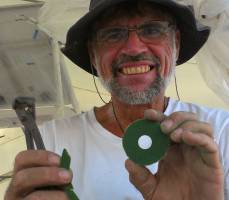 Trim the disk down so it fits in the pipe |
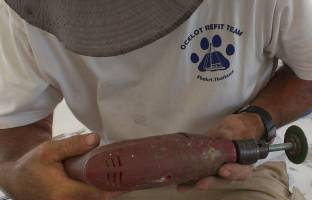 Fit the disk onto a custom, homemade drill mandrel |
The bigger cutting disks work OK, but they don't last very long. Jon went through 2 of them making a single cut around the inside of the pipe, and he still has at least 3 more cuts to go. Luckily the big disks are only $1 each (and some time to trim them down).
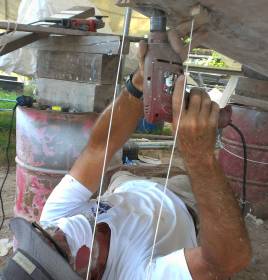 Cut the pipe from the inside with drill & disk |
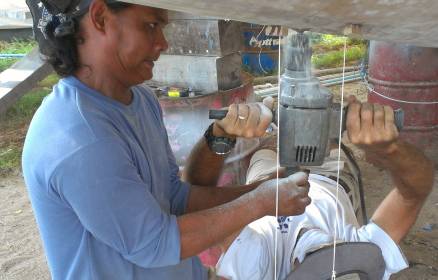 With the pipe shortened, Houa and Jon drill 1.5" deeper with the hole saw |
Once the pipe was cut and the bits pulled out, we made another attempt with the big hole‑saw. The hole‑saw only cuts 1.5" (4cm) deep at a time, and then we have to dig out the stuff inside (bits of fiberglass as well as the aluminum pipe) so it's slow going. The new bearing is 3½" (9cm) long so that's how far we have to dig. With a bit of luck we'll finish digging out port side tomorrow...
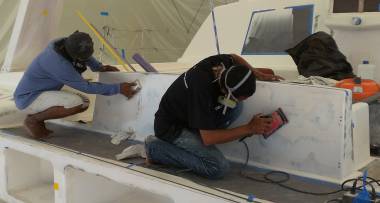 Yoong & Baw sanding the epoxy sealer on the aft cockpit seat |
Thursday, February 21:
Moving on like a freight train, with only minor detours...
The morning started with lots of activity by all the guys wiping and cleaning the port hull and the starboard deck, readying them to be sprayed with gelcoat. They got some of the plastic polyethylene sheeting up, and most of the areas surrounded in blue tape (which is hellishly expensive but peels off without leaving a residue). Amanda and Jon started off the day by shooting the paint line with our laser level.
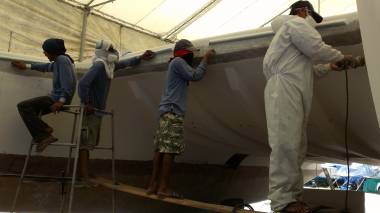 Jack, Lek, Nut and Pla sanding the front of the inner hulls |
Then we talked to Mike at AME to learn that he would prefer to spray the next gelcoat jobs on Monday and Tuesday, as he is still not feeling well. He could do the starboard deck this week, but it involves carefully balancing and moving about on the deck with all the "open" (plastic‑covered) hatches underfoot, and he fell down one last time and is still limping. Though we were sorry to hear he was under the weather, this respite actually gives us a few more days to really move ahead on projects, so all is not lost.
So we moved the guys from masking to preparing the inner hulls. Pla donned the white "bunny‑suit" (for fiberglass protection) and set to work removing the last of the UV damaged epoxy filler from the inner bows and up by the PVC trampoline line holders. Lek, Yoong, and Jack spent lots of time carefully finger‑sanding the areas around the port emergency hatch and on the sugar‑scoops where the fiberglass strands stood out. By finger‑sanding they get rid of the shiny epoxy between strands, thus allowing either epoxy or filler to stick better.
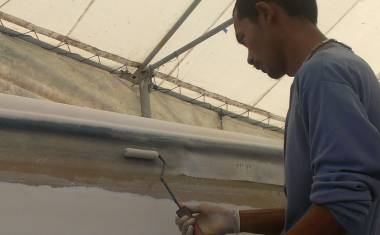 Baw adding more glass to our PVC trampoline holders |
Baw took the initiative to ask whether we wanted another layer of fiberglass to support the tramp holders. He figured that all the sanding and grinding might have gone through one of the 2 layers of glass holding them on. This is certainly the time to reinforce them, before the final gelcoat spray, so we let him go for it.
Baw and Nut worked on the deck, sanding the areas they covered in epoxy resin yesterday. Yoong was up there with them working on the companionway area as well.
Early in the day Baw had checked the fairness of the port hull, and found an area that was "hollow". This alone would have put off the gelcoat spray for a day. Before lunch he got the area cleaned and filled with polyester filler, and by mid‑afternoon had done a first sand, and re‑check. The hollow extended to the waterline, so he had to put on some epoxy phenolic filler as well. With the gelcoat spray happening on Monday, there's plenty of time to get it right. We'll be happy to have a nice, smooth, fair and happy hull!
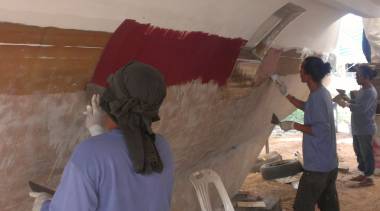 Yoong, Jack & Chai applying phenolic filler to the inner waterline |
Sue did some aluminum meditation on the mast again. She doesn't have as much fun as Amanda, who is able to listen to music on her phone (via earplugs) but it's a satisfying job.
Houa gave Sue a tour of the starboard cabins, showing off his new teak trim in place, and the new floor supports. The fact that his assistant K has not come back is not all bad. It was K's impatience (and inexperience or sloppiness?) that resulted in the floor supports being uneven. Houa explained that he had to re‑do several days of K's work, and he was apologetic, knowing it costs us money. But we will not be seeing K back on the team.
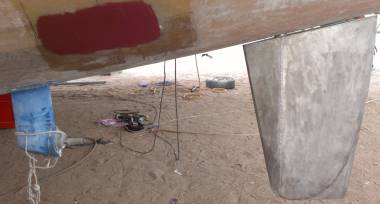 Ocelot's port rudder, back where it's supposed to be! |
Around 2pm the inside of port hull had been prepared enough for the guys to start rolling on epoxy resin at the waterline, which they followed with phenolic filler to fill in where the old boot‑stripe was ground off. They had to dance around Jon and his rudder work a bit, but by the end of the day we had a nice band of new red phenolic all down port waterline. They'll probably have to touch it up after sanding, but the entire waterline is now almost finished!
Jon's big event of the day revolved around the rudder bearings...again. With great progress made! With much cutting and drilling and lying on his back while bits of fiberglass fell on his face, he finally got a cleared hole for the new rudder bearing! Then he dug a deep hole in the ground, put the rudder in it, tied a rope to the top of the rudder‑shaft, and a couple of guys hoisted the rudder up into place! This is just a test‑run, to make sure everything fits. Jon sanded down the top of the upper rudder bearing (in the engine room) so the rudder hangs a bit lower and has some clearance from the hull but everything else looks good.
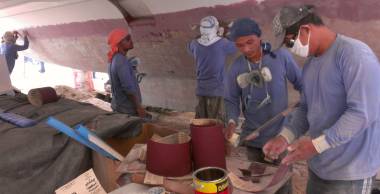 Sticking sandpaper to long-boards so they can fair the hulls |
In the final hour of the day, since there wasn't time to epoxy the port bearing into place, Jon and Amanda setup to do the starboard bearing, tying a string down the rudder‑tube and positioning it so it's in the exact center of the tube, on the exact axis of rotation of the starboard rudder. Now that we know what to do, we're hoping that starboard goes a bit faster than port...
Friday, February 22:
Another good day, with things moving along nicely.
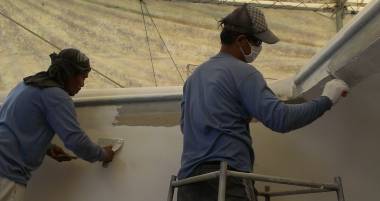 Yoong and Pla putting filler over yesterday's fiberglass |
Sue and Amanda started the day by running errands on Scooter. Mandy was sent off to buy more sandpaper, 60 and 80 grit. We hope we're seeing the end to that rough stuff as the major hull work is just about done, at least at the waterline and topsides. Then Sue and Amanda took off for TMT, the headliner/canvas folks, to pick up the very last headliner piece. They had a "very Thai" scooter experience returning with Mandy driving, and Sue behind holding a 5' (1.5m) roll of vinyl like a jousting pole on the left, and a 2' (.6m) long piece of vinyl‑covered plywood vertically in the right hand. Thanks to Amanda's careful driving, they made it back safely.
Our Team of Six worked on the inner topsides of port hull, sanding the phenolic at the waterline, then getting another (final) layer on and sanded by the end of the day. Yoong, Pla, Nut and Chai put filler up on the port inner bow, and around under the newly sanded fiberglass under the trampoline line. They were busy sanding that, too, by the end of the day.
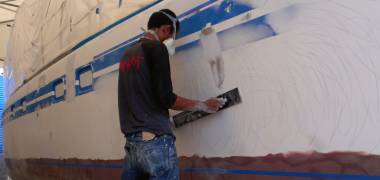 Baw doing final fairing of the port topsides by himself |
Baw, who had not been involved in the "finalizing" of port topsides, was over there alone, putting bits of filler here and there to give us a "very sure" topside. It seems his quality bar is a bit higher than the other workers. We love that he's so personally interested in making Ocelot as perfect as he can. But when we asked if port topsides would be ready to spray with gelcoat on Monday, he said no, there were too many ripples in the hull to fill and sand.
But we're not sure why he doesn't have more workers working with him. It might be an age thing. The Thais believe that the oldest person should be the leader, and Baw, at 24, is one of the younger workers. But we want Baw to direct what gets done, as he's the most committed to doing a good job. It may need more executive orders (which we try not to give too often). We Shall See...
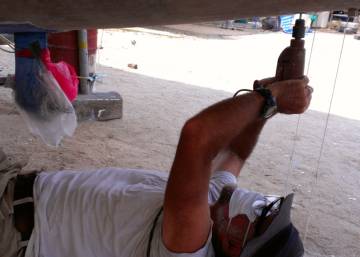 Jon drilled 40+ holes through the starboard rudder bearing |
We were hoping that Mike could spray gelcoat on Monday, but Monday is a national holiday. Our workers get no holiday pay, so they usually prefer to work on holidays, but we're not sure how many will show up. Also, it's due to rain from Sunday through Wednesday. Our agreement with Mike and AME is that they'll be on short notice in terms of rain, and how many workers appear on Monday morning.
Houa got all the headliner supports (brackets) put up in the starboard cabins, which is so nice to see. There is something reassuring about seeing the boat being put back together, instead of being pulled apart!
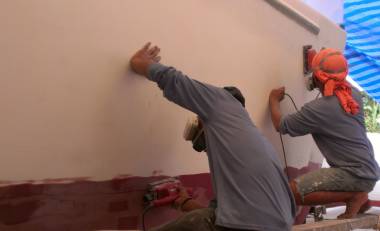 Jack and Chai sanding the port inner bow |
Sue got some good aluminizing done on the mast while Mandy helped Jon with more rudder bearing work. Although they had lots of discussions about how to proceed with the epoxying in of the new rudder bearing on port, the main work happened on starboard, trying to get the old rudder bearing out. After setting up parallel strings so we could align the big hole‑saw, the first cut was made into the old bearing holder. As on port, the hole‑saw doesn't cut deeply enough to get the whole bearing holder out, so Jon spent the rest of the day with various drills, cutting holes through the old bearing holder and trying to get it to fall apart. By the end of the day he was covered in sharp bits of aluminum and his arms were like rubber. Something to look forward to tomorrow...
Saturday, February 23:
End of another busy week...
Amanda took the morning off and took her computer to an air conditioned coffee shop to work on possible graphics for Ocelot's new white sides. We're playing with an Ocelot theme of gold and black, like the letters we have for the name, but the gold stripes are a bit glaring. Lots of time to play...
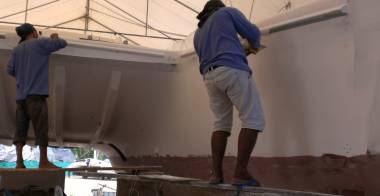 Jack and Yoong working on the inner bows |
Sue attacked the mast, once again. It feels endless, but then you just look down the long aluminum structure, and can see the progress. It will be great to start the wet sanding, someday, though.
Our Team of Six headed right for the port inner hull, where they began sanding the phenolic at the waterline. Chai, Jack and later Yoong all worked on the small vertical surface that faces forward under the trampoline lines. Lek spent a lot of time carefully finger‑sanding the phenolic around the emergency hatch, which is good, because we don't want the anti‑fouling to come off at the waterline, anywhere!
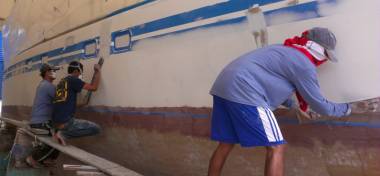 Pla, Baw, and Nut long-boarding the port topsides |
Strangely, Baw started the day all alone over on the port topsides. When we asked what was happening, he said we might be able to gelcoat on Tuesday or Wednesday. What?!? We thought it was ready. So he held up 3 fingers and said "Three men." He was obviously not comfortable asking them himself. So much for his being the team leader. Sue went to the guys working inside the hull and asked Nut and Pla to please join Baw. They went, no problem. Later when we asked Cris to help us figure out what was happening, we learned that there was a major miscommunication earlier. The Team all thought we said the topsides were ready, so they stopped sanding and cleaned up. We asked Cris to convey the fact that we were asking "when" they would be ready. And that we might make suggestions as to when we'd like things done, but they, not us, are the experts on the smoothness of the hull, and we defer to them. By afternoon Baw told us that it would be ready to gelcoat on Monday. But Monday is a Thai holiday, and Mike can't come, even though our team will probably all be working. So Tuesday it is.
Houa got the damaged wood out of starboard aft cabin over the bunk and began installing a newly made plywood strip. Jon asked him to please removed the vertical struts that hold the headliner at the foot of the bunk. These are currently about 3" wide, so making new ones flush with the bulkhead with add that much to the length of the bunk. A much needed improvement, as the 2 aft cabin bunks have always been short for us.
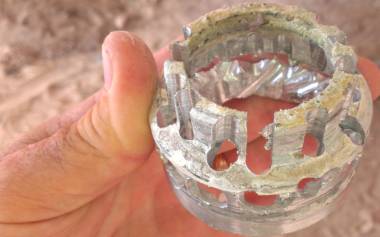 Stbd rudder bearing holder after Jon turned it into Swiss cheese |
Jon spent more time staring up into the rudder bearing tube with hole‑saw, drill and chisel. The old aluminum bearing came out as more or less one piece after Jon drilled over 60 holes in it, so the whole process went much faster than on port. By mid‑afternoon he had cleaned out the rudder bearing tube enough to place the starboard rudder and its new bearing into place! Yay! Of course, the tricky part of attaching the new bearing in place is still to come. Maybe it's a good thing tomorrow is Sunday, and Jon's brain can work on the issues for a day!
The trick is to make the bearing replaceable (able to come out) but not have it able to spin (we want to rudder shaft to turn inside the bearing, and not have the bearing itself move). We think we have a plan: The bearings are 3.5" (9cm) high with a 2¾" (70mm) outer diameter and 3/8" (10mm) thick walls. If we shaved, say, 1/8" (3mm) off one side and epoxy the bearing in, the shaved side should prevent the bearing from rotating yet still allow it to come out the bottom. We can put the shaved side towards the front, which doesn't get much rudder loads so shouldn't mind being thinner. And before epoxying the bearing in, we can coat it in thin packing tape, which is polyethylene so the epoxy doesn't stick to it. This should allow the bearing to slide out if (when) we need to replace it. Still mulling this one over...
Thai Refit:
Ocelot Pages:
Top Level: Home | Destinations | Cruising Info | Underwater | Boat Guests | Ocelot | Sue | Jon | Amanda | Chris | Site Map | Make a Comment
|
If our information is useful, you can help by making a donation |
Copyright © 2000‑ Contact: Jon and Sue Hacking -- HackingFamily.com, svOcelot.com. All rights reserved.