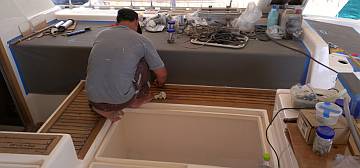
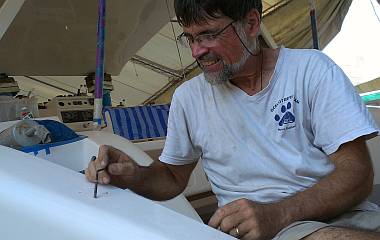
Pla worked in the cockpit, detailing the hatch rim gelcoat
111 Tomcat Painted
Summary: Good progress this week on several fronts - the teak cockpit floor was sanded and repaired, the bilges got cleaned and painted in gelcoat, the deck hatches were stuck down, and Tomcat, our big dinghy, got lots of pampering. Team accomplishments this week include:
|
 Pla worked in the cockpit, detailing the hatch rim gelcoat |
Monday, December 16:
Weather forecast was for rain all day but we got barely a drizzle, then lots of sun. Unsettled
weather but we'll take all the sun we can.
And a little unsettling at the yard as Baw was absent all day. We heard later that his daughter was sick. Luckily the men knew what jobs they had to work on, and Houa is taking more initiative to ask men to do things for him, so that's good.
Pla pretty much camped in the cockpit all day with all the big cockpit hatches pulled up. He detailed the gelcoat rims of each of the hatches and each teak section. Once this is done and taped over Houa can do a final teak sanding in situ.
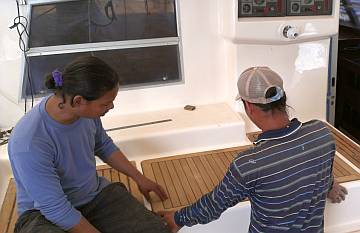 Houa and Heru confer over the cockpit battery hatch wobble |
Heru got the fun job of trying to flatten the underside of the big battery hatch. All 4 of the big cockpit hatches got reinforced months ago, with a good layer of foam and 2 skins of biaxial glass on the underside, but this has made some of them either too thick or slightly warped so they don't sit straight. Heru did well, sanding or grinding a bit under Ocelot and then schlepping it back up to the cockpit to check the fit. In the end he got the hatch to sit flat enough. It actually isn't stepped on that often, as the helm seat is usually over it.
Heru then moved to the salon where he fitted the last pieces of teak and holly flooring. Some small pieces on the port side near the table tended to tip up (more than just wobble) and he suggested putting small blocks of teak under the floor as extra supports. A good idea, and it worked well. He identified a second culprit in the late afternoon so he has more work for tomorrow.
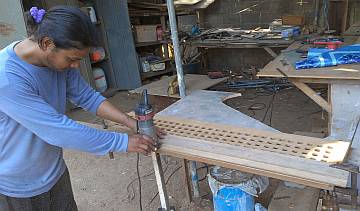 Houa trimmed down the edge of the interior entryway grate |
Houa found that the floor inside the entryway was about 5mm (<1/4") too long, probably because the door support was rebuilt a bit bigger. We decided to trim the edge of the teak grating just inside the entryway as trimming the edge of the teak and holly floorboards would mean resealing them with epoxy. A quick and easy fix, and we now have almost all of the salon floors down.
Lek helped Jon with the hatches, taping the edges so the excess silicone is easy to pull off, and sanding the gelcoat under the hatches so the silicone would have something to grab onto. After preparing the 2 big fo'c's'le hatches and the 3 overhead salon hatches, he moved on to the 2 salon port‑lights. These were found to no longer fit into their holes, so Lek first sanded and then used a grinder to open up the holes enough for the port‑lights to fit. He still has more work here, despite the mess it makes in the salon.
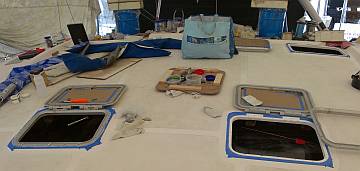 The 3 overhead salon hatches, with the left one mounted |
Between directing the workers, Jon spent all day preparing the hatches, and even managed to mount a couple. He drilled and tapped the 6 errant holes that had to be filled on Saturday, then he and Sue bolted down the big new hatch over the starboard forward cabin, thus finishing the overhead hatches for the cabins. After buying 100 new stainless steel screws for the 2 fo'c's'le and 3 salon hatches, he drilled all the mounting holes for them, but only got around to mounting one of the salon hatches before the day ran out. Once we get these 5 hatches mounted, they all need to have new gaskets glued in.
Yando and Chambron worked on the outboard all day, sanding back the old paint all the way from the motor to the propeller. It was fiddly, finger-sanding work, but it's looking good. Without Baw (the paint expert) there to tell them when to stop or how much paint to take off, they just kept working on it, asking Jon if they could take bits off now and then.
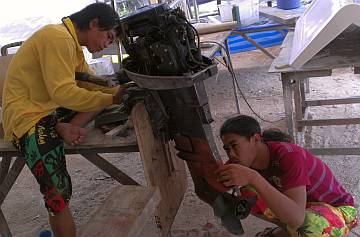 Yando and Chambron got the outboard completely sanded |
Sue ran 6 scooter errands before lunch for sandpaper, silica for the dinghy floor paint, etc etc. In the afternoon she took off with a salon cushion strapped to the scooter seat. The goal was to contact the 2 upholstery shops nearby and see who had what foam, and at what price. Unfortunately, the very Thai local one near the chandlery had no one who could speak English. At least with Sue's rudimentary Thai numbers she got a quote for sheets of closed cell foam in 1" and 2" thicknesses, and learned the size of the full sheets. We may put closed cell foam under (or over?) a layer of softer foam for the salon cushions to firm them up. The second shop also had no English speakers but a worker called the boss and we arranged to meet at the yard tomorrow. Here's hoping we get somewhere on this project soon.
Tuesday, December 17:
We had the whole team at the yard today, so lots of things got done.
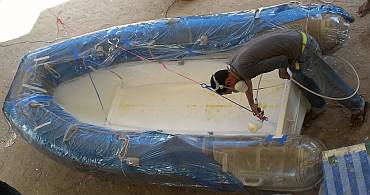 Baw spraying enamel around the floor of Tomcat |
Houa got a whole list of things worked on. He checked the level and then laid the floor supports in the port passageway (near his under‑fridge repair). He sanded back the new sticky drawer in the galley so it slides in and out more easily. He built small supports for under a part of the salon teak floor. He got the teak on the 3 big cockpit hatches all beautifully sanded, ready to be checked for levelness. Finally, he began working on the template for the polycarbonate that will fill our emergency hatches. And the wonderful part is that we didn't have to tell him any of the above - he knows what needs doing and does it!
Yando and Chambron were the bilge guys today. They masked, sanded and acetone cleaned bilges throughout the boat. Once an area was complete, Heru moved in with a newly mixed batch of Thai (tinted) gelcoat and brushed it on. We now have shiny white locker/bilges on starboard forward and aft under the bunk steps, up in the bunk itself, and in the starboard forward head. Chambron dove into the deep, deep bilges under the forward bunks (where there are lots of bilge pumps and water pressure tanks) to begin the masking and sanding.
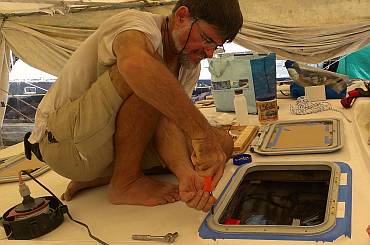 Jon spent much of the day mounting the 4 remaining hatches |
Pla did more cockpit gelcoat detailing, then he hand sanded the port louvers with 1500 and 2000 grit sandpaper. We think these louvers had already been polished, but they sat so long out on the scaffolding that they got gritty. We hated having him wet sand again as it reduces the amount of gelcoat left, but we didn't want gritty louvers. He and Ben then polished the louvers with the machine polisher.
Jon was the hatch guy today. He mounted (what a simple word to denote hours of sanding, masking, drilling, tapping, applying Tef‑Gel and silicone, and finally screwing and/or bolting) the final 4 of 17 deck hatches - 2 on the cabin‑top and the 2 big fo'c's'le hatches. The fo'c's'le hatches and the 3 cabin‑top hatches still need their handles installed before they can get their gaskets replaced, and the fo'c's'le hatches also need their complicated hinges installed.
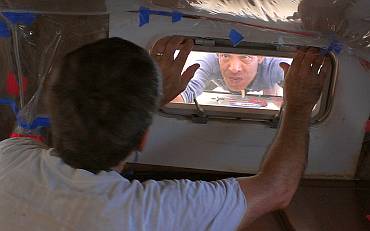 Jon and Lek check the fit of the starboard side salon port-light |
Lek followed Jon around cutting back the cured silicone overflow from the hatch rims. He also continued sanding away at the fiberglass rims of the 2 salon port‑lights. He and Jon made numerous efforts to check the fit, and while they are getting closer, they're not yet ready to install.
Jon's final project of the day was the most frustrating. He was cleaning the threads at the ends of the louvers so we can bolt them back in place when 2 of the threaded inserts came out. <sigh> After futzing with them for a bit he was able to reinstall the inserts and get them to stay in, as they wanted to come out with the bolts.
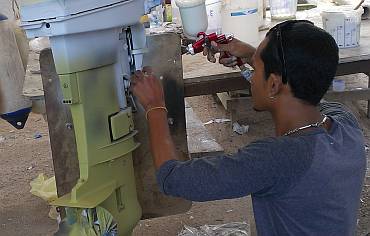 Baw spraying 2K primer over the green etch-primer |
Sue had a successful meeting with the owner of Thai Sailing who will be replacing the foam in our salon cushions. The cushions need to be 6" (15cm) high to come to a comfortable height. He suggested using a very firm composite foam for a 4" (10cm) base, with 2" (5cm) of a softer, more comfortable foam on top. The result will be a much firmer cushion than we've had before. We had thought that the composite foam would fall apart as we take the cushions in and out to wash the covers every few months. But Thai Sailing glues the layers together and wraps them in soft batting (glued on) and then encases the whole foam sandwich in a soft white cloth which stays on for years and allows the whole cushion to slide into and out of the Sunbrella upholstery fabric more easily.
Baw moved through a whole set of paint projects. He began by spraying white epoxy enamel on the inner sides and bilges of Tomcat, our big dinghy. He will be applying the sand/nonskid to the center floor tomorrow. He touched up the sanding job on the outboard and then spayed on a coat of Sherwin Williams green aluminum primer. It was hard enough to sand after lunch, and at 3pm he sprayed on the white 2K primer. Quite a run of spray painting in one day! It seems we're spending almost as much on acetone to clean Baw's spray guns as we are on spray paint!
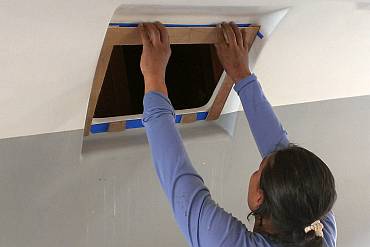 Houa built templates for the 2 polycarbonate sheets |
Wednesday, December 18:
A fun busy day, with so much going on in so many places.
Houa worked much of the day on the polycarbonate sheets that are to go into where our emergency hatches were. He made exact templates of each side and cut both sheets to the correct size. But drilling the bolt holes is going to be tricky...
Jon attacked the fo'c's'le hatch hinges, with his tray of bolts and hinges and springs and washers all lined up. His "dry run" a few days ago paid off, as they actually assembled fairly easily. Sue played assistant, and ended up with the satisfying job of removing the paper from the new dark acrylic so they look like real hatches now!
Baw did a final sand on the outboard motor and then sprayed on not only a 2K silver (matching the motor cover) but a clear coat as well on top.
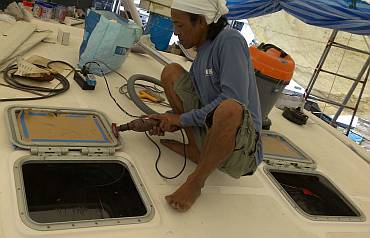 Lek cleaned out the gasket grooves on the 3 salon hatches |
He then joined Ben in preparing the dinghy floor for its nonskid paint. Baw added a touch of black pigment to the white enamel paint, so that the main floor has a slightly darker tinge. He rolled on a coat of paint, hand sprinkled the silica grains onto the wet paint, then rolled on a top coat. It looks very nice and we know it'll feel great on our feet. After lunch they flipped Tomcatover and started removing the paint from the bottom so that can be painted as well.
Lek got a coat of gloss varnish on the new teak cabinet trim that Houa finished yesterday. Then he joined us on deck preparing the salon hatches to receive their new gaskets. Baw should be able to install the gaskets tomorrow.
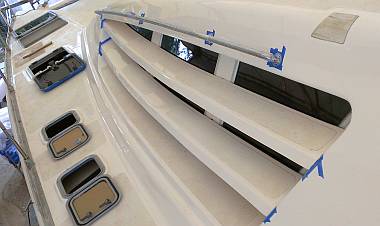 Portside louvers, grab-rail, and hatches happily installed! |
Jon concentrated on getting the 2 port louvers mounted, with help from Sue. But the window "frame" that these mount into has received 1mm of gelcoat on each side, and the louvers themselves have each received 1mm on each end, so there's about 4mm (>1/8") less room available, and only 6 of the 8 bolts would go in. After much sweat and contortion, Jon sanded down the end of the offending louver until it would sit low enough for the bolts to go in. Then it all had to be disassembled, masked, silicone applied, and reassembled with the bolts firmly tightened this time. It took hours, with both of us in pretty contorted positions, so we're glad that job's done!
The big news of the day was the arrival of our newly electro‑polished stainless steel bits from Bangkok: 4 grab‑rails, 2 swim‑ladders with their 4 hinges, 2 bow protectors, 6 stern protectors, and the backrest for the cockpit seat. (In somewhat typical Thai fashion, we also received 2 chain‑plates(?) from someone else's order, but we think we got all of our stuff.) So once the louvers were in place, Sue masked off the pads where the portside grab‑rail goes (just above the louvers) and Jon shot in some silicone and bolted the grab‑rail firmly in place. Wow! Talk about shiny bits going up on the boat!
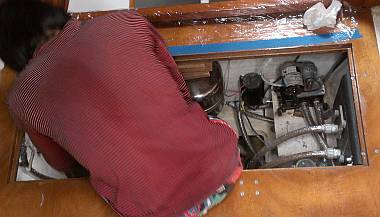 Yando trying to work around all the watermaker ganglia |
Inside, Pla, Yando and Chambron moved from bilge to bilge, sanding the gelcoat. Either Heru or Pla did the actual application of the gelcoat. The big slow jobs were in the 2 forward cabins, under the aft ends of the bunks. These are deep, double bilges, with lots of pumps and hoses running into and out of them, and with a deeper bilge beneath. It was amazing to see these guys all scrunched down inside those tiny places. But they're doing a great job.
Jon showed Heru how he wanted the gaskets done for the 8 port‑lights in the hulls. Each port‑light had already been sanded to remove any silicone from the gasket groove, so today Heru masked off everything near the gaskets, cut the gaskets to the correct length, cleaned everything with acetone, shot a bead of black silicone into the groove, laid the new gasket in, and clamped each port‑light shut to hold the gasket firmly in place while the silicone set. He got all 8 port‑lights done, so we're getting more waterproof!
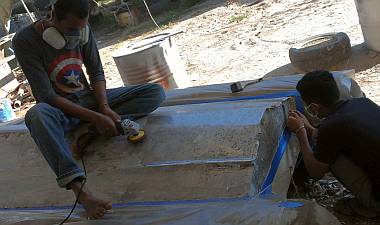 Baw and Ben removing the old paint from Tomcat's bottom |
Thursday, December 19:
Had everyone at the yard today, except Yando, and everyone was busy on their own projects.
Heru began the day by pulling the port lights open, revealing the new gaskets and the extra sploobed‑out black silicone. He was worried that some didn't work too well, as the gasket had twisted a bit, but as long as the gasket makes enough contact with the rim of the hatch to be waterproof, we're happy. He used a razor blade to carefully clear away the excess silicone, then moved on to bilge projects.
Pla and Chambron were down in the bilges all day. Some still needed more cleaning, even after all the attention they got yesterday. Sue had to point out that if acetone on a rag makes the slightly yellow wall turn white, then it needs more cleaning. We asked Heru to slow down a bit and be sure everything is 100% ready before applying the gelcoat. None of these men were with us last April when we had to chip off so much of the deck gelcoat, so they don't understand our sensitivity to making sure everything is squeaky clean before applying the next layer. The men got the last locker under the head sinks finished, the 2 side lockers in the port aft cabin, and all the lockers under bunk steps. The hardest was the starboard forward cabin main bilge where the watermaker is. It looks good but we should probably re‑check the hose connections after all the feet have been in there.
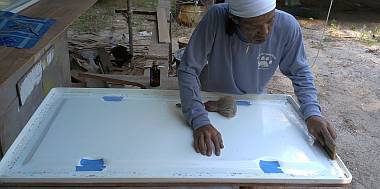 Lek sanding the gasket surface of a big cockpit hatch |
Lek got another layer of varnish on the teak under the fridges, then spend time on the cockpit hatches. These had received thick new gasket material months ago, but we've never been happy with it. It's too thick in places, and it stains the gelcoat yellow. So we've had it removed from all 4 cockpit hatches, and Lek was smoothing out the gasket surface so we can check if the hatches sit happily. If they wobble he'll grind them down until they sit flat. Then we'll glue on a better gasket, probably a neoprene like we have under the salon floor.
Baw and Ben spent the morning scraping and polishing the paint from Tomcat's bottom. After the alloy bottom was acid washed, Baw got a nice green layer of Sherwin Williams Etch Primer sprayed on. In the afternoon he and Ben sanded it lightly and Baw sprayed on a coat of Jotun HB primer. They should be able to get the topcoat on tomorrow. Is it still called the topcoat when it's on the bottom?
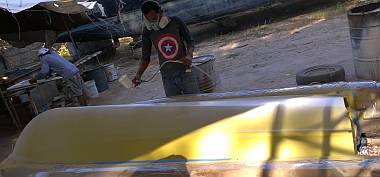 Baw spraying the mid-coat over the green etch-primer |
Sue was gone from the yard much of the day, mostly trying to finalize our nonskid and deck gelcoating bills with AME. AME originally contracted to do all the gelcoat and nonskid work, but we ended up doing much of that work ourselves, so we need to straighten it out so everyone's happy. Mike came by late in the afternoon to deliver new stainless steel bolts and a length of 316 threaded rod from which we'll make the bolts to hold the bimini legs in place.
Jon finished making the brackets that will hold the 2 new shower drain boxes and marked where they're to be mounted in the center bilges on each side of Ocelot. Then he organized Heru (with translation help from Baw) to epoxy the brackets in place. Those bilges still need sanding and cleaning, but at least the brackets are settled in before the final painting happens.
 Cleaning and checking the mounting holes for the port grab-rail |
Houa worked all day on the 2 polycarbonate covers for the emergency hatches. He and Jon decided on 8mm (3/8") bolts, but with 12mm (1/2") holes in the polycarbonate so that there is room for thermal expansion and contraction. Houa used a sharp drill and cold water to keep the bit from overheating and melting or cracking the polycarbonate sheet. He also routed the edges to fit the hull shape. Unfortunately, after checking with Jon every step of the way in the beginning, he drilled huge, oversized mounting holes in the port hull, not realizing that Jon wanted small holes so he could tap them with threads for the 8mm bolts. <sigh> Now those holes will have to be filled with epoxy and re‑drilled, but they won't be as strong as they were. At least we found that the hull is solid glass there...
Jon got the starboard handrail above the salon windows mounted (much to Sue's surprise and delight!) He spent a lot of time preparing to mount the portside grab‑rail going down to the swim‑platform. The rail is held down with 4 sets of 4 bolts, with the holes tapped into specially prepared fiberglass pads in the otherwise foam sandwich wall. The holes had to be cleaned out and their depths measured so we know what length bolts to use. Unfortunately, one of the holes seems to have been stripped, so it will have to be filled and re‑drilled/re‑tapped.
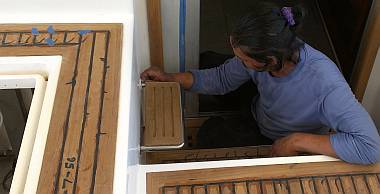 Houa was eventually able to mount the step to the helm station |
The happiest part of the day was dinner out with Rachel and her family from s/v Vamp at our favorite little Thai restaurant, By The Grace. We haven't seen Rachel for a year and it feels like yesterday.
Friday, December 20:
A bustling near‑end to the week, with many things checked off the list!
Houa gets the hero's award for the most noticeable progress today. He started by mounting the teak and stainless step that's our short‑cut from the companionway up to the helm seat. It's been off the boat for 2 years but Jon de‑cored and filled the mounting holes months ago. But when Houa went to replace the step, he found that the new gelcoating inside the battery compartment had covered the holes and he couldn't see where to drill. Luckily, a bit of discreet sanding revealed where one of the holes had to be, and Houa was able to estimate the positions of the others to successfully drill and mount the step. Yay!
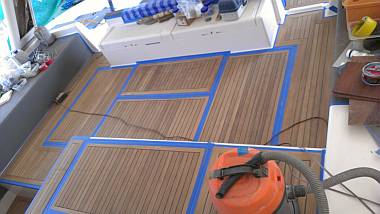 The newly sanded cockpit teak looks wonderful! |
Next, Houa replaced the 4 big cockpit lockers and taped the gelcoat around the edges of the teak in the cockpit and on the aft deck. Then he plugged in the big grinder with a 10" (25cm) sanding disk and started making clouds of fragrant teak dust that filled the air, the cockpit, the aft deck, the steps, the salon top, the boatyard, and probably most of Phang Nga Bay! He got Heru involved and the men took turns with the grinder/sander, a smaller sander and the small orbital. They took some breaks for vacuuming, thank goodness, but it sure was a mess. By day's end we had a beautifully sanded cockpit and aft deck! The edges of the hatches and each teak section are still sharp and need to be rounded off, and some small bubbles in the black Sikaflex caulking need to be filled, but it looks and feels great!
Baw and Ben spent the day on the dinghy bottom, which is upside down on water jugs at the bow of Ocelot. They smeared on yellow 2‑part polyester filler, let it cure, and sanded it back to give the bottom a nice smooth surface. Maybe we'll go faster now? By mid‑afternoon they were ready to tape and bag the pontoons to spray the topcoat, but Houa's activities in the cockpit made that a bad idea.
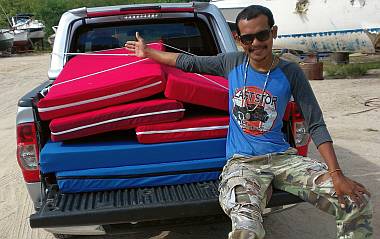 Baw and our new mattresses in the back of EU's nice truck |
Sue ran about 10 scooter errands during the day. Seems like when there are lots of projects on‑going everyone runs out of things randomly throughout the day, and our workers don't understand the concept of warning us when something is running low - they just tell us when they've run out, when they need it immediately to continue whatever job they're doing. Duct tape, blue tape, making plastic, paint brushes, super‑glue, razor blades, rags, the list goes on and on. But it also let Sue stop in at the seamstress who had just finished making our mattress covers. We were lucky in that EU, one of the long‑time contractors at the yard, let us borrow his truck (in exchange for putting in fuel). So Sue was able to pick up the 2 large and 4 half‑size mattresses, which we put in our storage room for now.
While we had EU's truck, Jon grabbed 12 of our Gerry jugs and made a diesel run to the local petrol station. We now have 330 liters (87 gallons) of diesel ready to put in the tanks. After Jon siphons it into the tanks and rigs up a cooling water hose, he can test the engines!
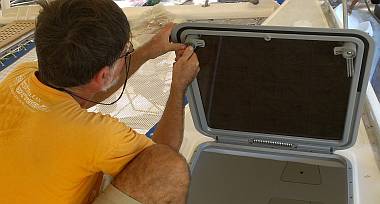 Jon managed to replace the hatch handles in all 5 hatches |
Lek did a bit more sanding on the frames for the salon port‑lights, and they still need some epoxy over the exposed foam core, but Jon didn't get a chance to oversee that project, so it's on hold. Also inside the boat all day were Pla, Chambron and Yando who were still involved in beautifying our gelcoated bilges. Pla asked for bathroom cleaner (a pretty strong alkaline cleanser) to scrub the food lockers under the mast in the forward part of the salon. We wouldn't want to use this cleaner on new gelcoat (like on the deck) but a one‑time scrubbing and a good water rinse isn't going to hurt anything, and it sure did clean up the gelcoat. Chambron and Yando were pretty much upside down all day in the port passageway, cleaning out the deep bilges under the floor. Not a job we want to do, so we're happy to have someone younger and more agile in there.
In the afternoon, Jon worked on Goiot hatch handles for the 3 salon and 2 fo'c's'le hatches. We've been able to replace some, but not all, of the necessary parts, so it was a bit of a mish‑mash, and some of the new parts had to be modified to fit our older hatches. But by the end of the day he'd got all 5 pairs of hatch handles mounted, as well as the 3 locking clips for the salon hatches. Now Baw and his team can replace the gaskets and dog the hatches to hold the gaskets in place while the glue cures.
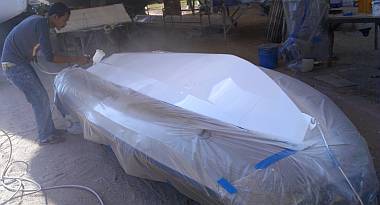 Baw sprayed 2-part enamel on Tomcat's bottom |
Saturday, December 21:
A roaring end to the week, and Christmas plans in the making (finally). Unfortunately, Ocelot
won't be on the water by then.
Baw and Ben sprayed white Jotun 2‑part enamel on Tomcat's bottom, and it looks new! When this coat is fully hardened he'll sand it lightly and spray a final coat. He also got a final white coat on the orphaned mast steps and some jam cleats that got left out of the painting pipeline weeks ago. The wooden oars for our sailing dinghy also got a new coat of white enamel paint.
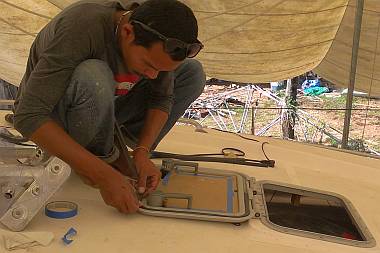 Baw gluing the gaskets into our salon hatches |
Ben headed off to polish the last of the rod rigging on the mast. Baw took on the hatch gasket project. He used Dunlop rubber cement to mount the gaskets in the 3 salon hatches. We had enough soft (real) Goiot gasket material for the salon hatches plus one of the fo'c's'les, but not both. So Baw used the grinder and created a more shapely gasket from the stiffer, more rectangular stuff we've had on board since the Caribbean. Once the second gasket was formed, he poured rubber cement in the gasket groove, spread it thinly, being careful to have it only touch the bottom, not the sides. Then he laid out and spread glue on the bottom‑most part of the gasket. Waited for it all to dry to tacky and pushed the 2 together. To hold the new gaskets in place he closed the hatches and dogged the handles (which is why Jon had to install the handles first). On Monday we get to unveil them.
The last of the hatches and port‑lights to be installed are the 2 large port‑lights in the front of the salon. Lek has worked on shaping the fiberglass rims off and on for a few days but is a bit out of his depth, so Jon worked with Lek to fit the aluminum port‑lights, deciding where more sanding was necessary. The problem is that this whole area was rebuilt, and some of the areas that are supposed to be flat aren't. After some sweaty time shaping the openings, Jon finally declared them ready. During his sanding, Lek had gone through the fiberglass and into the foam core, which now needed protection. So Lek brushed on some epoxy to seal the exposed foam and wood. It will all get sealed up with a good silicone, but we still don't want any exposed core material.
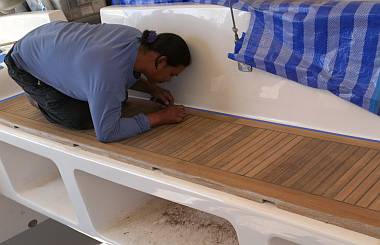 Houa on hands and knees, inspecting all the Sika caulking |
Jon took on the fiddly and time‑consuming job of getting the bolt holes in the sugar‑scoop outer walls ready for the handrail. Each hole had to be scraped clean with a long, sharp pick then have the debris blown out. After huffing and puffing for awhile, Jon remembered Houa's electric compressor and used that to blast the holes clean. Then Jon used a syringe with a straw attached to fill the holes with epoxy. Next step is to re‑drill the holes correctly and mount the new grab‑rails.
Houa spent the morning on his hands and knees, examining every inch of the black Sika caulking on the teak decks. There are many small flaws where the Sika got an air bubble or something disrupted the flow. He used a razor blade to cut each of these places out, then put blue tape on each side of the gap. We were surprised to see so many more repairs needed on some of the starboard teak sections and the aft deck, compared to elsewhere. His reason: it was afternoon and very hot when he laid those sections, and Sika doesn't like the heat. Whatever the reason, he seems unperturbed about making all the meticulous cuts to repair our caulking.
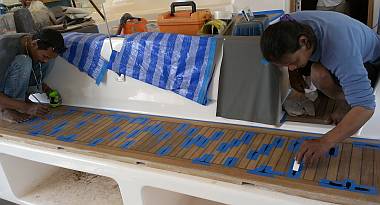 Baw primed the holes while Houa filled and smoothed them |
Baw worked with Houa on the teak after lunch. Baw lead by cleaning each sliced Sika area with acetone. Then he applied Sika Primer with a narrow artist's paint brush. Houa followed behind with the Sika gun, squeezing new black caulking into each slice and using a bit of formica as a spatula to smooth the Sika into place to be sure to fill the repair. Everyone had to tiptoe around the cockpit all afternoon, but it was worth it! On Monday the tape will come off and the whole cockpit will get another light sanding.
Inside, Pla finished cleaning and gelcoating the 4 lockers forward of the salon table. Yando, Chambron and Heru worked on the deep bilges on port, and by day's end we asked for a tour. All the port side deep bilges, under‑sinks, lockers and cubbies under the bunks are completed. The only place remaining is a bit of floor just under the steps, where Houa was repairing some teak and a last floor support still needs to be put down, which Houa can't do with the men working there. On starboard, the bunk cubbies and heads are done. The men got a good start on the deep bilges, but they still have a few more days of work.
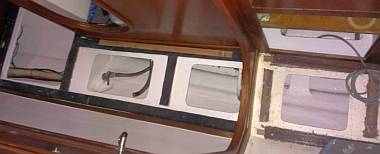 Newly gelcoated bilges! (seen from above, looking straight down) |
The diesel tanks are essentially empty (thanks to Golf's having stolen the diesel a couple years ago) which is an ideal time to calibrate the fuel gauges, but the gauges are only active when the Yanmar engine keys are on and the keys were not on the nav‑table where we'd left them. The men had moved everything during the varnishing project and none of them remembered moving keys. We sorted through the lock box under Ocelot and scrounged the many work and tool areas for a long time but we couldn't find the keys. Miracles never cease, but it was Jon who found them, late in the afternoon, buried amongst the tangle of exposed wires next to the nav‑table. So, with keys turned to the "on" but not "start" position, Jon siphoned diesel into the Baja filter and the tanks while Sue noted and recorded each meter reading of the fuel gauges.
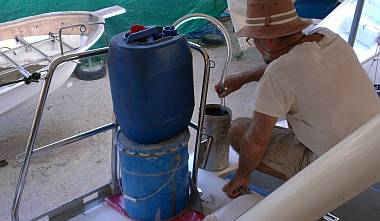 Siphoning diesel through our Baja filter & into the starboard tank |
Ocelot's specs say the diesel tanks hold 170 liters (45 gallons) on each side, but the gauges show essentially empty after burning only 120 liters (32 gallons) so we've never been sure of the specs. But we got 150‑160 liters into each tank, and neither is showing completely full, so 170 liters is probably accurate, even though the gauges don't register near the bottom. With our newly discovered 120 liter (32 gallon) tanks up forward, this will give us 580 liters (153 gallons) of diesel capacity (not counting any jerry jugs) for a nominal motoring range of over 1,000 nautical miles in flat water.
Christmas plans have been up and down as we try and figure out the logistics of getting out to the boats we want to spend time with. Problem solved, in that Rachel's family on Vamp will be anchored way up north in Nai Yang near the airport (to pick up a friend), and that's exactly where Cankata will be, the folks who've invited us to sleep over for a couple nights. So Tuesday afternoon we'll be scootereing an hour north to Nai Yang Bay, enjoying Wednesday with good friends, and scootering back to Chalong on Thursday. We told the men that the bad news is that there will be no work on Ocelot on Wednesday, but the good news is that they'll all be paid anyway - our Christmas present to them. It was lovely to see their looks of surprise and happiness. Not sure if any of them have had a paid day off before.
Thai Refit:
Ocelot Pages:
Top Level: Home | Destinations | Cruising Info | Underwater | Boat Guests | Ocelot | Sue | Jon | Amanda | Chris | Site Map | Make a Comment
|
If our information is useful, you can help by making a donation |
Copyright © 2000‑ Contact: Jon and Sue Hacking -- HackingFamily.com, svOcelot.com. All rights reserved.