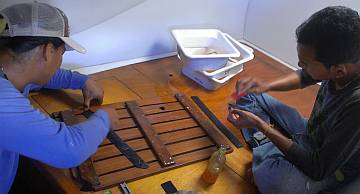
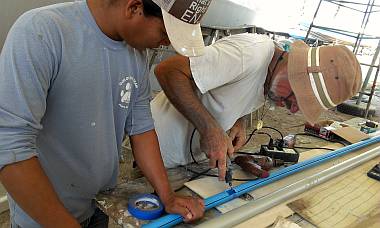
Heru and Baw gluing neoprene on the shower grates
119 Polish & Wax
Summary: The big pushes this week were polishing and waxing Ocelot's topsides, including under the bridge‑deck, and preparing the salon headliners for installation. We also completed much of the electrification of the mast, and finished mounting the big cleats and bollards. Team accomplishments include:
|
 Heru and Baw gluing neoprene on the shower grates |
Monday, February 10:
After the problems with the engine on Sunday, we approached
the day with trepidation, but it turned out to be a pretty good day after all!
The port engine, with its flooded cylinders, was at the top of Jon's mind in the morning. Bruce sent us the information from Calder's book on how to manually get the water out by slowly forcing the engine to turn over. But this forces the water past the rings and into the oil, which takes a lot of time and ruins the oil. Our mechanic, Hem, arrived at 9:30 with a different idea: remove the injectors!
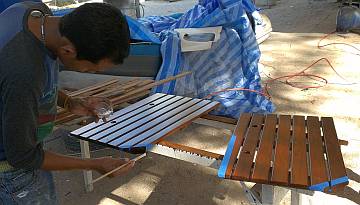 Adding polyurethane after sanding to relieve squeaking |
Crouching on top of the engine, Hem removed all 4 steel fuel lines from the injector pump to the injectors, then he removed the injectors themselves. He put several rags on top of the injector holes, weighted them down, and told Jon to turn the engine over with the starter. Water WHOOSHED out of the injector holes, but after a few seconds no more water came out so Jon stopped.
Hem then replaced the injectors and the steel fuel lines, but only tightened the nuts on top of the injectors finger tight, so we could bleed the air out. Jon turned the engine over again and after a few seconds all of the air had been blown out of the fuel lines. Hem tightened the fuel line nuts, Jon turned on the key, and the engine started immediately, and ran happily, blowing the remaining water out of the muffler and the exhaust line. Hem cleaned up, collected his tools, and charged us $15 for his 1 hour repair. Whew! Another crisis averted.
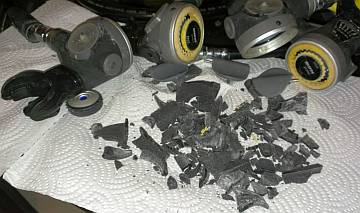 Shattered plastic from our (expensive) Mares regulators |
Meanwhile, Sue and our friend Werner (who's an Austrian dive instructor) ventured onto Chalong's dive‑street, seeking somewhere to get our scuba tanks inspected, and to find what what to do about our 6 second‑stage regulators that have crumbled. Sue and Werner had examined the regulators in the room last night, and he was aghast. The plastic casing around the 10‑year‑old Mares Proton second stages were literally crumbling like cookies in our hands. The first stage and the hoses looked fine (but we'll have them serviced) but the purge valve covers just broke apart, and the casings peeled off. Werner, in his 50 years(!) of diving, had never seen anything like it.
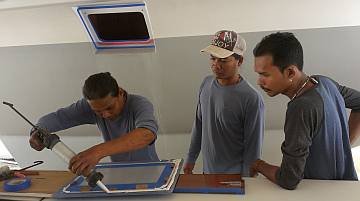 Gooping up the portside emergency hatch window |
The Aqualung shop came recommended as the place to get equipment checked and fixed so we dropped in there first. Deeno, the Canadian manger, was awesome. He knew right away what the problem was with the regulators. Bacteria! Apparently there is a plastic‑eating bacteria in the tropics (not in the high latitudes, which is why Werner had never seen it) that literally demolishes the plastics on dive gear. There is no stopping it, but you can delay the process by using the gear often, or rinsing it at least monthly. Given that months or even years often go by between dives on Ocelot, it was inevitable that the bacteria would find its way into our regulators. It was nice to have Werner's vehicle to transport the 3 tanks and regulators, and now we await word on the cost of inspection and repairs so we can dive again when we find some clear water!
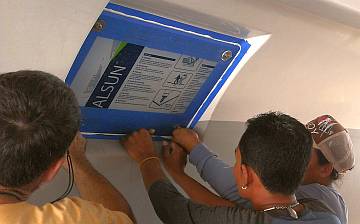 Screwing the 4 bolts through the polycarbonate, into the hull |
While Jon was playing with the engine, Baw and Heru were preparing to install the new polycarbonate "glass" in the old emergency hatch areas near the waterline. This is a bit of a nerve‑wracking job, as we are very aware that windows can be leaky on a boat, and here we are installing plastic windows right at the waterline! But Houa is a very confident window technician, and he guided the men (and us!) each step of the way.
They test mounted the port side polycarbonate to the framed hatch opening, and on the blue‑taped surface of the plastic they super‑glued small wooden blocks to securely position each window. The bolts we are using are tapped into the fiberglass hull and do not actually touch the polycarbonate (to allow for different thermal expansions), but they were run home to help ensure the correct placement. Then, with the blocks in place, the plastic was taken down, the coating peeled back, and the surface sanded and alcohol cleaned to receive the sealant. The hatch rim on Ocelot was also sanded and cleaned.
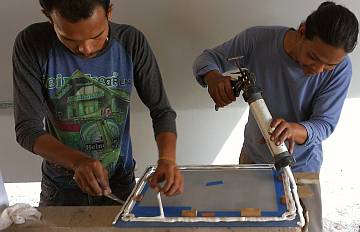 We managed to do the starboard side just before 5pm |
The men applied a 2mm thick strip of 3M double‑sided tape all around the window near the inner edge of the frame, to act as a spacer to be sure we don't press out all the sealant. The sealant needs some thickness to work correctly. We used Sikaflex 295iUV as the sealant. Houa ran thick beads around the hatch rim of the boat, then around the plastic window itself. Once we were all happy with the over‑abundance of Sika (better to have too much than too little!) the men mounted the window and pressed it home. Jon screwed in the 8mm (~5/16") bolts with their oversized washers, and Sue tightened them on the outside while Jon made sure there was still some adhesive thickness on the inside. Then Jon ran on the locking nuts on the inside and Heru cleaned up the huge volumes of Sikaflex which had sploobed out the sides.
After lunch Jon removed a couple big hose clamps from port engine, and scootered off to Boat Lagoon to buy good stainless clamps from AME and to deliver our seized Profurl upper swivel to Precision Marine, the only Profurl folks here in Phuket. He also picked up a second tube of Sikaflex 295 as we had used an entire tube on the first window.
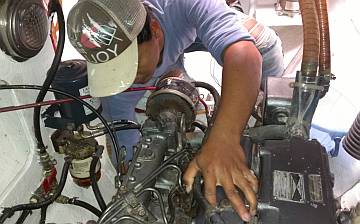 Heru cleaning the water from the portside engine bilge |
With Jon gone, Sue was in charge of keeping the men busy. Houa, of course needs no direction. Between working on the polycarbonate windows today, he continues sorting, cutting, fitting, and stapling all the edges of the salon headliners. Tomorrow he will be doing more of the same, as there are over 30 salon panels to be done.
After the engine debacle, we had lots of water and oil in the (beautifully cleaned and painted) port engine bilge. Heru drew the short straw for that job. He was game, creating long swabbing tools to reach the deepest parts of the bilge, and using detergent and water in copious amounts to get the area clean again.
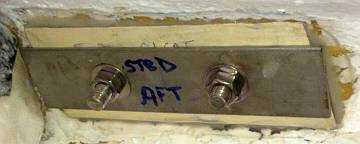 Backing plates under our 4 big cleats |
Both Baw and Heru worked on the grates for the heads. These nicely varnished teak gratings used to fit perfectly in the shower floors, but with the new shower pan profiles and the thicker varnish, there is now some rubbing and squeaking. So much so that Baw ended up trimming off some of the teak and re‑applying polyurethane. They also put neoprene rubber under the cross‑planks to help cushion and reduce the squeaks.
Jon retuned from his jaunt north (despite the horrific traffic) in time for us to prepare and mount the starboard polycarbonate window, which was finished just at 5pm. Ocelot is now (finally) sealed up! And Jon used some of the leftover Sikaflex to finish mounting the cleats, so that job is also checked off now.
Tuesday, February 11:
A busy day of bollards and buffers aboard the boat. Sue began the day a bit down, worried about how
we are to finish all the projects before launch day, but Jon just trundled ahead and got a lot done.
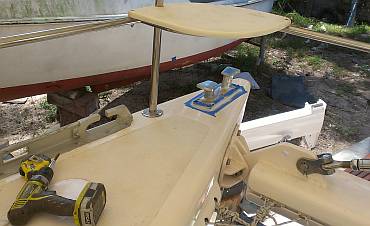 The portside bollard mounted at the very bow |
It was bollard day for Jon (at Sue's request, so we can begin returning things to the fo'c's'les' for storage). Our bollards go on our extreme bows, and usually hold our anchor bridle, but also sometimes hold docking lines on those rare occasions we find ourselves in a marina. But both bows were extended (made sharper) which changed the bollard mounting surfaces. Portside was still usable, but the starboard side now has a bit of a crown, making it difficult to mount hardware.
Everywhere Jon tested the bollard, it wobbled. He and Baw threw ideas around, and eventually decided to build an epoxy base under the starboard bollard. They'd put release wax on the 6 mounting bolts and the deck, smear a thick layer of epoxy mud under the bollard, and bolt it down. Once the epoxy had cured, the bolts would be removed, gooped in Sikaflex, and the bollard would be bolted down more securely. This would create a perfectly shaped epoxy base for the bollard.
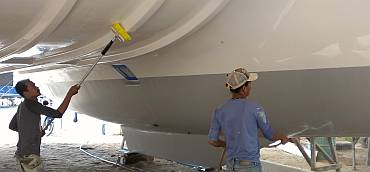 Baw and Heru enjoyed cleaning Ocelot's bridge-deck |
The portside bollard was a lot more straight‑forward because it could be mounted to a (relatively) flat section of the deck. Jon aligned the bollard (easier said than done) then drilled and tapped the bolt holes. Sue sanded and acetone cleaned the deck inside Jon's blue tape, and then Jon applied slow‑cure 5200 to the bottom of the bollard and the upper threads of the bolts. With Sue below to put on washers and nuts, Jon screwed the bolts home, making them extra tight with his impact driver. Sue wasn't real happy to be scrunched up inside the pointy end of the fo'c's'le, pulling on a socket wrench while being blasted by the sound of Jon hammering on the impact driver, but together she and Jon got the bollard mounted and secure, with the excess 5200 wiped into a nice, small filet.
On starboard, Jon again laid out where the bollard was to go, drilled and tapped the holes, and masked and cleaned the area. Baw smeared release‑wax on the bolts and on bow where the bollard was to mount. Jon mixed up some epoxy mud, smeared it on the base of the bollard, and screwed the bolts in (but not hard). Thankfully, Baw stepped in for the messy wiping up of sploobed‑out epoxy phase. Tomorrow we'll remove the bolts, goop them up, and finish the job.
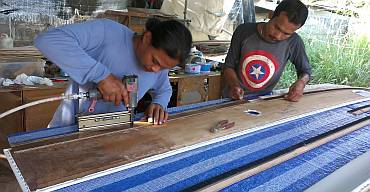 Stapling the mounting "ears" onto the long salon headliners |
Houa carried on getting the salon headliners ready to mount, gluing the plywood "mounting ears" on the vinyl covered headliners. He's getting about 2 done a day. A big, slow job, but he's much better at it than we are!
Baw and Heru were happy with the plan to polish and wax under the boat today, so they started out removing all the junk that has accumulated under Ocelot over the past umpteen months. Sue sometimes had to rescue things they were going to throw away, but which have some function on the boat. They used the boat brush and Boat Soap to scrub the topsides, under the bridge‑deck and even down onto the bottom. Just that cleaning off of months of dust and grime made Ocelot look 100% better! Strangely, when Heru started the polishing the inner port hull, it didn't look like much was happening. It wasn't getting shinier.
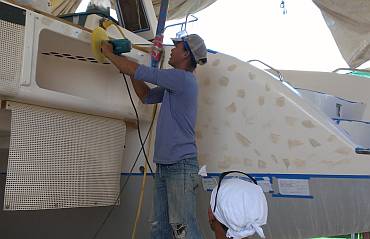 Heru and Baw traded off using the heavy polisher |
Thus began the dreaded Baw vs. Madam discussion of just how to go about finishing the shiny surface of Ocelot's new gelcoat. Baw said that the Solar (local car rubbing compound) that he had bought this morning was just not enough cutting to polish out the old 1500 grit sandpaper scratches. That gelcoat is very hard, much harder than paint, and it would take many passes to get the shine. He said we need 3M "74" to get the shine.
Sue got too tired and grumpy to argue. We sure didn't want to pay for new polishing compound that left the boat duller than before, or to pay for 3x the man‑time to get the desired effect. She went out and bought 3M "74" which Baw then mixed with Solar, and Yay! A bright and shiny hull. Heru and Baw worked all day, arms overhead holding up the big polisher, as they worked their way down the insides of the 2 hulls and across the aft half of the bridge‑deck. Tomorrow they will attack the upward sloping forward end of the bridge‑deck, which will be even tougher, physically. Pla will be with us tomorrow, though, so that will help, as he is the biggest and strongest of our men.
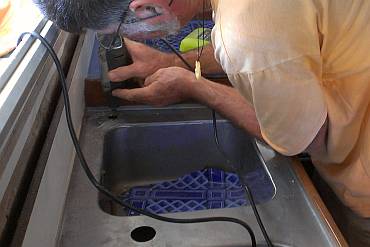 Dremeling open a hole for a faucet in the galley sink |
A last little project occurred in the late afternoon, when Jon used his Dremel to open up the hole in the galley sink enough to accept the foot‑pump faucet. He also fiddled with how to mount the main faucet (for which we had a special brass nut made last week), and we had Heru cut us a new gasket from a sheet of thin rubber.
Wednesday, February 12:
Just when we thought everything was going well. An almost wholly wasted Wednesday.
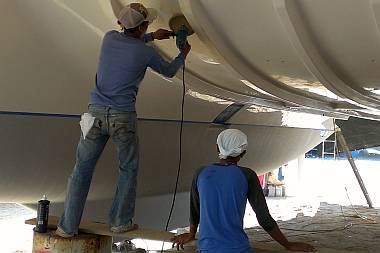 Heru and Baw traded off wielding the heavy polisher |
Houa was out sick, so nothing happened on the headliners. And despite the fact that Pla came by yesterday and asked if there was work today, he never showed.
Without Pla there to help with the heavy machine polishing and waxing under the bridge‑deck, the work fell to Baw and Heru, who did keep at it all morning. But it's tough going, holding that big polisher up overhead and pushing with it, while moving it over the gelcoat. They finished all the polishing under the forward bridge‑deck, and then began the actual protective waxing process. They used a 3M product, Marine Wax, which goes on very smoothly. About 1/3 of the bridge‑deck got done before lunch. The bad news of the day came after lunch, when Baw claimed sore muscles, and asked for the afternoon off, promising to start fresh and energetic in the morning. Since Heru had shared a ride in, we lost him as well.
We had been hoping to do more on the mast today, but neither of the men wanted to stay and help with wiring, which would have been a much easier job than polishing.
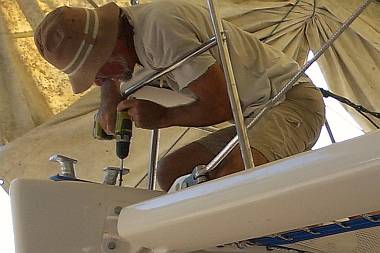 We got the last bollard bolted down permanently |
Sue scootered off to Rolly Tasker in the morning to consult with Johnnie about the main sail cover. They unrolled it on the big sail loft floor and had a good look at it. Johnnie's off the cuff estimate to replace: about $800‑1000. He figured we had several more years of good use out of it, and more if we repair it for a fraction of the cost of the new one. So we decided to go for repairs, replacing stitching and cloth where it's bad. The main addition will be UV resistant lettering of OCELOT on the sides, in Hobo font.
Jon's morning was taken up finishing the tricky starboard bollard. The bolts that had been set (with release wax) through the bollard and epoxy and the hull came out with a bit of strong persuasion. Once they were out, Jon hopped into the fo'c's'le with the grinder and proceeded to flatten the somewhat uneven surface where the bolts came through, so the washers would seat properly. He emerged minutes later as the white snowman of Phuket. Jon siliconed the bolts, drove them in, used his impact driver to make sure they were down hard, and then Sue helped put on the washers and lock‑nuts.
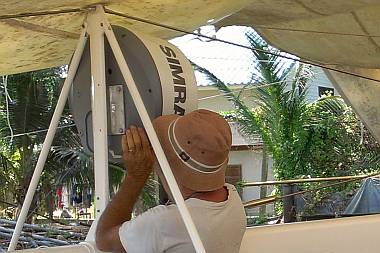 Testing the fit of our new (to us) FM radar |
With no workers around after lunch, we spent some time discussing how we'd run the mast wires up their PVC conduits. We also played with the placement of the radar dome on the first spreader and were happy that it will fit pretty much where the older, smaller dome fit. We do have to make a new mounting base though, as it must be bigger than the old, so we dropped the schematic and the old aluminum base at our friendly local machine shop after work.
Up on Ocelot, Jon realized he had a good opportunity to replace the anchor winch solenoids. Several of the nuts had seized so it took a couple of hours to remove the old bits. He mounted the new (continuous duty) solenoids where the old ones were, but it will take a few more hours to clean up and re‑install the wiring.
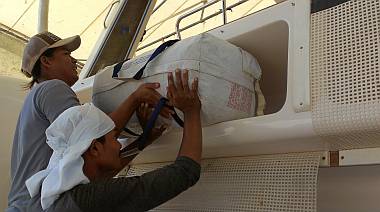 Heru and Baw lift the life-raft into its storage compartment |
Thursday, February 13: Start the Mast Wiring
We had Heru, Baw and Houa back with us today, so things felt like they were moving again.
Sue is having fun emptying out the storage room. Today's big removal was the new life raft. It's an 8 person raft like our old one, but this one's in a soft valise, not a fiberglass canister, so it's much lighter. Heru schlepped it to the boat for us and cleaned out its lazarette compartment, and he and Baw hefted it in. To secure the raft to the boat, Heru drilled holes and screwed in a small stainless steel bale to which we attached the webbing strap raft painter. This line is 35' (11m) long, and if we ever had to deploy the raft, we simply pull it from the lazarette and let it float behind the boat, attached by the long painter. We would then jerk hard on the painter to start the raft inflating, and once all safely aboard, cut the painter from the boat. Let's hope we never have to try it out!
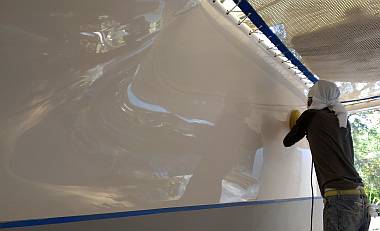 Baw polished and waxed the bridge-deck and insides of the hulls |
Baw gave a massive effort on the waxing of the under bridge‑deck today, stopping often enough to not kill himself, but it was obviously still very taxing work. But now the whole underside of the boat is glowing with a brilliant shine from the polishing and the top coating of 3M Marine Wax. It won't last forever but for now it gives us a feeling of a new boat! Fun! Tomorrow he starts on the outer topsides.
Houa seemed his cheerful self, and gamely continued with the headliner project. Tomorrow he plans to remove the front salon piece that needs a bottom wooden brace, and once that's done, he can lock it in place with the long overhead pieces. But before he puts it back, we need to finish bolting in a pad‑eye right next to the mast that takes our reefing lines. The nuts for the pad‑eye need to be tightened from where that piece of headliner is.
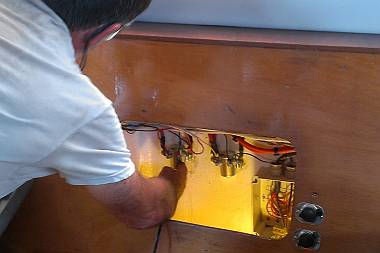 Jon got the 2 anchor winch solenoids (relays) wired up |
Jon spent the morning head down in the salon lockers wiring up and testing the 2 new solenoids (relays) for the anchor windlass. He carefully labeled all the wires so that in future he won't have to play guessing games anymore. It was great to hear the deep whirr of the windlass as it lowered the anchor a bit, then a pause, and the whirr of it coming up, followed by the satisfying Ker‑thunk as the anchor settled back into place. Yay! We can anchor! And weigh anchor!
Jon's afternoon project was to attack the mast wiring. This involves 2 separate wiring events: The masthead electrics go up a PVC conduit on the backside of the mast (just inside of the mainsail track) and the wires for the 3 lights and radar on the front of the mast go up a separate PVC conduit. The PVC to the masthead was put in months ago so we tackled those wires first. The tri‑color (red, green, white) light and the anchor (white) light require a 3 wire cable, the VHF antenna needs a thick RG8 coax cable, and the wind instruments need 4 thin wires enclosed in a shield. Given that the wind instruments are so important to us (and we happen to have 2 masthead units) we decided to run 2 of those cables.
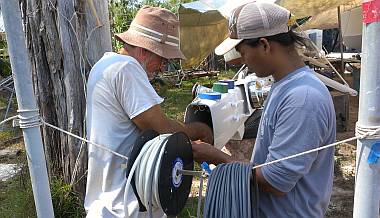 Jon and Heru prepare to pull some wires up the mast |
One problem we discovered some time ago is that we can pull wires up from the bottom of the mast, but we can't pull them down from the top - they always get caught on something where the top piece of PVC conduit ends and the next one begins. We suspect that the very top of the lower conduit has jumped off its track and is preventing wires from going down. This is important to us because the wind instrument cable has an aluminum block on the top that holds the anemometer, so it has to be fed from the top down (or the cable cut and all 5 wires re‑soldered, which would be a pain).
So we pulled up the other cables first, thinking they might fill the area that's keeping wires from being pulled from the top down. We put together a wire‑spool holder, and those cables went up without a problem. Then we pulled the wind instruments cable down from the top and it also went without a hitch! We still have several fittings to bolt to the masthead and wire up, but that's pretty straightforward. The important part is that the wires themselves are all ready to be connected.
 Heru and Jon cut holes in the sides of the wiring conduit |
Once the masthead wires were in place, Jon and Heru worked on the wires up the front side of the mast: Steaming light, running lights, foredeck lights, and the radar. The radar sits on the first spreader, and the foredeck lights are just under that, so those wires come out of the mast at the same place. The running and steaming lights come out higher up, at different places. We have the PVC for this conduit, but it's not in place yet. The interior of the mast extrusion has some inverted "T" extrusions, which make running conduit very simple - just slit the PVC lengthwise and clip it onto the T. We'd slit the PVC, but it was very tight on the T, so Houa opened up our slit with a grinder so the PVC now slides easily.
The PVC is in two 4m (13') sections, but the joiner between them had come apart. This time we opened up the slits so the joiner piece would have good contact along its entire length. Then we brushed on the PVC cement and quickly pushed the 2 PVC pieces into the joiner, making sure the slits were aligned. Then we measured where the wires have to come out of the PVC so Jon and Heru could carve big holes in the sides of the conduit for the wires to come out. Tomorrow we hope to thread the wires into the PVC, attach strings to the wires so we can pull them out of the mast, and push the whole thing up the T.
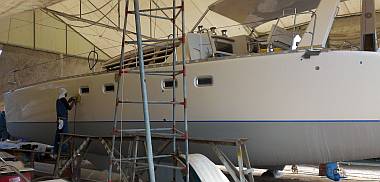 Baw polished and waxed the entire port topsides |
Friday, February 14:
A combined Valentine's Day and Thai National Holiday of Macha Bucha (a Buddhist holiday) meant the
roads were jammed, shops were closed, and our workers left at 4pm to attend religious ceremonies.
Baw worked alone again on the port topsides, polishing with a combination of auto compound "Solar" and 3m "74". This brings up the shine of the gelcoat and removes the fine scratches left by the hand sanding with 1500 or 2000 grit sandpaper. Once he had the whole port side gleaming he started back at the bow with 3M Marine Wax to give the boat a protective layer. Beautiful!
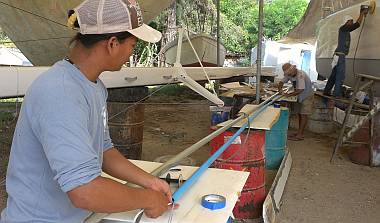 Heru & Jon running wires & rope-pulls through the PVC conduit |
The big work happened on the mast. Jon and Heru (and Sue in the morning) devised a way to get 4 big wires up the PVC conduit. The trick was that they don't all come out of the mast at the same place, so we had to do some fancy rope tying, and taping wires and rope‑pulls together to extract the correct wire at the correct location. We pushed the uppermost pair of wires up the PVC while it was still out of the mast, and used those wires to pull up thin ropes for the other wires. We had additional rope‑pulls inside the mast, so as we pushed the PVC up its "T" inside the mast we tied the PVC rope‑pulls to the mast rope‑pulls. Once the PVC was in its correct place inside the mast, we now had pulls that led from the base of the mast, up the PVC, out through pre‑cut holes in the side of the PVC, and out the front of the mast where the electrical fittings need to go. This made it very east to then pull each wire through, and we were able to finish pulling all the wires before lunch!
Houa did his continued work on the salon headliners, and we're glad to see the pile of "still‑to‑do" headliners is down to just a couple pieces. He also removed the big front of the salon piece that surrounds our front window, as it still needs a piece of wood to brace it in place. With that headliner out, we can mount a pad‑eye at the base of the mast.
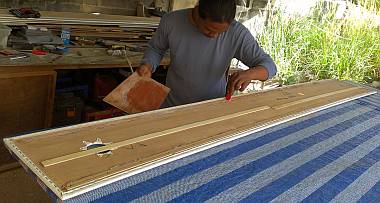 Houa epoxying on the "ears" that hold the salon headliners up |
But we didn't have the 100mm (4") long bolts for that pad‑eye, so Sue scootered up to Boat Lagoon after lunch to AME's stock of 316 stainless bolts. That mission accomplished she stopped in at Precision Yachts to see how our seized Profurl top swivel is doing. David, the rigger, was not in (holiday and all that) but his boss called and found out that the swivel should be ready in 3 days! Now THAT was great news. It means that David either has already dismantled (or is confident that he can) the swivel and can replace the seized bearings. This should be only a fraction of the cost of a new swivel ($700 in the US but $1,800 here in Thailand!)
In the afternoon, Jon and Heru continued their work on the mast. The internal rope‑pull for the jib halyard had gotten lost inside the mast, so the first order of business was to replace it. We were able to reach inside the mast where the jib halyard comes out and hook one of the spinnaker halyard pulls, so we could use that to re‑run the jib halyard pull.
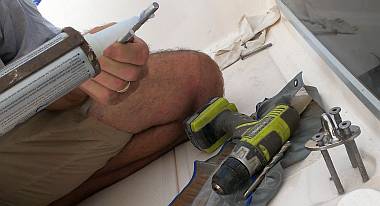 Gooping up the long pad-eye bolts by the mast |
Heru inspected each tang and pin, and inserted split‑pins wherever necessary. Jon started sorting out all the sheaves and pins, trying to work out which went where, as the newly machined sheaves aren't labeled. He managed to install the 4 sheaves at the masthead (big and small spinnakers, topping lift, and main halyard). Once we install the jib sheave and the screecher sheave, we can start installing the 6 halyards themselves.
When Sue returned from Boat Lagoon, she worked with Jon to mount the pad‑eye to the foredeck. This pad‑eye is at the base of the mast, and takes all of our reefing loads (which can be considerable). The bolts were a bit long, but they don't interfere with anything so they'll do. Jon had tapped the 4 mounting holes, so the bolts are holding onto 3" of fiberglass, with big washers and locking nuts on the bottoms. Sue also showed Jon where the sheaves etc. are for the boom. It had confused him that we didn't seem to have enough hardware, but now we should be able to start rigging the boom in just a few days.
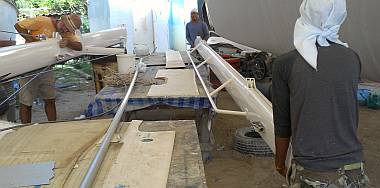 Jon installs sheaves while the men get the boom ready to work on |
Saturday, February 15:
End of Week 1 of 3 on the Countdown. Not sure if we're on track until we get some time to sit
and analyze what's still to do. But things moved along today.
Houa finished re‑building the long salon headliners and started adding the wooden braces or brackets to the corner pieces so that the headliners lock each other in. Lots of climbing up and down, fitting pieces and pulling them back out. We just hope the vinyl is up to it.
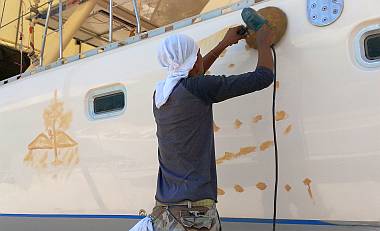 Baw polished and waxed much of the starboard topsides |
Baw spent the day with his arms in the air, holding that heavy polisher against Ocelot's topsides. He finished the wax on port, then moved to starboard with the compound to get rid of small scratches. With a bit of help from Heru when he was bushed, they got all of starboard polished and about half waxed.
Jon set Heru up to lash the spreader boots to the ends of the spreaders. These are commercial rubber, shaped made to go over the ends of the spreaders and then fasten to the rigging to protect the sails when they sweep by the rig. Before Heru could put 2 of the boots on, Jon had him lash the rod rigging on the forward diamonds because the small aluminum pieces that usually hold the rod in place had had to be cut off, as they were seized. Heru wore a sailing glove and really put his heart into the lashing, calling on his experience of 3 years on a commercial tuna fishing boat. After he'd finished the first of the rubber boots, Jon had to ask him to unlay it and do it again but with less force! He was able to pull so tightly we were concerned he would destroy the rubber! Anyway, before end of the day we had 4 large boots and 2 smaller boots in place, with the rod lashed securely under the smaller pieces.
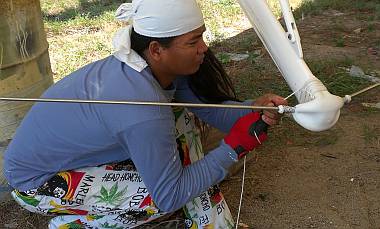 Heru got a bit carried away with lashing the spreader boots |
Jon worked most of the day on the masthead electrics. This involved mounting both wind instrument holders (1 is a spare), one of which had to have new holes drilled due to broken‑off bolts in the old piece. He also mounted the plastic shoe for the tall masthead light. On a smaller scale, he got the final 2 sheaves mounted in the mast, as well as the fairlead for the upper spinnaker halyard, so now the mast is ready to have all 6 halyards pulled through (but we're going to wait on that so the ropes don't get so dirty). Unfortunately, we're missing 5 small stainless steel plates that hold the sheave pins in place. Sue scootered all over southern Phuket looking for them, but no one seems to sell them. At Rolly Tasker, the rigger said he makes them when they're needed. That may be our next move.
Sue's job of hunting up parts, locating things, and farming out things we can't do, has gotten intense. We now have farmed out items at 8 places around the island. Our scuba gear is now serviced and ready (to the tune of $500) and our sail cover is nearly repaired and about to get OCELOT sewn on the side. The list goes on, the money goes out. Someday this, too, will slow.
 Sue playing with Ocelot's bow logo |
Sunday, February 16:
These 7‑day work weeks will have to stop soon. This is getting exhausting. But it's
also very exciting, as we move through the Things To Do list.
Now that the topsides are gleaming, we're ready to think about putting our "OCELOT" name on the bow once again. Although we're pretty sure where we'll have the vinyl sticker made, we still haven't worked out the size of the letters. So Sue mocked up a panel of black vinyl with tape letters and played with positioning it on the port topsides. Final size will depend on the height to width ratio of our favorite OCELOT font, Hobo. But the letters will basically cover about 5' (1.5m) of hull, and stand just over 1' (30cm) high. We'll be putting a paw print in the middle of the second "O" like we did before, but thanks to Amanda it will be a feline, not a canine, paw this time!
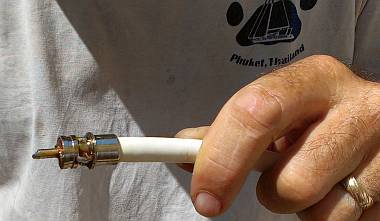 Soldering a PL259 connector onto RG8 cable is difficult |
Jon spent the day wiring up the electrics at the masthead. Much nicer to work here in the yard than 60' (18m) up in the air in a rolly anchorage! He soldered a connector to the end of the VHF coax. This is a tricky job, as you have to get the fitting, which is about half the size of a thumb, hot enough for the solder without overheating the internal elements. Jon has done several over the years, but they're never easy. With Sue's extra hands (now THAT would have been interesting 60' up!) Jon did a very creditable job that he's quite proud of. Sue's having a difficult time locating our 3' (3db) steel VHF whip antenna, so we might have to buy a new one. If we do, we're thinking of a 6' (2m) power‑boat antenna, as we don't heel significantly so we don't need a regular monohull antenna, and a 6' (6db) antenna will give us twice the effective power.
When we bought Ocelot, she had 2 wind instrument bases on the masthead, but one only had about 6" (15cm) of wire. Soldering a new 5 conductor wire to the old one should have been relatively easy, but Raymarine (actually, Autohelm then) didn't use tinned wire, so the wires were rather corroded after 17 years at the masthead. So Jon gently sanded the wires until he got to nice copper, then soldered on the new wires. He cut each wire to a different length, so the connections are not next to each other. To waterproof everything he put 2 layers of shrink‑tubing on each individual lead, and another 2 layers over the whole joint bundle.
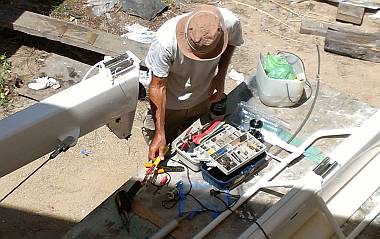 Jon's electrical work station by the masthead |
The last job was the new masthead light. This Aqua Signal fitting has 2 lights, an all‑around white anchor light on the bottom and a tri‑color (red on the left, green on the right, white behind) on top. It comes with special 10W and 25W vertical‑filament bulbs but we want to replace them with low power, high output LEDs. The anchor light is easy, and our LED supplier (Lighting Matrix) sent us one that we love. The normal 10W bulb puts out perhaps 100 lumens of light (for almost 1A of current) but our LED puts out almost 500 lumens for only 0.35A! That's 5 times as much light, and only 1/3 of the current. In a crowded anchorage, we find Ocelot just by looking for the brightest anchor light. For more about LEDs on boats, see our LED page.
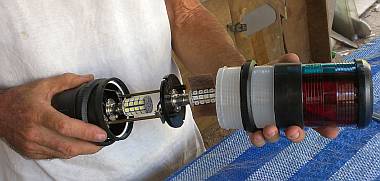 New LEDs (with baffles) going into our masthead fixture |
The tri‑color is a bit more of a problem. The vertical filament bulb is designed so that a boat in front of us sees a quick transition between red and green. But these LED 'bulbs' are about as thick as a thumb, so for a narrow angle directly in front of us, a boat sees light coming through both the red and green segments at the same time, and the brain combines these into yellow (or white, if the LEDs have the bluish cast of a 'cool' white color). So our LED supplier sent us a trial sample of a bulb with red LEDs on the left, green LEDs on the right, and white LEDs at the back. This certainly helped, but to make it even better, we glued baffles onto the bulb between where the segments change color. Houa helped us make them out of scrap formica, and after positioning them on the bulb, we held them in with super‑glue. There is still a (much narrower) angle directly in front where light is coming from both the red and the green, but it's so fine now that we don't think it will be a problem. And like the anchor light, this tri‑color LED generates more light (about 450 lumens for 0.65A) than the 25W incandescent that it replaces (which only gives us about 250 lumens for 2A).
Sue's other projects involved measuring the fenders in anticipation of making covers for them (we
hate to think of stained vinyl fenders rubbing on Ocelot's gleaming topsides if we go to a dock!).
And she took photos and stored them in the smart phone's "notes" section of the current galley
faucet, which is really too big. And she measured and photographed the need‑to‑be‑replaced electrical
switch plates in the cabins. We hope to make a jaunt to Home Pro this evening for some
consumerism (but our shopping trip was cut short by an invitation to go out to dinner with
friends ![]() ).
).
Thai Refit:
Ocelot Pages:<
Top Level: Home | Destinations | Cruising Info | Underwater | Boat Guests | Ocelot | Sue | Jon | Amanda | Chris | Site Map | Make a Comment
|
If our information is useful, you can help by making a donation |
Copyright © 2000‑ Contact: Jon and Sue Hacking -- HackingFamily.com, svOcelot.com. All rights reserved.