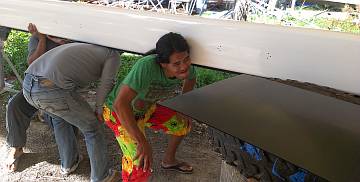
Lifting the mast to put it on support drums with tire cushions
109 Diamonds On
Summary: A very productive week, with many projects coming together! The projects are smaller now, so hopefully we'll be able to finish them faster. Team accomplishments this week include:
|
 Lifting the mast to put it on support drums with tire cushions |
Monday, December 2 -- Start Rigging Mast:
Wow! The day zoomed by. Guess time does fly when you're having fun!
And fun we had! First task of the morning was to release the mast from its hanging position (where it got sprayed) and raise it onto drums topped with tires and clean new "future board" to protect the paint. From that moment on, Jon was hot on the rigging project. We got the 6 lower spreaders all shoved into place, with only minimum paint scraping for the inserts. The uppermost spreaders took Jon a bit longer as the thick paint got in the way, but he eventually got them mounted as well. Baw tested the mast boot to be sure it would fit, and it does. Sue ran several trips to the storage unit to retrieve rigging pins and other hardware.
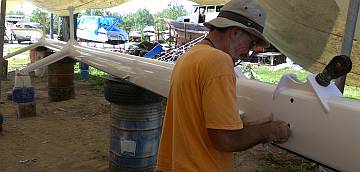 Ocelot's spreaders, with Jon working on the uppermost |
Ocelot's mast has 3 lower spreaders in a triangular formation - one forward and 2 swept back - about 20' (6m) above the deck, and 3 more middle spreaders in the same configuration about 17' (5m) above that, while the uppermost spreaders are the more normal straight‑across orientation. Each of these supports a "diamond" stay that goes from the mast, out to the end of the spreader, and back to the mast. These diamond stays are designed to keep the mast straight (in column) despite intense sailing loads. They were originally built using very strong rod rigging - a solid rod of stainless steel instead of the more normal stranded wire. We'd originally planned to replace these rods with new "Dynex Dux" rope that's as strong as steel but much lighter. However, lack of time is forcing us to put the original rods back. We'll replace the rods with the Dux at some later time - we have all the fittings except for a UV jacket for the Dux.
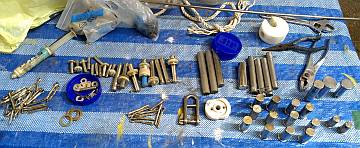 Only SOME of the rigging bits that need to go on the mast |
Chambron and Heru replaced Ben today as the polishers. They happily shined up the rigging pins and the turnbuckles for the first 2 pieces of rod rigging that we released from their "nest" under a neighboring catamaran. Just after lunch Jon realized that the end pieces of one of the uppermost rods were all polished, and, Oh My Gosh. We got the first piece of rigging mounted on the mast! Soon after the second uppermost rod diamond went on! It's starting to look like a mast again!
Heru and Chambron kept up with our demands for rigging pins, split‑pins, and turnbuckles, giving us shiny pieces to work with. By clean‑up time we had both upper diamond stays mounted, and they'd started polishing the actual rod, which is much easier to do in situ than when it's loose. We put the lower‑forward diamond stay in position, but its turnbuckle is very stiff so it needs more work.
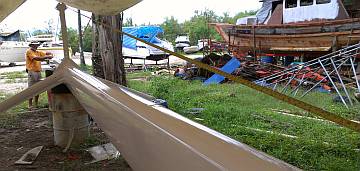 Sue & Jon had to measure the mast and the diamond stays |
One problem is that we don't know which piece of rod goes where. The 2 uppermost rods are thinner so they're easy, but the 6 lower rods are all very similar. We'd labeled them all when we took them off 2 years ago, but the ink has all disappeared, even though the tags were all shaded from the sun. So we had to measure both the mast where the diamond stays are to go, as well as the rods themselves - a tricky proposition as the rods all kink in the middle where they go over the ends of the spreaders. But our measurements yielded a clear pattern - the side stays are slightly longer than the front stays, and the upper stays are slightly longer than the lower stays - so now we know where everything needs to go.
Pla touched up some of his engine room paint and then spent most of the morning sanding and masking the 2 areas of the aft deck that need gelcoat attention. A small area under the starboard base of the targa‑bar has a color change line, probably from not stirring the new drum of gelcoat well enough. And the portside base of the targa‑bar is thin, with dark patches visible beneath it. And in preparation for the last "Ocelot White" gelcoat spray, Baw spent the morning sanding and masking the helm seat so that it can get a last thick gelcoating.
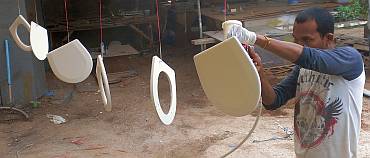 Toilet seats and covers getting a new lease on life |
Inside, Lek sanded some interior lockers in anticipation of brushing on satin varnish. He and Pla sanded the 4 interior steps in the afternoon, but not in time to get a polyurethane coat on. <sigh> Another day passed by without progress on that small, but day‑consuming job.
Sue has had a pet project in mind for many months. It has always seemed too trivial but today she attacked it. The wooden toilet seats in 3 of the 4 heads are mildewed and disreputable looking, and not a normal (replaceable) size at all. She unscrewed them all, presented them to Baw, and asked "What can we do?" When he started sanding them he realized they were painted wood, so he suggested that he could sand them down and get a layer of primer on today and topcoat them tomorrow. And voila! Three toilets seats and covers strung up and primed (Baw sprayed on Interseal 670) and waiting for tomorrow's topcoat.
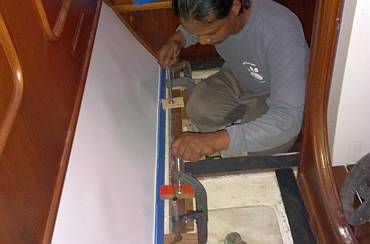 Mounting the teak floor-strip beside the white formica |
Baw's other small project was to stencil OCELOT on our cooking gas bottles. Sue ran off several possibilities on the computer this morning in different fonts. Baw chose one he was happy making, and asked Sue for some "sticker paper." It's not clear if she got the right thing, but Baw made do. He cut out the letters, stuck the sticky paper on the tanks and sprayed a name label on both tanks, in black paint.
Houa made good strides in the portside cabins. He shaped, cut, trimmed, checked, and finally mounted the teak floor trim next to the formica kickboards in both portside cabins. Only the starboard aft cabin left to do.
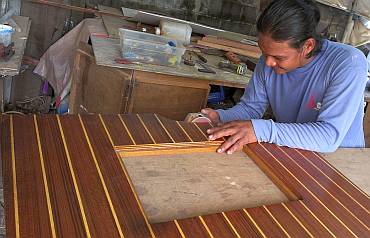 Houa sanding down a tight floorboard in his workshop |
Tuesday, December 3:
Another beautiful day in Paradise, with a few more important things checked off the To Do List.
Houa spent the day in and out of his wood workshop and the starboard aft cabin. There are 2 pieces of teak trim needed in there on the floor, up against the white formica. Unfortunately, in the weeks since he made the teak strips (and fitted them, but didn't mount them), one of them wandered off. We've looked everywhere. All we can think is that someone tossed it out as a "spare" piece of wood, as it's pretty short. Oh well. Luckily we have more teak on hand, so Houa shaped up a new one. He got both pieces installed with Sikaflex 295, and clamped to the underlying epoxy/filler frame. One of the teak and holly floors was too tight to lay down, so he trimmed up its edges as well.
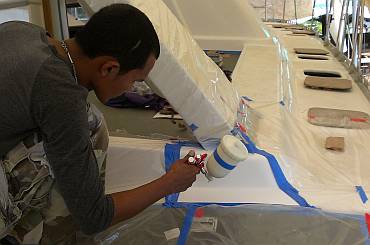 Fixing a gelcoat color-line at the base of the targa-bar |
Lek and Pla sanded interior spaces, starting with some lockers on the starboard side. We're not sure they need another coat of varnish, but once they were sanded it had to be done. We never actually learned if it was put on or not. But up in the salon and galley, several interior lockers had their gloss sanded and Lek got on a nice finish coat of Epifanes Rubbed Effect (satin) near the end of the day. He also got satin put on the top of the peninsula shelf, so it looks great. And at the very last minute of the day, he sanded and cleaned the steps to the cabins and got another coat of gloss polyurethane on. This way it can cure overnight without the worry of someone stepping there. We just hope the cat stays out!
Baw set up for a last Ocelot White gelcoat spray. He scraped together our last 1 liter of gelcoat and did a final check on the 3 areas that needed to be sprayed. The 2 areas near the legs of the targa‑bar were both small and only needed a little gelcoat. The helm seat got the lion's share and it was looking really good until a big insect landed on the vertical surface, slid down and wriggled across the seat, there to get stuck. Good thing Baw and the men are good at gelcoat repairs. So that marked the end of the last drum of Ocelot White. But we still have a few little "dit‑dot" repairs to make so Baw used his artist's eye and gelcoat colors to create an off‑white in Thai gelcoat that comes pretty darn close to our own Ocelot White. We'll see how those dit‑dot repairs look when they're sanded back.
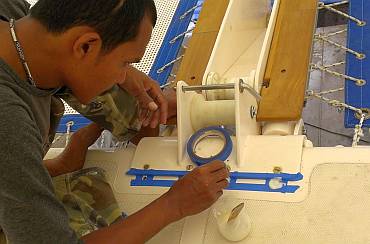 Baw filling 4 no longer needed holes in the foredeck |
Baw also mixed up epoxy and silica to fill the 4 extraneous bolt holes just in front of the anchor winch. These were originally to mount the anchor support bracket, but then the bracket had to move when the forebeam had to be moved. Now the holes are filled but they're visible, so tomorrow he'll sand them down and touch them up with his new Thai Ocelot White gelcoat.
Ben was back and resumed his duties as polisher. He helped cart the last 4 pieces of rod rigging from under the neighboring boat, and seemed happy to see his efforts turning into real rigging.
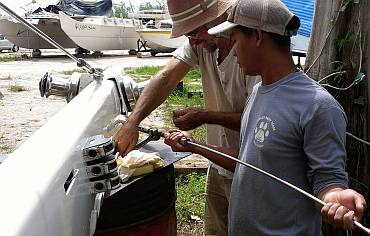 Jon and Heru installing the starboard lower diamond stay |
Jon worked on the mast all morning, pinning spreaders in place and cleaning excess paint out of holes. He and Heru worked together to mount 3 more of our rod diamond stays, so we've only got 2 more to go. It sure is great to see the rigging on there! Two rods came too close to one of our support barrels, so we had to gather all the men together for yet another mast‑lifting so we could reposition the offending barrel.
We had some errands to run in Phuket Town and Boat Lagoon, so Jon scootered off mid‑afternoon. His shopping trip was mostly successful.
As usual, Sue had her hands in many things today (none of them pie!) She played mechanic, removing the old anode from starboard sail‑drive, and then had the fun of washing/scrubbing/scouring the bolts in diesel to clean them up for the new anodes. She also showed Heru and Ben how to disassemble the turnbuckles so the bronze rigging screws can be cleaned. More wire brushes and diesel hands. She ran errands, of course, and on one managed to fit in a visit to the seamstress who is doing our mattress covers. With cling wrap around the foam it's really easy to slip on the cover to check it. Sue asked the woman to make the cover as tight as possible. Not sure that idea got across, but we'll see. The finished covers won't be ready until maybe Saturday, but that's OK, as they would just fill up the storage room.
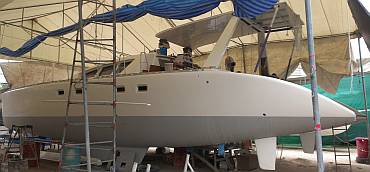 Ocelot's coming along, slowly but surely |
Pla sanded the new gelcoat at each leg of the targa‑bar and got them all the way up to 2000, so they're ready to polish. Yando and Chambron sanded the helm seat's new gelcoat in the afternoon, and got it smoothed up to 600 grit. The insect trail still shows and will need some special attention tomorrow.
Wednesday, December 4:
A hazy, and eventually almost drizzly day, but temperatures are still on the cool side (for Thailand
- 82°F/28°C) so that's nice.
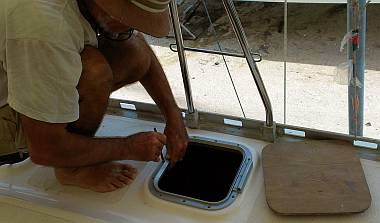 Jon marking out where to drill the mounting holes for a hatch |
Baw and Ben were both gone all day. Not sure why, could be sick or could be school stuff for Baw's daughter. Tomorrow is the King's birthday, so there are lots of special school things, and most places will be closed tomorrow.
Yando took over the helm seat gelcoat polishing, and by the time he was up to 800 grit there was no longer any sign of the insect death throes. By mid‑afternoon he had finished all the way though 2000 grit. Next step: machine polishing and waxing. Our guys don't seem to do waxing on the boats they work on, but everything we've read says that a good marine wax on the gelcoat helps it repel dirt and pollution and retards UV damage. Makes sense to us. Are we missing something? Suggestions appreciated!
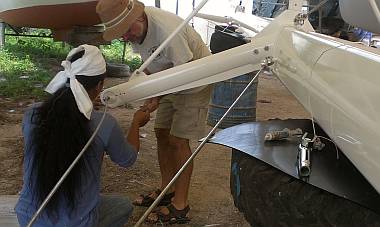 Heru and Jon fitting a spreader tip around the rod rigging |
Chambron and Heru began the day on stainless steel polishing jobs. They finished the rigging pins and the turnbuckles on the ends of the last 2 rod rigging pieces. Sue kept bringing out more bits and pieces to work on. Heru got the fun of playing with paint remover to strip the old paint from the 4 aluminum folding mast steps and the radar mounting bracket. His fiddly job of the day was to strip the paint from the metal basket that is essential in our fridge to keep things organized in the vertical space. Jon cut and created it in 2002, and we can't find another like it. So it will get primer and topcoat along with all the important things like mast steps. We brought the last big stainless project from the storage room, the helm seat support, so that was Chambron's afternoon job.
Jon began the day with the small hatches. His first thought was to assemble all the tools, try one hatch, then teach Heru (and Baw, if he'd been there) to mount them. It's fiddly work, but very repetitive, with over 200 holes to drill and tap for the 17 hatches. But in drilling the bolt holes and tapping them, he realized that there was just too much engineering involved to turn it over to our workers. Messing up the bolt holes can be a real hassle, and it was too easy to do, as Jon discovered. Sometimes the tap would get stuck and then strip its own threads, or the drill could go in at the wrong angle. Sue sat nearby playing "dental assistant" with the vacuum cleaner to minimize the epoxy dust inside the boat. With one hole messed up in the first hatch Jon did, we decided to buy about 10 longer bolts that can be put all the way through the hatch coaming and held with a nut.
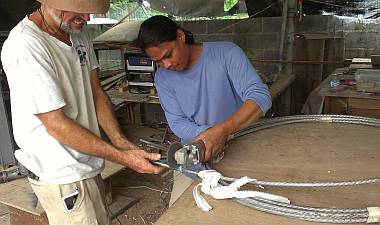 Cutting a big stainless swaged stud off our old headstay |
The original plan was to continue the hatch project all day, but just before lunch we realized the last 2 rod rigging pieces were ready to be mounted on the mast. So we blithely decided to "quickly mount them, have lunch, then do the hatches." Ha! It was not to be. The first went on as quickly as each of the previous 6 had, with just a bit of paint scraping inside pin holes. But the last piece - Yikes. The threaded rod (bronze rigging screw) just refused to go past the 17th thread in the turnbuckle barrel. We cleaned both parts repeatedly, and Jon made a tool to scrape out the threads inside the barrel, all to no avail. Eventually we retrieved our old headstay, cut off the swaged on stainless stud from the bottom (which had the same thread) and ran that up the barrel. This seems to have finally sorted the threads out. A bit of lanolin grease on the threads and late in the afternoon we were able to mount the last rod.
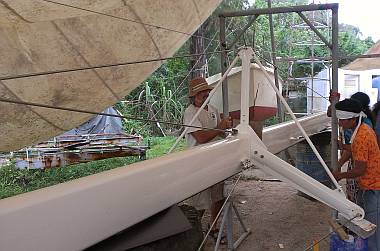 Tomorrow we'll suspend the mast from these scaffolds |
It was after 4pm when the 8th and final diamond was in place. Next project on the mast is to get it as straight as possible, using the turnbuckles on the rod diamonds. For this, Houa created 5 surveying blocks to sit on the mast at each end and at the 3 sets of spreaders. He got the middle 3 made, but didn't quite understand the point of the end ones until we demonstrated how we were going to run a string from the ends through the larger holes in the middle 3, to see how straight the mast is. The men moved 3 metal scaffolds back in place over the mast and tomorrow Jon will hang the mast from the spreader‑mast junctions and get to work making it straight. At least, that's the plan.
Sue finally got some time in the storage room to measure all the fenders for new covers. They are incredibly grungy now, and may not clean up as they were impregnated with coal dust and oil from our last big docking in Chennai, India, in 2011. Anyone have success getting black sticky grunge off of inflatable fenders?
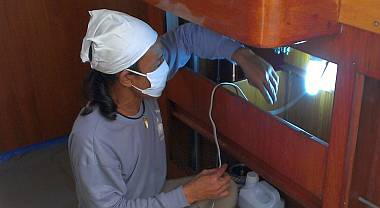 Lek got a coat of satin varnish under the nav-station |
Inside Ocelot, Houa finalized the floor boards in the starboard cabins. Lek sanded the new teak border strips and got polyurethane on them. In the salon, Pla and Lek sanded odd places that needed more varnish or polyurethane: under the nav‑table, on top of the peninsula shelf, the sill to the galley, and finally the steps to the cabins (again). The sanding happened all day, then at the last hour everything was cleaned up and vacuumed, and Lek could get the new polyurethane on without fear of folks walking in it. We had to take the ladder down from Ocelot because Turtle, the yard cat that has adopted us, has decided that Ocelot's tramps make an excellent nighttime resting place. We don't want cat paw prints in the new varnish!
Thursday, December 5:
A bit of a forwards/backwards day, as we made some great progress on the mast, but slid sideways on
varnish.
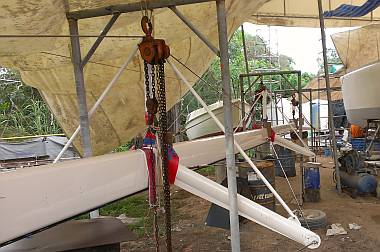 The mast suspended from 3 chain-hoists |
The exciting news of the day was Jon's attempt to tension the rigging while getting the mast straight. Sue located all the bits and pieces for the final 2 spreader poles, and Jon got those mounted quick‑smart. He tweaked the mast rigging a bit and then borrowed 3 chain‑hoists from the boatyard. The object of the exercise was to suspend the mast from the spreader bases, make sure it was level, and then tension the diamonds while ensuring that the mast remained (or became) straight.
Sue, ever watchful of the paint job that we've worked so hard to get, protected the mast from the support ropes with future board, vinyl cloth, and carpeting. Hoisting the mast above its supports took only seconds once everything was setup, and Jon sighted along the mainsail track. The mast was straight horizontally but had a noticeable bend to the left, which was not unexpected. To help with tracking mast movement as we tweaked the diamonds, we'd already asked Houa to make us 5 boards that fitted snugly to the mast and all had a hole in exactly the same location. The 3 boards with 1" (25mm) holes were mounted at each set of spreaders and the 2 boards with tiny holes were put at both ends of the mast. Then Jon strung a 60' (18m) length of monofilament fishing line through the holes, and pulled it tight enough to remove any sag. Then all we had to do was tighten the diamonds until the line went through the middle of each hole.
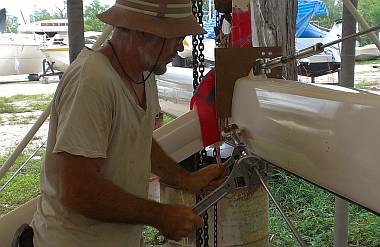 "Tuning" the mast - note sighting board with nylon string |
Which is easy to say but something else again to do, as each diamond stay affects the others, as well as several of the sighting positions, and the side diamonds are not at right angles to the mast. With Sue watching how the line went through the holes and calling out positions to Jon, he tightened each of the 8 diamond stays until the line went through the exact center of each hole. It took several hours of tweaking and twiddling with big wrenches (the loads on each diamond stay are over 1,100 lbs/500 kg) but it actually went faster than we'd hoped. The sighting line and the target holes made things MUCH easier and much more accurate than, for instance, sighting down the mainsail track.
Of course, we're suspending the full weight of the mast on only 3 points, and the loads will change when it goes vertical, but for now we've got the mast in‑column within about 1/8" (3mm) over its entire 60' (18m) length, and the rigging tension seems about right. We've left it suspended for the night, to see if things settle and/or change by morning. If not, we'll lower it back down and let it rest on the tires and barrels once again while we finish preparing it.
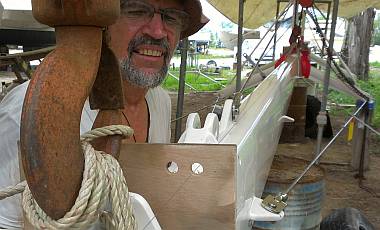 Checking a sighting hole - string right through the middle! |
The sideways step came from Baw, of all people. Sue urged Baw to join her in the boat to look at the varnish in the cabins. Although we had marked off "Varnish Cabins" from the To‑Do‑List long ago, we knew (and Baw agreed) that there were some areas of overspray that made the varnished walls a bit rough to the touch. They'll attract dust so keeping them clean would not be fun. So we were surprised to hear Baw's excuses for why the surfaces were rough. "Not easy, inside, you know. Too much overspray." Or "Will happen same‑same again." It was frustrating to feel like we had to argue our way into requesting a "repair" job. It's not like we were blaming Baw or saying he had to do it again without pay. It is our choice to have those rough areas re‑sprayed, or at least sanded and brush repaired. Sue tried to point out that he had whole walls that were great, and whole big horizontal shelf areas that were great (where obviously no varnish drifted down from above to "grit" up the surface). Probably just human nature, but Baw wanted to look forward, and put the varnish job away, without having to readdress it. Jon's not sure Baw has enough experience with the spray gun to see it as an engineer and figure out what makes what happen. Too much air maybe leads to too much overspray in small areas.
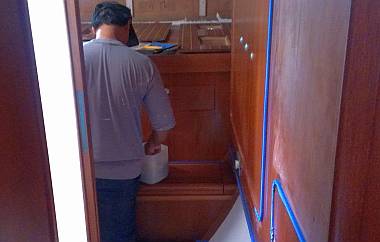 Pla sanding rough varnish in the starboard aft cabin |
Our compromise for the day ‑ Sue marked those walls and flat surfaces she wasn't happy with. Baw used blue tape to surround areas to be re‑done, and Pla spent the day sanding the rough satin varnish. When Baw left at 4pm, he was still unsure whether he would spray all those places or brush some and spray some. At least we made progress towards the amelioration of the rough varnish.
Ben and Yando made great progress polishing the helm seat, including the gangly mechanism for holding the rotating seat in the upright position. We think there's only 1 "footpad" left to polish tomorrow. Further on the helm seat itself, Baw found areas on the back and bottom of the seat that were thin on gelcoat, as in we could see through it. After a bit of griping by Sue (it was not her best day) that the expensive Ocelot White gelcoat is all gone, and the back of the helm seat was supposed to be re‑sprayed with it, Baw suggested that we spray it with Thai gelcoat. OK. Since it's the bottom, and won't be holding water like the top of the seat, we agreed. Baw worked hard with his artist's eye to create a color match in the Thai gelcoat to our special Ocelot White. He masked off the top and sides of the seat, and sprayed on over a liter of his specially tinted Thai gelcoat. It looks great. Tomorrow we'll get to see how the two colors match. Even if they're not perfect it won't matter, as they meet on a sharp edge.
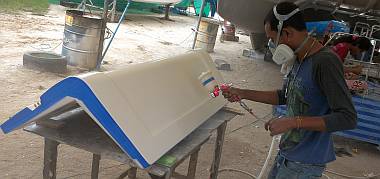 Baw spraying Thai gelcoat on the back of the helm seat |
Sue got another funny little project started and half finished. The overboard pole which we've carried since 2001 has faded to white, and been re‑painted in bright orange at least once but it was due for another overhaul. So Chambron had the pleasure of sanding the fiberglass pole, then spraying on a car finish day‑glow orange. Yow! Bright! Now to guard against color fade we need to top coat it with either a clear 2K spray, or maybe even our nemesis, Nyalic, which should be fine over paint and fiberglass.
As for those pesky, nasty fenders, Sue started a cleaning project to test some of the 14 different approaches recommended on the internet, but got sidetracked, so more on that tomorrow.
The men all left at 4pm to celebrate "Papa's Day" (the King's birthday) so we anticipated a quiet hour to ourselves to play with the hatches. We got another hatch rim drilled, but then Jon's battery drill (which he uses to tap the bolt holes) ran out of juice, and the second battery hasn't been charging, so we called it quits.
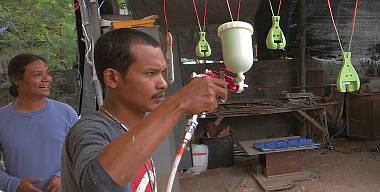 Spraying the folding mast steps. Wire brush? What wire brush? |
Friday, December 6:
Another day of ups and downs, with mini‑projects finished, a visit from good cruising friends, and a
sunny but hazy day.
The morning got off to a rollicking start, as Baw set up and sprayed green anti‑corrosive primer on the 4 aluminum mast steps and our fridge basket. A couple hours later he was able to turn the step platforms and get the top sides sprayed as well, so they are all ready for white undercoat next.
Then things slowed down, as Baw sat with the men and hand polished the bronze barometer. We never should have pulled it out. It was probably too tempting to ignore. Despite Sue's request for the men to mask and clean the battery compartment so that it can get a rolled‑on coat of gelcoat, nothing happened.
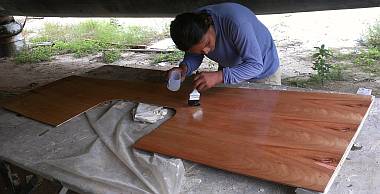 Houa epoxy coated a headliner board that had to be remade |
Nearby, Yando, Heru and Chambron were hand sanding the back of the helm seat's gelcoat. Ben was finalizing the stainless steel polishing. Sue got Ben to scrub a couple of the oil and grit covered finders using a stiff brush and bathroom cleaner which we suspect is a lye‑based chemical. Ben scrubbed hard, and got them looking a lot better than Sue did, so he's just given himself the job of doing the other 4.
Jon's morning was a great success in that the mast had not moved at all overnight in its suspended position. Which means the rigging is tuned nicely. It took just a few moments to lower the two outer chain‑hoists and return the mast to the barrels. While it was suspended only in the middle (on the second spreader) it was still rigid and the base was heavier than the top, which means we will be okay raising it from the 2nd spreader when the crane picks it up. Once the mast was back on all the barrels Jon tended to some details like checking split pins. He's putting together a shopping list for the next time he has to venture north.
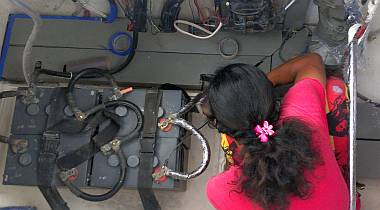 Chambron started masking off the battery box so he can sand |
Sue started the day inside the starboard forward cabin under the bunk where the stainless steel "shore water" tank lives. She removed the access plate and the (nonfunctional) water level sensor and peered inside. The water was clear and clean and looked excellent. Tomorrow we'll set up a siphon to remove any grunge that may have settled to the bottom, but we're not expecting much. Ben polished up the access plate, and Houa cut us new rubber gaskets. We still have to check the portside tank, but we couldn't get over there due to other work.
That other work was Lek and Pla sanding and masking the port cabins for a second satin varnish spray. They spent the day getting everything ready and Lek got a coat of satin on the side steps in the late afternoon, but there was no spraying today.
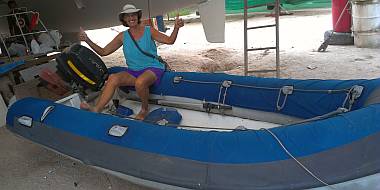 Tomcat, our inflatable dinghy, was delivered from storage today |
The weird part of the day was when Baw invited Sue into starboard hull and pointed to the all the plastic masking, saying how hard it was to do the satin spray. "Not easy, Madam. So much plastic here and here and here." Sue kept her cool and pointed out that "hard" didn't matter, that it was work for Baw to do, and he could do it or not. "No can make nice, Madam," he said. Sue showed him places he had done a beautiful 100% job before, but he countered that there was no 100%. She said to do his best. "No, can not do in 1 day, Madam." Okay, do a little bit 1 day, then move the plastic and do another place the next day. Interestingly it was Heru who understood the majority of what Sue was saying and played translator, apparently with some success, as Baw agreed to do his best. The men carried on sanding and masking, and by end of day it was all set up for one spray tomorrow and one the next day. At least that's what we understand. The frustration is that when Baw had finished the first satin spraying months ago he told us he wasn't happy and had some "repairs" to do. So why the reluctance now?
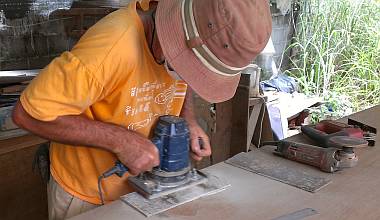 Jon's hat sanding the supports for the shower drain systems |
Sue took off to run errands before she screamed. One cold green tea and a successful visit to Cholamark, the dinghy manufacturer and storage place put her in a better mood. Cholamark was generous and waved a month of storage fees, and agreed to return both Tomcat(our inflatable dinghy) and Nikka (our sailing dinghy) right away, all the way to Coconuts yard. So at 4pm we welcomed our 2 wandering dinghies back into the fold. Baw welcomed Sue back as "Boss Lady Owner" with a big smile. With Tomcat's arrival the men have another job: sand and paint the interior aluminum floor. We last did it in Fiji in 2005, without the benefit of an aluminum primer or tie‑coat before the topcoat.
Sue was also happy to see both Heru and Chambron in the battery compartment masking off the wires and hoses. Tomorrow they clean and gelcoat. Yay! Houa took off at noon as his work and Baw's were in conflict inside the boat, but he did get the forward cabin headliner re‑cut and epoxied.
Jon wanted to get the shower drain box project set up so that Baw can finish it. But the fiberglass brackets that support the boxes in the bilges had disappeared. After looking all over for them, Jon found some old bits of a fiberglass hull and cut out new supports. He had to chisel and sand the old antifouling off but they should work OK.
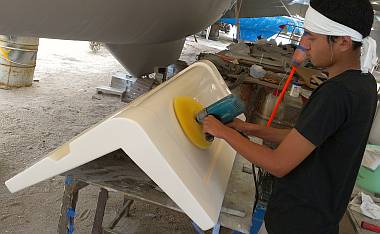 Ben got the helm seat & its stainless hardware nicely polished |
Saturday, December 7:
A beautiful day, or as we say, a Buddha‑ful day, meaning the Big Buddha statue on the hill
above Chalong was visible and bright all day. No low clouds and no rain.
Our main goal for the day was to get the cabin varnish re‑sprayed. Once the local chandlery opened at 8:30 Sue and Pla scootered (separately) down the road, Sue to pay with credit card and Pla to carry the new cans of Epifanes varnish and spray thinner and the 5' (1.5m) roll of cling wrap plastic. Our starboard forward cabin needed 2 areas re‑sprayed but each of the other cabins only had 1 area. It took Lek and Pla much of the morning to finalize the spray tents and access slits and to set up the extractor fan through the emergency hatches.
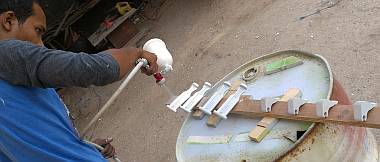 Baw sprayed mid- & topcoats on our mast steps & jam cleats |
Meanwhile Baw sprayed other things, like the mast steps and our fridge basket, all hanging on a rope at Ocelot's bows. By spraying this white primer in the morning, Baw could spray the topcoat that afternoon - which he did, so another project checked off.
Baw disappeared into the boat for maybe half an hour to repair the varnish in the cabins. First he sprayed the vertical walls that needed it, then he returned to the starboard forward cabin for the seat. There was lots of joking about his varnishing being 120% or even 140%. We haven't been able to go into the spray areas yet to check the feel of the walls. Fingers crossed that they are satin smooth, not gritty with overspray or dust.
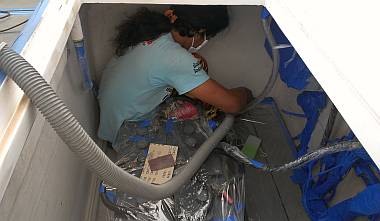 Chambron made good progress sanding the battery compartment |
Houa spent some time sanding the new headliner plywood that will go over our starboard forward cabin. Yesterday he removed over 100 staples from the old one that had been erroneously covered in new vinyl. We need to preserve that new vinyl to use on the new plywood, but we were dismayed to see signs of corrosion on some of the staples that are only a year old. Not great stainless steel, even though they are not (very) magnetic.
Searching for truly stainless staples was just one of several errands on Jon's To Do in Phuket list. He scootered off as soon as Sue returned from the chandlery, heading for Kittipan, a hardware store cum chandlery in the heart of Phuket town. Houa had suggested that they might carry better stainless steel staples. Jon took samples of the staples we'd bought for the headliner last year and a strong magnet. Kittipan had (nominally) stainless staples that were also not (very) magnetic, but the box was all in English (instead of Chinese/Thai) so he bought a $12 box to try.
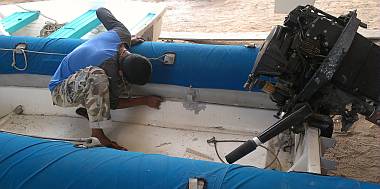 Baw and Heru started working on Tomcat, our big dinghy |
Jon was also in search of a replacement 12v Lithium battery for his Ryobi drill and a new (real) Dremel as the Chinese knock‑off we bought broke its chuck and is now useless. The Dremel was pretty easy to find at Bangkok Hardware, but Ryobi doesn't seem to be well represented in Phuket. On the way back Jon stopped at Rolly Tasker sail loft to see if J.P., the French rigger, could come to Ocelot to give a second opinion on the tension in our newly mounted rod rigging. J.P. doesn't often leave his office and would rather do the rigging check once Ocelot is on the water. Jon had a successful morning and returned with BBQ'd chicken, chips, cold water and soda for our daily picnic lunch on the beach.
Sue meanwhile was supervising the men's projects. In searching for the key to unlock Tomcat's outboard, she came upon our 6 matching, still working locks we use on the cockpit lockers when we close up Ocelot to travel ashore. They were barely recognizable as bronze (now green) and the shafts were badly corroded. So she gave them to Ben, our lowest paid worker, and he spent half a day on them, much to the amusement of others. We later learned they thought the locks were worth about 20 baht (US 65¢) each. We assured them that these were not cheap throw‑away locks, and were worth cleaning up as they had served us for many years!
Sue hauled out 2 more disgustingly black fenders and Heru was happy to play with water, bathroom cleaner and a scrub brush. He got about half of the grunge off, then with our OK wiped them with acetone. Concerns about the vinyl turning sticky were unfounded, although the colored ends were more prone to reacting to the acetone than the white centers.
Yando and Chambron were crowded together in the cockpit battery compartment all day. The morning was spent masking and taping the electrical wires and the drain hoses, then sanding the old gelcoat walls, floor and ceiling. They had hoped to roll gelcoat today but didn't get that far. Monday, Monday.
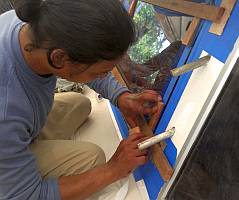
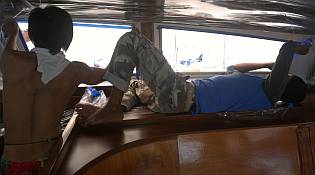 Insides of the window frames were carefully masked |
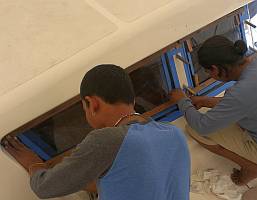
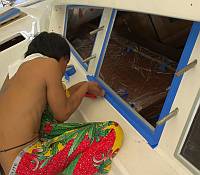 Outsides were also masked |
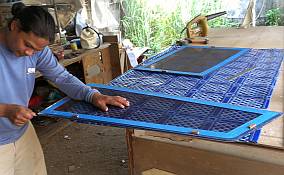 Note positioning blocks glued to inside masking |
Houa worked on remounting the acrylic windows for the salon, and grabbed Yando to help him. The windows (which Baw had polished for us) had to be cleaned, taped carefully, and sanded on the edges where the sealant was to go. After lunch, when the interior varnish was dry enough to not worry about dust, Baw joined them taping and cleaning the frames of the windows. Houa used a clever trick - he put blue‑tape on the gelcoat (to protect it) and super‑glued wood pads to the tape. He also super‑glued small positioning blocks to the tape on the insides of the window panes, so the windows would be correctly positioned in the middle of their frames.
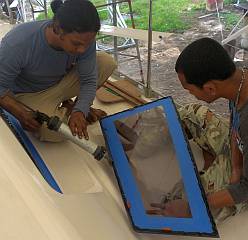 Both window & frame got beads of silicone |
Note wood pads super-glued to the blue release tape |
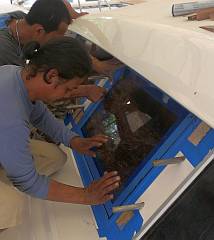 Window is pushed into position |
To mount the windows, Houa used his big silicone gun to put a heavy snake of black Sony silicone sealant around each frame and on the edges of the first window to go in, then he and Baw pressed it into position. They super‑glued pre‑made wooden battens across the windows onto the previously positioned wooden pads on each side of the window, then Houa tapped wooden wedges between the battens and the window to keep the window pressed firmly into its frame as the silicone cures. To our pleasure, the men worked quickly and efficiently, and soon they had the second window wiped, siliconed, and pressed into place. Two windows replaced and another big job crossed off the list! Now we can reinstall the portside louvers. Yay!
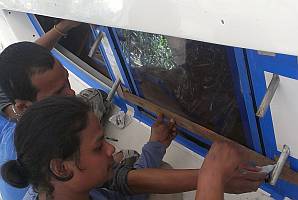 Precut battens were super-glued to wooden pads |
 Wedges pressed the window into place |
 All was repeated for the forward window |
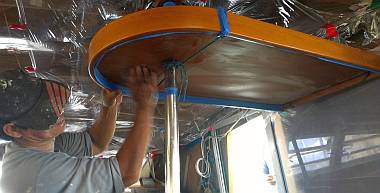 Pla raised and sanded the galley shelf above the fridge |
Other accomplishments for the day: the inside steps got their coat of satin varnish over the gloss, so they may be finished now. Pla raised and sanded the bottom of the peninsula shelf so that it can begin its series of varnishes next week. Sue set up a rust test on the "stainless" steel staples to see if we detect corrosion on either the old or new ones in a week or so. Ben got the gelcoat on the back of the helm seat polished, and its hardware is all polished and ready to mount. Baw and Heru began work on the dinghy: Heru taking the outboard cover apart to repair and re‑paint, Baw beginning the hand sanding of the old paint up near the hypalon tubes. The floor itself can be power sanded, but we don't want sanding tools near the fragile inflatable material. And perhaps the best, Houa managed to replace the gasket at the bottom of our entryway door without having to remove the door itself (a huge job now that it's sealed in). Now the door slides easily again!
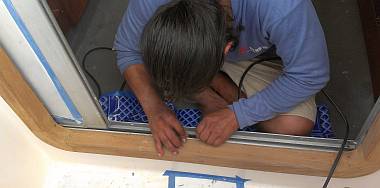 Houa was able to replace the entryway door gasket! |
Jon used his new (real) Dremel to cut away the broken aft stanchion base that's been frozen to the starboard toe‑rail. Once it was gone, he was able to check the positioning of the pushpit (the stainless steel structure where the lifelines end). We were, of course, without the correct bolts to mount it, so at 4:45 Jon scootered off to the local "Chinaman shop" to find the right bolts.
Sue organized the wages and the men raked the yard and put away tools. At our request Baw ran up to "Seven" (as they call 7‑11) to get Sprite and "soda manau" (Schweppes Lemon) for everyone. A good end to a good day.
Thai Refit:
Ocelot Pages:
Top Level: Home | Destinations | Cruising Info | Underwater | Boat Guests | Ocelot | Sue | Jon | Amanda | Chris | Site Map | Make a Comment
|
If our information is useful, you can help by making a donation |
Copyright © 2000‑ Contact: Jon and Sue Hacking -- HackingFamily.com, svOcelot.com. All rights reserved.