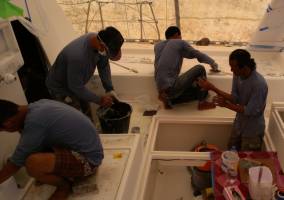
Baw (middle) smearing filler on side seats ...
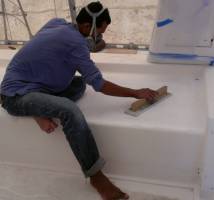
then sanding it smooth for gelcoat
82 Cockpit Gelcoat
Summary: A lot of cockpit work this week, first sanding the gelcoat but then adding filler to the big beds on either side, smoothing them down, and spraying more gelcoat on the beds and the entryway. But instead of borrowing E‑Us compressor, we finally broke down and replaced the motor on our compressor (and repaired the cracked engine mounting bracket). Baw also sprayed the rope/scuba shelves, the 4 internal fo'c's'le hatches, and the 4 plastic‑wood pieces that go in the bathrooms. Houa spent some time trying to create the interior trim pieces for the 2 new forward hatches but got frustrated so we asked him to install the acrylic in our 10 newly powder‑coated deck hatches and 2 big fo'c's'le hatches instead. Sue is learning to use the scooter more so she published her scooter driving instructions. Sue also spent many hours sanding and polishing the forebeam and sorting and cleaning all the many bits for the hatches. Jon filled and sanded the old handle holes on the 2 chain‑locker hatches, and mounted our washing machine shelf in the port fo'c's'le. Mike delivered the many nonskid panels that he's cut, sold us a new liferaft, showed us a sample of the mast steps he's making for us, and showed us samples of the 316 hose‑clamps that AME carries.
Monday, May 27:
Back at work Monday morning, after our normal 1 day weekend. No Memorial Day for us! But
a nice bright blue sky.
Houa continued his carpentry magic on the fiberglass hatch interior hatch trim. He's got to shrink them down to fit the hatches, so he sanded the interior and added a new layer of glass. He also cut up more 1/8" (3mm) plywood for the 15 nonskid templates that still need to be created.
 Baw (middle) smearing filler on side seats ... |
 then sanding it smooth for gelcoat |
Our Mighty Foursome spent another day in the cockpit. Ben and Pla sanded the helm area and the surrounding vertical walls. Baw and Lek prepared then put filler on the 2 side benches -- the areas we have decided to NOT put nonskid on. So of course they need some filler (this IS Thailand) to make sure they are flat flat flat. So polyester filler was smeared on, left to harden and then sanded down.
Tomorrow is supposed to be another big cockpit gelcoat spray day, weather permitting, so Baw gave Sue a list of all the things he needs, like more plastic sheeting, duct and masking tape, filters for the breathing masks, and she scootered out for them. This used to be Amanda's job, and Jon's before that. But now Sue is getting more adept on the scooter, so it was good practice.
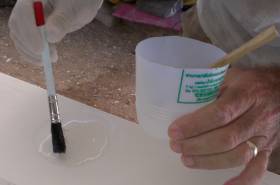 Dribbling epoxy into the low area of the hatch ... |
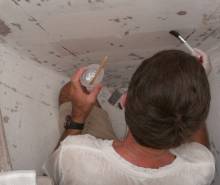 then painting epoxy on fo'c's'le wall |
Jon put more epoxy on the chain locker hatches, where he'd sanded Baw's filler a bit too concave. Then he tackled the washing machine bracket in the port fo'c's'le. Sweat sweat. To attach the "L" shaped fiberglass bracket that he made last week, he cleaned the aft bulkhead with acetone, painted epoxy resin on the wall and the bracket, mixed up epoxy mud with silica and micro‑balloons, smeared that on the bracket, skloobed the bracket onto the wall, and screwed it in place. Then he epoxied several more strips of glass above the bracket (and onto the shelf) and a few around the bottom.
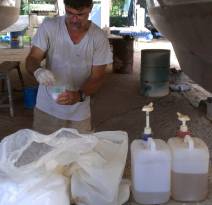 A stiff epoxy mud was mixed up ... |
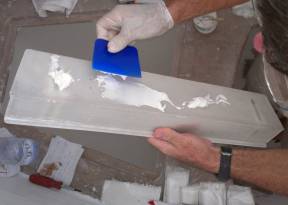 and smeared on the new washing machine shelf |
Sue gave herself a Boatyard Manicure again, with aluminum dust under the nails and around the cuticles. Charming. But the goal of prettying up the little corners of the forebeam for Nyalic treatment was met. She spent hours (and several layers of skin) on the tough finger sanding, then treated herself to some smooth sanding with 600 grit to give the forebeam a brushed glow. There is a date with Nyalic in the future, but maybe not until next Sunday.
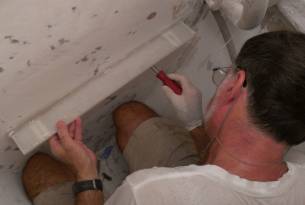 The shelf is temporarily screwed into position ... |
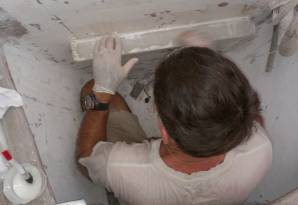 and some more glass is epoxied on for strength |
Mike Cherry came by late afternoon to bring us 2 more 20 liter drums of gelcoat, some sample 316L stainless steel hose clamps (like gold here in Phuket) and a sample of a new aluminum mast step, modeled on our old stainless (plated with bronze and chrome) ones. He said he's making good progress on the nonskid, which is always good to hear, but he didn't give us a date for when he'd like to come stick some of it down to Ocelot's decks.
Jon was out for the afternoon, having to visit the local dentist to have a molar pulled, so Sue held down the fort and ran her Scooter errands. Which led to...
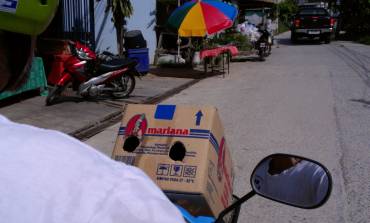 Transporting Turtle (in the box, in the scooter basket) to the vet |
Tuesday, May 28:
A good day to ignore the WindGuru
website as they predicted not a stitch of cloud or rain, and we had a thunderstorm in the early
afternoon. We find they're right about half the time, just like flipping a coin.
The most unusual event of the day was our transporting the yard cat, Turtle (so named because of her tortoise shell coloring) to the local vet. We found a double thick cardboard box and Jon cut air/viewing holes in three sides. Then he picked up unsuspecting Turtle by her legs, upside down (she is totally placid about this!) and plunked her in. We had to tape the box shut with duct tape because she was very indignant and determined to get out. Turtle defends her territory against the 5 big boatyard dogs, so she knows how to fight.
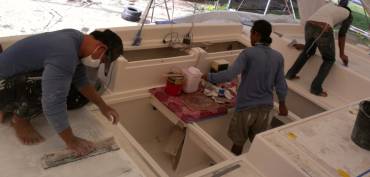 Pla sanding, Lek mixing, and Baw spreading filler |
With Turtle in the box in the scooter basket we rode most of the way back towards our apartment to the Andaman Pet Hospital. The vet was great, giving Turtle a careful examination with an ultraviolet light(!) for signs of ring‑worm lesions. None! Yay! So the fungus Jon picked up must have been from the kittens he cuddled over a month ago, at his birthday party in Ao Po. Apparently ring‑worm is an airborne fungus, so it can stay around on furniture, etc, and is not necessarily picked up directly from the cat. Anyway, the cursory health check and weighing and temperature taking and ring‑worm check came to a staggering US$3.30. Turtle was very glad to be back in the yard, and she seems to be a most forgiving cat as she didn't hold a grudge about her treatment.
It was a strangely quiet day on Ocelot as the Team of Three (young Ben was out getting his driver's license) spent the day putting down filler, sanding and long boarding it off, and cleaning things up for the gelcoat spray. The spray is now scheduled for tomorrow, so at the end of the day the guys were stringing up masking plastic, once again.
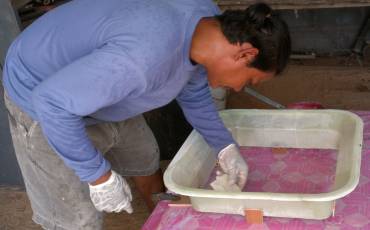 Houa shaping the hatch trim to precisely fit the hatch |
Houa carried on with the shaping and sizing of the new interior hatch trim. They will be gorgeous, which is good because we'll lie in our bunk and stare at them every day! The plan is for Baw to gelcoat them, but probably not tomorrow.
Jon cleaned up his fiberglass work from yesterday and declared the washing machine shelf officially finished. He also finalized the epoxy filler sanding on the chain locker hatches.
Sue worked on cleaning up the gazillion bits and pieces of hatch hardware for the cabin and salon top Goiot hatches. Just in time, too, as Mike came by with the first half of our newly powder‑coated hatches. Wow are they gorgeous! Silver and shiny. At about $40 per hatch it was a bargain for resurrecting 20 year old hatches. They were given a boiling bath to remove the salts, then powder‑coated (some up to 4 times) and then a couple layers of 2K clear‑coat.
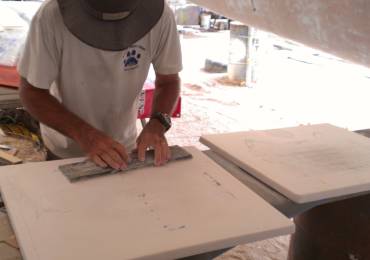 Sanding the filler on the chain-locker hatches |
Jon, Sue and Mike (AME) spent a lot of time discussing options for replacing the broken Goiot hatch handles and hardware bits. Getting parts from Goiot is like pulling teeth, and they charge for each inhale and exhale. Also how to re‑line the anchor bracket with plastic like it was, or even whether to bother. Mike had brought a beta version of a new aluminum mast step to replace our old heavy bronze and stainless steel ones and he and Jon discussed the pros and cons of the style and how to improve the production versions.
We also discussed the chain‑stripper and chain hawse‑pipe for the anchor windlass. These are mounted on a separate stainless steel plate that used to be recessed into the teak and mounted under the anchor winch. We talked about cutting the plate so it can be mounted next to the winch without having to go under it, but we eventually decided to use a router to recess the deck where the plate goes. We'll probably hit some balsa that will need to be removed and replaced with epoxy mud, but this was deemed easier than other options.
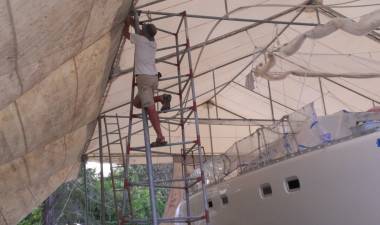 Jon, high in the air, replacing the guy ropes for our tent & awning |
AME carries 2 types of 316 stainless steel hose clamps, one that's about $4 each and the other, which is beefier and very nice, for about $8 each. For comparison, 304 stainless steel hose clamps are about $1 each, but are prone to rusting and falling apart. Since we need probably 100 of them, Sue spent the last half hour at the yard photographing all the hose clamps in Ocelot's bilges so we can come up with a reasonable inventory of what we need. Something is weird here, but she actually had FUN doing it. In truth, all of this is very exciting, because it has to do with reassembling Ocelot!
Jon's late afternoon project was to re‑string several of the ropes supporting our big awning and the upwind side of the tent. Many of the ropes are quite old and since they're only polypropylene, they perish quickly in the sun. Two of them actually broke during the squall this afternoon, and others are showing signs of aging. We have been getting lots of wind storms from that side (the west) and it's obviously important to have a sturdy tent! This sounds like it should be simple, but of the several tents we know covering boats, many have collapsed entirely, and ours has had by far the fewest problems.
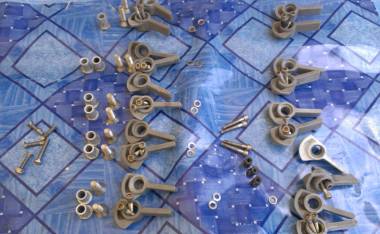 Some of the hatch bits & pieces Sue is cleaning & tracking |
Wednesday, May 29:
A beautifully clear day after some morning sprinkles, with some interesting advances.
Sue spent the day in Detail Land, cleaning, sorting and categorizing all the handles and hardware for 15 hatches. We need to order some new parts from Goiot, and given their sky‑high prices we don't want to over‑order, but we also don't want to get too few and have to pay for another shipment.
When we discovered how badly Golf had ripped us off and fired him, we assumed possession of the tools and other equipment (like our tent) that he'd left behind. These didn't come close to covering the $30,000 he'd taken from us, but they softened the blow somewhat. Some things he was able to steal back in the night, like his spray gun and a roll of fiberglass chopped strand mat, but we've kept his extractor fan, steel storage cabinets, sanders, and the compressor (which was bought specifically for our job, with our money).
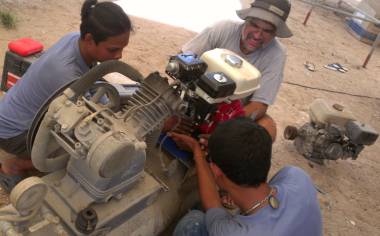 Houa, Baw & Jon fit the new motor onto our compressor |
But despite the ministrations of qualified mechanics, the compressor motor died several months ago, so we have been renting either E‑U's compressor here at the yard or Mike's, which has to be transported down by truck from Boat Lagoon. Either way, we pay $10‑15 for each use. And since we plan to sell our compressor when we leave, it makes sense to replace the motor now (or even a few months ago). So Jon set out to buy a new Honda motor (the brand of choice here) for the old compressor.
There's a 5.5 hp Chinese knock‑off for $200 at the local hardware store, but it's been on the shelf for over a year so we think it was bought and returned and doesn't work well. So Jon scootered off to another hardware store towards Phuket Town that was recommend by Manoon, one of the owners of the boatyard, but he couldn't find the store. Returning to the yard, he told Manoon and was happy when Manoon offered to take him there - and somewhat vindicated when it turned out that the shop had moved. They ended up at a small Honda dealer in town, owned and run by an old Chinaman with a long grey wispy beard tied in the middle with a rubber band. Manoon assured Jon that this was the place to get a motor, so they returned at lunchtime with a new 5.5 hp Honda GX160. It cost $280 (no credit cards, cash only) but it seems real and theoretically comes with a 1 year guarantee.
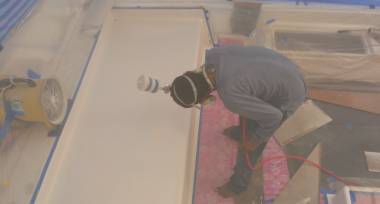 It got thick in the tent before we got power to the extractor fan |
So after lunch the big excitement was Jon, Houa and Baw playing mechanics with the new motor. They unbolted the old one and threw it aside (Baw wants to see if he can resurrect it) and got the new one aligned and fitted on the compressor. It came with the wrong size pulley, but it should work until we get a new pulley for it. It fired up happily and seems to drive the compressor just fine! Cool!
Then we realized we didn't own the high pressure hose or the fittings for the spray gun or the water trap (parts Golf had swiped back). New water traps cost about $50 so Jon worked on resurrecting the old one that the guys swore was "No good. No work. Air come out." Jon found the problem, and Voila. Saved ourselves $50.
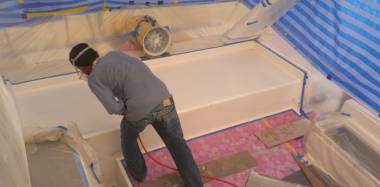 Baw spraying gelcoat on the stbd cockpit seat & entryway area |
Baw went on a shopping trip for the hose and fittings, and by 4pm he was all set to spray the cockpit. We were pleased that he decided to spray even though it was late in the day. The next challenge was that the electricity was off for the whole yard, so that meant no extractor fan, and no ventilation for Baw in the plastic house. But Jon asked the yard owners to turn on the generator for us so Baw would be spared the fumes. Baw sprayed for an hour and got the entire starboard cockpit bench sprayed, as well as a touch‑up spray around the companionway.
Tomorrow he will start early and do the port cockpit bench seat, and some loose hatches which will be hung down in the yard. It is so gratifying to see the gelcoat happening!
We had on‑going power issues at the yard today, and since Houa's work is now mainly power sanding the new interior trim for the forward cabin hatches, not much happened in his workshop today.
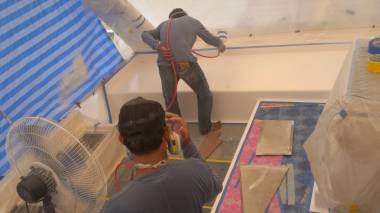 Pla & Baw on the morning spray of the portside cockpit bench |
Thursday, May 30:
Another move‑ahead day, but always sort of slow and strange when there's a gelcoat spray going on.
And today there were 2!
First thing in the morning the guys had the compressor pulled round to the stern of Ocelot, and the gelcoat table all set up. Lek did the ground work of weighing, filtering (good old women's stockings at $1.30) and adding the mono‑styrene (thinners) in the prescribed amount. Up on deck, Pla received the jug of filtered gelcoat and as Baw needed it, Pla poured some into the gun, added the requisite amount of catalyst, stirred it up, and handed it back. Baw got the whole port side cockpit bench sprayed in just under an hour.
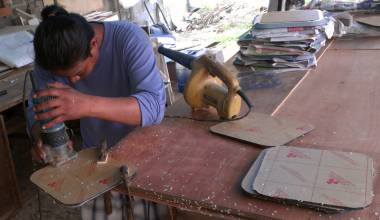 Houa trimming the new acrylic for the powder-coated hatches |
While the guys sprayed, Sue and Jon discussed future plans and hung out to be available for gun cleaning, compressor work, and picture taking. This is what makes the day feel sort of strange -- it's hard to start any other projects when there is a time‑critical and messy job going on! When it seemed that things were running smoothly, Jon scootered into Phuket Town with the new swim ladders tied to the bike (very Thai) to take them back to Luk Engineering. We have decided to get them electro‑polished to make them as corrosion resistant as possible, but first we want the team at Luk to do their best machine polishing possible. It may or may not make a difference in the long run, but given that we're not pleased with the new rusting, we would like Luk to take some responsibility for it.
Mike and K'Wiwat came by to check on the neighboring boat, and to help clarify things for us. It seems that Mike will send down the AME truck to deliver the nonskid that he's already cut, and to collect our large nonskid templates. Mike has scheduled to come next Wednesday to begin laying nonskid on Ocelot's decks. We Shall See. We sure hope so!
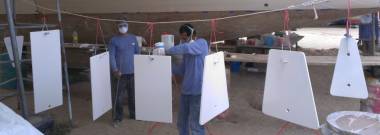 Afternoon shoot: Baw spraying 7 flat panels, Pla & Lek helping |
After lunch Baw's team once again prepared to spray. This time they hung the 4 interior fo'c's'le hatches and the 3 scuba lazarette shelves by plastic rope next to Ocelot. It was a quick spray, again less than an hour, and we now have spiffy gelcoated hatches. These are the same hatches that we had tried painting with Nippon 2‑part epoxy paint a few weeks ago, which had to be all sanded off! If we'd only known...
The guys were going to spray a few places in the cockpit after the hatches, but we discovered that one of the 2 engine support brackets on top of the compressor had cracked completely in two, and the engine was vibrating a lot. It seems that Golf had broken that bracket long ago and had it welded very poorly, so it just kept cracking. Closer inspection showed that the other engine support bracket also had a small crack. So Jon dismounted the new motor and took the brackets to Mannop, the yard owner, to have them welded up. He asked that the bracket that's broken in two have a gusset welded across the crack, which should make it stronger than the original bracket. They won't be ready until tomorrow morning, so no more gelcoating today!
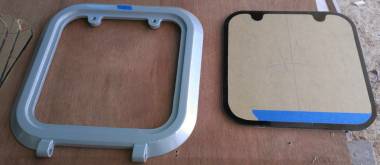 The silicone will go where the paper has been trimmed back |
Houa was pretty frustrated with the interior hatch trim that he's been working on. He and Jon tested the Lewmar hatches in the deck, then played with the new trim, and basically are not happy with the whole thing. We will try a new approach soon but for now we're putting it on the back burner.
To distract us (and Houa) from the hatch trim debacle, we presented him with the newly powder‑coated old deck hatches. These are getting new acrylic windows and Houa is happy to do the work, as he is very familiar with the procedure. He cut the acrylic months ago, but he purposely cut each piece a tad too big, so that if there was scratching or chipping on the edges they would still be OK. So today he routered the edges to the right size. Then he cut the edge of the protective paper off, where the silicone will go, and sanded that edge lightly. These Goiot deck hatches had their acrylic sealed in place with plain old silicone for 17 years, and no leaks, ever! So Houa will be using silicone again, but in black this time instead of clear. Nice to have a "rebuild‑the‑boat" project going on!
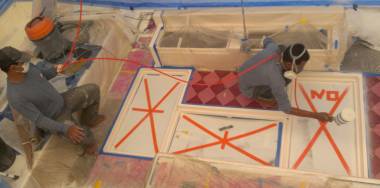 Baw respraying the deep gutters for the cockpit hatches |
Friday, May 31:
Yay! Another gorgeous day with light breezes and a sunny sky. The light breezes meant it
got hot, but we accomplished a fair amount.
The day didn't start off so well when we discovered that yesterday's gelcoat spray on the hanging hatches hadn't cured hard. Sticky, soft. Baw reassured us that by afternoon with lots of sun they would be good, but they weren't. Mike thinks it's because Baw didn't spray the gelcoat thick enough. Apparently, gelcoat needs a good millimeter of thickness or it won't cure well. To add to the discomfort, we found that the port side cockpit bench (a really huge area) was also soft. Baw blamed it on our telling him to not put Mono‑Wax in the gelcoat, and he compared port to starboard cockpit bench. Starboard had cured hard as a rock, and he had put in extra wax. This is all a bit of an alchemy magic thing, as we are missing consistency in results, despite syringes, scales, marked containers for volume etc. We were discouraged, but again Baw showed us that by sanding through the top (soft) gelcoat layer, he would reach the hardened layer beneath, and it seems to be true.
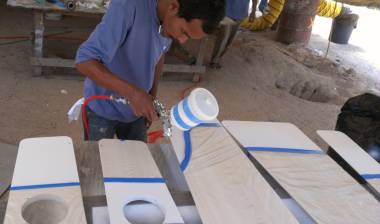 Baw respraying some of the targa-bar panels |
Another interesting development is that Golf actually did not steal back his 2 spray‑guns. It was E‑U who "borrowed" the guns. He also apparently "borrowed" a grinder from us. Now, we don't mind loaning equipment out to friends in need, but E‑U charges us to use his sanders ($3/day) and to use his compressor ($10/day). So Jon went to Cris, the yard manager, and said we're feeling a bit used. If E‑U wants to borrow something (for free) then we shouldn't have to pay when we need some of his equipment. Or, if he wants to charge us for using his equipment, then he should pay us when he uses our equipment. We'll do it either way. Cris made a phone call and said that E‑U's men won't touch our stuff again, which isn't quite what we had in mind - we don't want to be the ogres - but we just want things fair both ways. And we'd like to be asked. But many Thais don't seem to distinguish between "borrowing" (with permission) and "taking" so Cris' "solution" is probably for the best.
And the good news is that we got the guns back - both desperately in need of a thorough cleaning. It took lots and lots of cleaning to make it ready for use again. This is apparently another cultural difference. Mike has loaned us (at his suggestion) his precious 4mm spray‑gun, and we hope to return it to him in better condition than we received it. But the Thai yard workers don't seem to take care of even their own gear, much less gear belonging to someone else (and especially a "rich" foreigner).
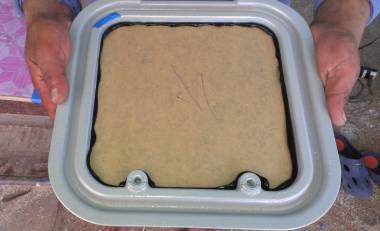 Houa's trial hatch, with the new acrylic stuck on with silicone |
Houa was with us just half a day, having some function to attend at his kids' school (he's got 4 young kids). He spent the morning masking, sanding, and preparing the small deck hatches for their acrylic windows. He did a trial run with one, setting the acrylic into its frame with silicone around the edges, so we'll see how it goes. We have decided to use tiny strips of 3M super bonding double‑sided tape to give us a vertical spacer under the acrylic to allow the silicone to stay thick enough to be of use.
Houa also brought us a letter, written by his sister. Houa's English is OK, and it has gotten MUCH better over the year that he's worked for us, but it doesn't extend to writing more than numbers yet, and apparently his sister's English is better. Houa's been working on the fiberglass interior trim for the new Lewmar hatches for the past week, and feeling that he's not been doing a very good job. This and some disappearing beer from our fridge prompted him to ask his sister to write us a letter, apologizing for his recent performance and acknowledging how much we try to help him and saying that he really wants to do the best he can for us and he'll try to do better in the future. It was very touching that he went to so much trouble. Ya gotta love the guy.
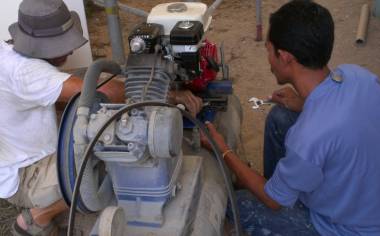 Jon and Baw reassembling the motor on our compressor |
Jon followed up on the broken motor bracket for the compressor. Mannop's men in the big workshop were just welding it up this morning, adding a rod of material into the broken inner corner of the "U" to reinforce it (at Jon's suggestion). Jon re‑assembled the motor onto the compressor (with some help from Sue and Baw to tension the belts) so that it would be ready for use. And just in time, as Baw used it 3 times today.
Baw and the guys prepared the small rims around the cockpit lockers for a re‑spray. Mike and Baw sprayed these rims last week but both commented that they couldn't get the gelcoat to go down into the gutters for the cockpit hatches. They're just too deep and narrow. Baw thought it was because Mike's big 4mm gun blows too much air, which doesn't let the gelcoat settle in the narrow gutters. So this time he used a smaller 1.4mm gun (recovered from E‑U) which has a finer spray and doesn't use as much air. He had to thin the gelcoat down with mono‑styrene so it would go through the smaller nozzle, but he added more wax to the gelcoat to help it harden up nicely.
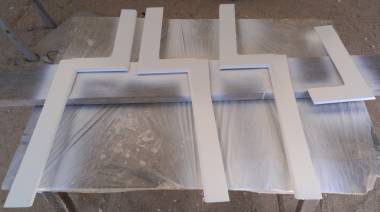 Plastic-wood strips to replace rotten plywood in the bathrooms |
After lunch Baw sprayed International InterSeal primer onto the plastic board panels that will rim the 4 heads. These boards have been sort of orphaned for a couple months, and pushed into the limelight and back out. When we saw Ben sanding them, we teased Baw that it was sanding #3, and that was enough. He laughed and said he was going to spray primer on today, for sure. He did, but it hadn't dried enough for an overcoat of white paint before the end of the day.
Bow's third spray of the day was on 5 removable panels from the Targa‑bar that had some thin spots. He masked off the parts that were OK, sanded and cleaned the thin bits, and sprayed on another layer of gelcoat.
Jon and Sue spent a good hour in the roasting heat of the cabin‑top where the hot air gets trapped under the tent when there is no breeze. We were trying to figure out if the double camber of the cabin‑top was too great for the proposed large pieces of nonskid. To that end, we cleaned some of the cabin‑top and put down the big half‑sheet of nonskid that Mike gave us way back in January. It is well cured, and as stiff as it will get. We used boards to press the nonskid to the curved deck, then weighted it down with sand‑filled epoxy jugs. We figured we'd show all this to Mike when he came by in the afternoon.
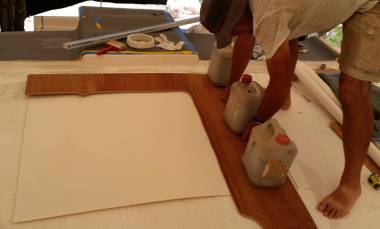 Seeing if we can make a nonskid panel lay down smoothly |
But Mike had a better idea. He has decided to wait and make the nonskid panels for the double‑curved cabin top at the last minute, then bring them over within a day of their manufacture, and lay them in place to cure. This way they will have a chance to cure in situ, and take on the needed slope cambers. Sounds like a plan. If we can't use Mike's molded nonskid panels, we may have to put gelcoat with nonskid "sand" up there, but we hope we don't have to go that route.
Mike's afternoon visit was a long one, as we had many projects to discuss. AME will be making 25 new mast steps for us out of 1/8" (2.8mm) sheet aluminum. We will get them powder coated in a silver/aluminum colored finish like the deck hatches, but without the top clear coating. We will probably put small teak pads on them for foot comfort, but only if we can find aluminum screws, as we don't want bi‑metallic corrosion problems again. AME will also be lining us up with a couple upholsterers to figure out what to do about salon cushions and new mattresses for the bunks. Can't have a "new" boat with 19‑year‑old foam mattresses! As much as we hated to do it, we also arranged to purchase a new liferaft, which will be lighter, smaller and less expensive than our old one, but still an 8‑person ocean raft. As Mike said, even with a nominally unsinkable multihull, if there's an explosion or a fire, you have to get off the boat. And the price Mike is giving us is so good that he doesn't want us publishing it!
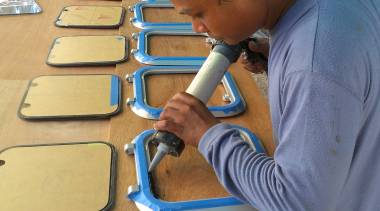 Shooting silicone into the small hatches - note bits of spacer tape |
The big news was the detailed scheduling of the laying of our nonskid. First thing Monday morning we'll have the AME team here to do the final preparations on the nonskid pieces themselves. Mike hopes to get at least one whole side deck prepared. This will involve checking each piece's placement and size, doing any trimming necessary and then masking each piece, ready for the gluing. If time allows, we may even be able to do a first glue‑down on a piece that is loose (like an engine hatch cover) so that our we and our guys can all see how it's done. It looks like Mike will be counting on our team to help do the nonskid mounting, which is fine as he is short‑handed. Wednesday Mike will be back and he hopes to get a whole side deck mounted, then more on Thursday. Wish us luck. It is very exciting to think about!
Saturday, June 1:
Yay! End of the week, and a weekend getaway to look forward to!
Our Intrepid Team of 4 continued sanding the gelcoat in the cockpit. Unlike the topsides, which were big smooth areas to cover with long strokes of the sandpaper, the cockpit is very fiddly. Small verticals, tiny horizontals, gutters to stick your fingers into. Their goal is to take the sanding up to 1500 grit, but leave the last polishing until after the teak. But that will have to be hand polished, as the teak will stand a tiny bit higher than the gelcoat.
Houa got a lot done on the hatches. We talked about what adhesive to use. Houa wanted to use Sikaflex, but that's really too gnarly, and would make the acrylic almost impossible to remove later. Originally, the hatch acrylic had been bedded with silicone, and only one of the big fo'c's'le hatches ever leaked in 17 years of active service. Silicone seems to be what the pros use, so that's what we decided to use - a high quality (not acetic acid cured) black marine silicone from Sony (of all companies).
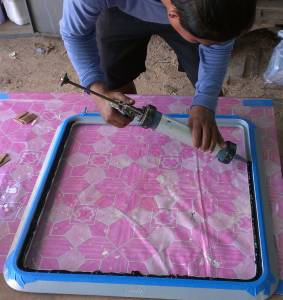 Silicone is shot into the tray of the cleaned frame |
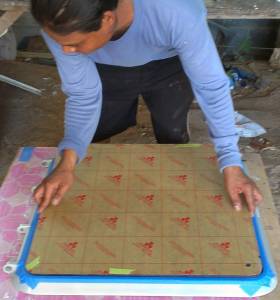 The sanded and cleaned acrylic is lowered in |
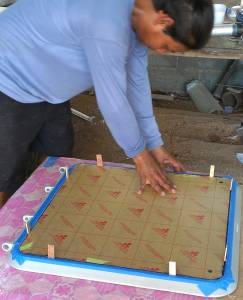 Wood spacers initially center the acrylic |
He prepared by sanding and masking the edges of 10 of our small deck hatches. Next he stuck small bits of 2mm thick double‑sided tape at 4 places around the hatch where the acrylic will go, to provide a physical spacer - we want some thickness to the silicone, so it can flex and compensate when the acrylic (or the hatch frame) gets hot and one expands more than the other. Then he applied fresh silicone to the acetone‑cleaned surface, and carefully placed the acrylic window in. He pushed down slightly, checked the bottom to be sure the silicone was oozing out everywhere. Then he squeezed more silicone from the top into the vertical gap between aluminum frame and acrylic to finalize the bond. With a soap‑wet finger, he smoothed out the top of the silicone. That being done, be repeated the process on our two big fo'c's'le hatches, with their ½" (12 mm) smoky colored acrylic. These big hatches already had a lip so they didn't need the double‑sided tape. All the hatch hardware will be attached later.
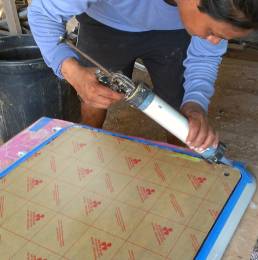 More silicone is shot in from above |
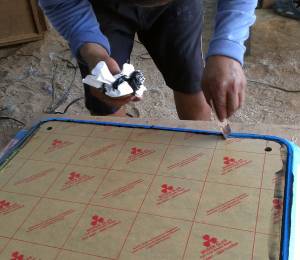 The excess is wiped off with a small spatula |
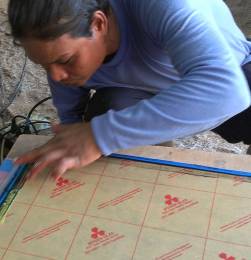 And the bead is smoothed with a wet finger |
Sue located the aluminum track that is used to hold up the trampolines along the sides of the forebeam and anchor chain bracket. Jon was about to cut a long piece to replace the missing (stolen? thrown away?) pieces, but found that our hacksaw had also gone walkabout. So the delay meant he didn't get that project done in time to send the aluminum track with Mike to be powder coated. We are becoming quite fond of powder coating. On something like these complex trampoline tracks it makes perfect sense: we can't buy the sail‑track here, and to clean up all those long slots and angles and screw holes would be impossible. Powder coating begins with a sand blast treatment, then boiling water to remove the salts, then coating with special paint powder which is applied with an electro‑magnetic system so it gets EVERYwhere, then baked to a hard glossy finish.
Baw fine‑sanded the 4 plastic‑wood pieces that are to go in the heads (bathrooms), and then he sprayed them with a 2‑part epoxy paint. The paint didn't look very good after it was sprayed, but we put the pieces out in the sun and in a few minutes they'd flowed out and leveled themselves into nice finishes - or, at least, nice enough to go under the door of the heads where nobody will see them.
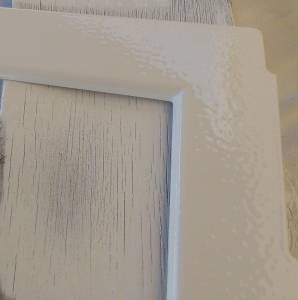 The badly mottled surface smoothed out in the sun |
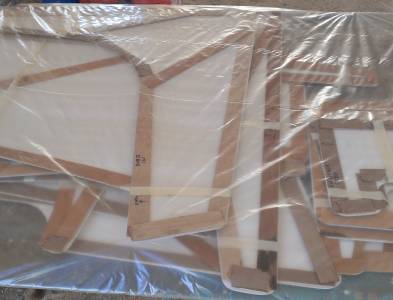 Some of the pile of nonskid panels and templates, under plastic |
In preparation for our big Nonskid Monday, we swapped some tables around from under the bimini and from the "lunch area" under the neighboring catamaran. Then Baw ground off the bumps and lumps of epoxy and polyester resin to give them a smooth surface for our precious new nonskid to lie on. Wiwat brought all of the nonskid panels that Mike has cut so we piled them all up on one of the tables, ready to be fitted into place on Monday!
But for now we're off to Ao Po for a weekend with Bruce and Alene at their sumptuous villa! Sue will be taking her own scooter north to get practice, and to help transport stuff, like champagne and other brunch goodies from Flint's Bakery!
Thai Refit:
Ocelot Pages:
Top Level: Home | Destinations | Cruising Info | Underwater | Boat Guests | Ocelot | Sue | Jon | Amanda | Chris | Site Map | Make a Comment
|
If our information is useful, you can help by making a donation |
Copyright © 2000‑ Contact: Jon and Sue Hacking -- HackingFamily.com, svOcelot.com. All rights reserved.