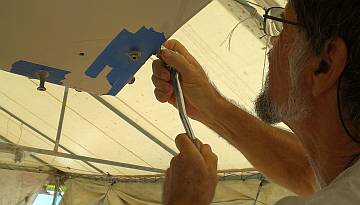
The waxed bolts came out of the epoxy just as they should
116 Bimini Legs
Summary: The big accomplishment of the week is that we finally got the bimini legs bolted onto the bimini and onto the deck, which clears the way for several other jobs. The headliner project also got a lot of attention, and it's taking a lot longer than we expected, but it is moving. Baw and Heru both expanded their talents to new (for them) jobs. Team accomplishments this week include:
|
 The waxed bolts came out of the epoxy just as they should |
Monday, January 20:
Yikers! Another week starting! With the usual mix of good and bad.
The good (and it was very good!) news was that yesterday's hard work of installing wax‑released bolts into epoxy in the bimini WORKED! Each of the 12 bolts backed out of their holes relatively easily. Yay!
Each bolt then had to be cut down by about 1/4" (6mm) so they wouldn't run into the end of their hole when holding the bimini leg on. Cutting 12 thick stainless steel bolts and then repairing the cut threads took a couple of hours (and ruined a hacksaw blade) but now they're all ready to go.
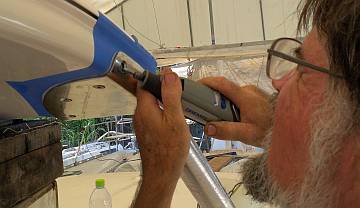 "Massaging" a bimini leg mounting hole with the Dremel |
Jon had to suspend bimini work to scooter off to Bangkok Hardware in Phuket Town where they are fixing (for free, under warranty) Jon's 2‑month‑old Dremel. Hours of time wasted on a repairing a brand new tool. But he knew he would need it to fit the bolts through the stainless steel bimini leg.
Starting on the starboard side, Jon found that only one of the 6 bolts came out exactly where the bimini leg wanted it to be. The other 5 holes had to be massaged a bit with the Dremel, widening a hole a bit here and relieving a bit of excess steel there until the bolts could all be screwed in happily. None of the bolts are perpendicular to the steel, mostly because of interference problems from other bolts or the water‑catch hole. This means most of the bolt heads won't sit down flat against the steel, but that's just cosmetic and can't be helped much.
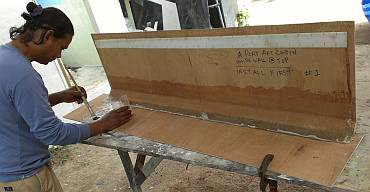
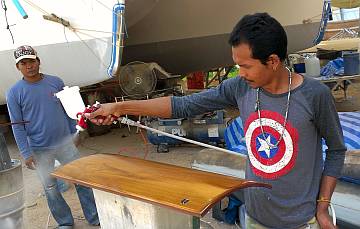 Heru helped Baw spray polyurethane on 2 small doors |
But the final bolt on starboard proved troublesome. The first (shallower) nut was apparently next to an air pocket and broke loose from the epoxy, jamming the bolt so it couldn't go in or out (the nut just spun with the bolt). Eventually Jon had to cut off the bolt with a grinder and then cheese out the errant nut by drilling multiple holes into the fiberglass of the bimini. He got it out (thank goodness) at the end of the day, so tomorrow we'll have to assess the situation. Hopefully the rest of the hole and the second (higher) nut are still intact and we can just epoxy another nut and bolt into the same hole.
Baw and Heru sanded, then sprayed 2‑3 coats of polyurethane varnish on the rounded door and the nav table shelf. Polyurethane dries really quickly and can be sanded within a couple hours, so they were able to move right along with piling up that bright, clear finish. By day's end Baw declared the door ready for a light sanding and a satin varnish spray on top to finish the job. We hope it matches its mating rounded door...
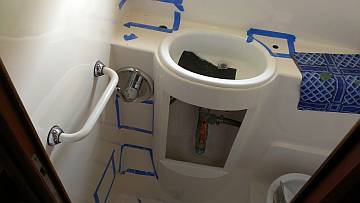 All 4 heads are getting several areas repaired |
Pla spent the day hand sanding the polyester filler that he put in the heads on Saturday. He's getting all the small repaired areas smoothed to perfection, so they can receive a spray of white gelcoat tomorrow. To this end, Baw mixed up batches of white gelcoat, then smeared them on the head walls to check for color match. His first batch needed adjusting, but he thinks he got it right after that. Unfortunately, Baw may not be in tomorrow to spray as he has some family problems to sort out. We had hoped he could spray in the morning so that the men would have the afternoon to sand and polish the heads.
Houa got the new piece of plywood joined to the fiberglass "L" shaped headliner. While the epoxy cured, he removed hundreds of staples from a scratched headliner from one of the aft cabins and started the covering process. This piece is over 2 meters (yards) long, and more than half a meter wide. Lots of vinyl to stretch and pull into place, aiming for no wrinkles.
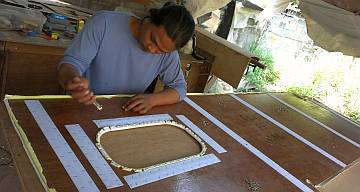 Removing staples from a big headliner that needs recovering |
Sue rounded up more salon cushions and scootered to our cushion shop, Thai Sailing. It's not far, 3km or 2 miles, but it's through a very busy traffic circle. They are making good progress on the new salon seat cushions (nice and firm to sit on!) and they were happy to repair a few more Sunbrella panels on the old cushion covers that are stained or faded. We should have them all back (wrapped in plastic for the store room) in a few days.
Sue also rooted around in the store room and found more plumbing bits that we'll be needing, and got all the stuff together for the cloth covers for the lazarettes (where the life raft is stowed). She got the project started enough to realize we'll need to re‑think how and where we attach the cloth covers because the aft deck has changed enough that our old mounting locations won't work. More on that later.
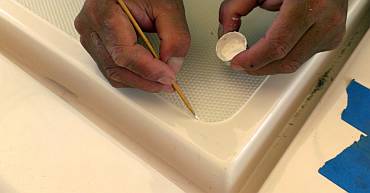 Pla repairing the gelcoat around the edge of the nonskid |
Tuesday, January 21:
A good day, with things moving forward and things getting prepared for "the next step".
As expected, Baw was not at work today, but Yando was. In the morning Yando and Pla finished the last of the filler and gelcoat sanding in the heads, checked the plastic masking, and basically got everything ready for Baw's gelcoat spray.
Houa then brought our attention to the inside of the 2 emergency hatch openings. This area is white gelcoat inside (around the old hatch), and he had the good idea to get it re‑gelcoated before the new Lexan "window" is installed. So Pla and Yando moved from head sanding to hatch rim sanding. They got either gelcoat or polyester filler in the old small screw holes around the rim, and got everything sanded and ready to receive a coat of white gelcoat. Then Pla and Heru masked the 2 areas off (somewhat differently). With luck, Baw will be back tomorrow and spray both hatch rims and the heads in the morning.
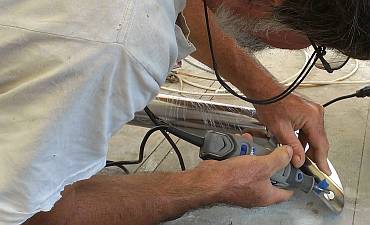 Widening a mounting hole in the leg so the bolt sits better |
Heru offered to run a finger filet of 5200 around the edges of our new stainless steel transom "jewelry." We only had enough fast cure 5200 for starboard side and we didn't want to break open a whole new tube just for a few squeezes, so instead we used the slow cure 5200 for port. We noted a huge difference in curing times: starboard was tack‑free in less than 2 hours but port remained gooey all day.
In anticipation of jobs to come, we set Yando up sanding the de‑coring holes (filler and fiberglass) in the salon ceiling. The sail tracks are already bolted down but there are over 50 other holes that Jon de‑cored and filled, and many had globs of epoxy or rough edges protruding enough that we wouldn't be able to get a big washer in place once the winch bolts were through.
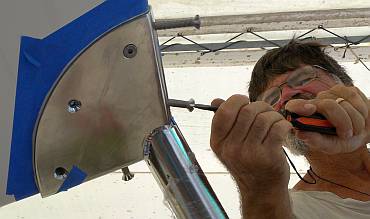 Port leg mounted, now test fitting the starboard leg |
Sue hauled a couple men to the store room and carted back both he old jib and the mainsail "stack pack" (cover). The stack pack we laid out on a piece of plastic sheeting in the yard and had a good look at it. We have talked about replacing the mainsail and the jib. But in fact the stack pack has the most structural issues, so it may have to be the first to be replaced. This started a whole discussion of finances and sail replacement options and costs and companies. The jury is still out on all of this, as we've already spent way more than we intended for this refit.
Jon dedicated the day to the bimini legs, once again, and we made real progress today. The nut he had to cut out of the starboard side was only 1 of 2 for that bolt, and the remaining nut should be strong enough all by itself. On port, he spent many hours with the Dremel (which seems to be behaving itself) refining the shape and depth of the bolt holes in the stainless steel leg. With many trial runs of running the bolts home and back out, he finally declared it "as good as it will get". So with silicone and the screw gun we mounted the port side upper bimini leg and drove home all 7 bolts. Yay! He even used his impact driver to make sure the 4 big bolts are good and tight.
 Houa repairing an angled headliner that had bad wood |
Tomorrow should see a repeat on starboard side, but it should go faster as Jon has already done a lot of the Dremel work. Then we attack the cabin‑top end of each leg. These are only 3 bolts each, so we hope they'll go faster.
Houa finished the epoxy and woodwork needed to re‑build the water damaged headliner and got a new layer of foam applied with spray glue, then stapled on the new vinyl. Fast to write, hours of work. He also got the last of the big damaged pieces covered, so now this batch of headliners are all ready to be put back in the boat. Carefully this time! But first, Baw has to finish his messy, fume‑filled gelcoat spraying inside, and some of the headliners need wiring holes poked through them, a Jon job.
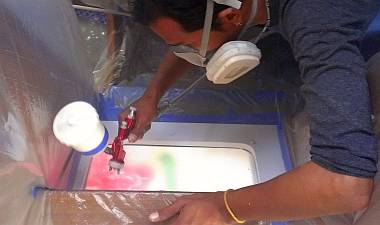 Baw spraying gelcoat around the emergency hatch openings |
Wednesday, January 22: Bimini Legs Mounted!
Wednesday, Wonderful Wednesday. The most awesome day in a long time! So many things were
going on and Getting Done, with each of our 4 workers accomplishing very specific tasks. Oh, and Jon and Sue, too!
Baw was back and dove right into some spraying projects. First he sanded the polyurethane on the rounded teak door, and then got 2 coats of Epifanes Satin varnish sprayed on. We hope that's the last of the varnish spraying we have to see! Then he checked the masking in the heads and the inside rim of the emergency hatches before spraying gelcoat, first on starboard, then port. It made the boat uninhabitable for the morning, but No Worries. We were all working outside.
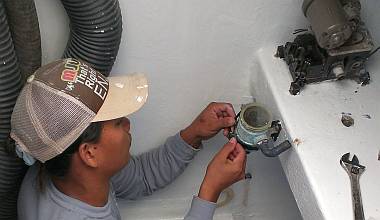 Heru dismounting the old, slow bilge pump & its strainer |
Pla helped Baw with the gelcoat spray, then did more dit‑dot gelcoat repairs on deck. After lunch the new gelcoat inside was ready for sanding, and that job fell to both Pla and Baw. Since they're not looking for a really fine polish like on the exterior, they sanded with 600, 1500 and 2000. They got both inside emergency hatch rims sanded to 2000, and 1 of the 4 heads finished. More sanding tomorrow, then polishing.
Houa finished applying the vinyl to the damaged headliners and sent Sue off to TMT for more Velcro (which is what holds the headliners to the cabin tops). He got a couple pieces mounted in the aft port cabin and others test fitted, then removed, to have their edges trimmed back. Jon got involved in determining the position of the wall lights (which need holes drilled through the vinyl and plywood for the wires) and Houa installed the big wall liner and ran the wires through, so that cabin is very close to being finished. Yes, we thought we were there a couple weeks ago, but we think this time it's for real!
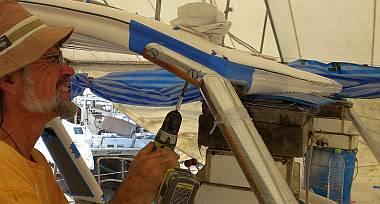 Mounting the upper end of the starboard bimini leg |
Jon started the day working on the starboard bimini leg. He test mounted it, trimmed back some of the stainless steel so one bolt would nestle down better, dismounted the leg, cleaned it with acetone, shot silicone around the mating surfaces, and fastened the leg to the bimini. The 4 big bolts got tapped home with the impact driver. It all went together reasonably well, and feels very strong.
Heru assisted Jon with the bimini leg mounting, then Sue commandeered him to help mount the 2 handles on the inside "walls" of the sugar‑scoops. Although we've been saying that no one drills holes in the boat, this was a relatively safe place to let Heru drill as it was nowhere near the water or vulnerable hull, and the holes were already there. They just needed reaming out. Jon showed Heru how to choose the right size drill bit, then watched him make the first pass. Once the holes were drilled and the handles pushed into place (test run), Heru sanded the surfaces and cleaned with acetone. He and Sue chose the right washers and lock nuts, then applied slow cure 5200 to the bonding surfaces. Heru went into the engine rooms to tighten the nuts while Sue applied pressure above. Voila! Two shiny stainless steel handles!
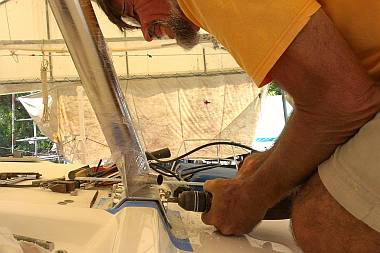 Drilling 10mm holes to mount the bottoms of the bimini legs |
Jon used the Dremel to finish cleaning up the "tugging" stainless steel latches in the cockpit and Sue tested all 6 latches, fitted them with their lock nuts, and declared the cockpit hatches finished!
Then Jon introduced Sue and Heru to another new project that stretched some skill sets, but Heru (with Sue overseeing) did really well. The goal was to remove the old low volume bilge pump from the starboard engine room, cut the hoses, and mount and plumb in a new high capacity, centrifugal bilge pump. Although this is also out of Sue's normal skill set, she was involved to keep an eye on Heru's progress because Jon knew she wasn't afraid to stop Heru, ask questions of Jon, and be sure it all stayed on track. Heru unbolted the old pump (and later sanded the unpainted surface in preparation for a cosmetic fix in the engine room), mounted the new Rule centrifugal pump to a wooden mounting plate on the engine room floor, and repositioned the float switch. Using one of our new one‑way valves, Heru attached the valve to a length of new 1" hose at one end, and to the existing 3/4" hose at the other. Jon will do the electrical hookup tomorrow. Heru also cleaned the water strainer and re‑bolted it to the wooden platform next to the rudder post. We have 2 more centrifugal pumps to be mounted in the forward bilges, so Heru will probably get to do those as well.
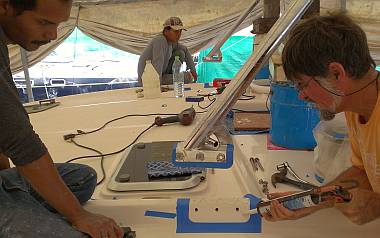 Shooting 5200 under where the (raised) bimini leg will go |
After mounting the tops of the bimini legs, Jon moved to the bimini leg bases. These mount around a fiberglass ridge that runs down the cabin‑top, with 3 big (10mm or 3/8") bolts going completely through the ridge. It was tricky drilling the holes as we didn't want to hit the fiberglass at the top of the ridge. Jon started by drilling 8mm holes, with Sue spotting him so the holes lined up. When those went through with no problems he drilled the final 10mm holes.
The bolts needed to be 125mm (5") long, but nobody here carries 316 stainless bolts longer than 100mm (4") so we had to buy some threaded rod and make our own bolts. Jon and Heru marked and cut 6 lengths of rod, then Jon trimmed and polished the ends, as they'll be visible. We decided to go with lock‑nuts on the insides (towards Ocelot's centerline) and domed cap‑nuts on the outside, so Jon threaded the lock‑nuts onto the rods in preparation, and tested their fit in a dry‑run.
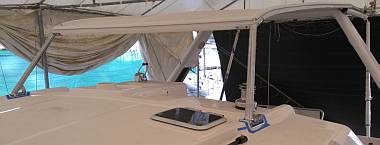 The bimini legs mounted (at last!) |
Faster than any of us could believe, the bimini bases were ready. Jon physically lifted the bimini up and we wedged in supports so the legs were about 6" above the cabin‑top, letting us clean everything and apply 5200 to the mating surfaces. We lowered the bimini until it was sitting on its legs, ran the bolts in, and Jon tightened them up while Baw and Heru cleaned up the 5200 into nice filets around the edges of the steel.
WOW! A mounted bimini! The gelcoat cans and blocks of wood that have been holding the bimini up for the last 13 weeks(!) were ritualistically thrown over the side. Baw and Heru were quick to clean up the tools and paraphernalia of the mounting, and soon we had a beautiful, simple cabin top with new bimini! We can almost taste the salt air!
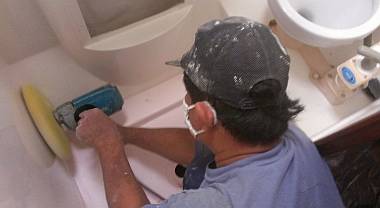 Pla polished up both portside heads |
Thursday, January 23:
We're on a roll! It was another good day on Ocelot, with several things accomplished.
Houa worked on headliners for the port aft (Amanda's) cabin all day. He had to put headliners in and take them out. Remove staples, cut back the plywood the calculated amount, then re‑staple the foam and vinyl. Baw assisted him for much of the afternoon, and they were like a headliner train moving up and down Ocelot's ladder. Net result: Amanda's cabin is finished, including the fan mounted and all the electrical light wires protruding as needed. Only things left are the fiberglass rims around the overhead hatches. We'll be checking them out tomorrow to be sure they fit. Houa will then move on to other cabins, one by one.
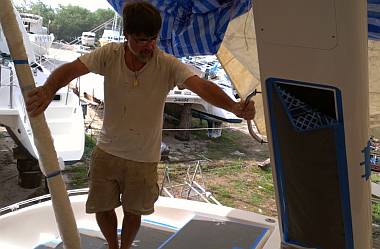 Jon testing where we want to mount the new grab handles |
Pla was deep into the heads all day. He finished hand sanding the gelcoat, then used the big polisher on all the gelcoat, getting the portside heads finished. Starboard aft needed some more gelcoat repair, but not spraying, just hand wiping, so he took care of that. They're coming along. Houa is looking forward to mounting the locker doors under the head sinks.
Our small morning project was to add 2 new stainless steel handles to the aft side of the targa bar. These handles were the second set on the old sugar‑scoops, and have been replaced by long handrails. Jon got them engineered into position (with Sue's approval of height and placement!). Then Heru prepared them, taped and mounted the second one, after assisting Jon with the first. Two new safety additions to Ocelot!
Jon's big project was winches. Ocelot has eight 2‑speed, self‑tailing Andersen winches: 4 on the front of the cockpit, 2 on the mast for halyards, 1 on the targa bar to lift the dinghy, and 1 on the port side of the cockpit to control the mainsheet traveler. All need cleaning and greasing, and all but the 2 on the mast need to be mounted.
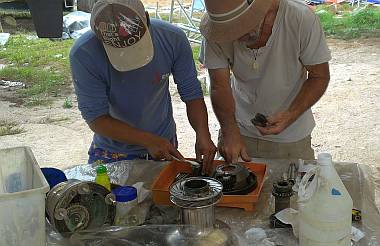 Jon showing Heru how to strip, clean, and re-grease winches |
Jon commandeered Heru for much of the day, teaching him how to strip, clean, grease and re‑assemble the winches. Sue also got her hands dirty with old winch grease and diesel (our cleaning fluid of choice). We started with the small Andersen 40 that controls the mainsheet traveler back near the targa bar. This one is mounted on a big hefty teak block, and bolts right through to Amanda's cabin (which was preventing Houa from finishing the headliner in there). It had already been stripped and cleaned, so it only needed the final winch grease, re‑assembly and mounting. This is the only winch where the mounting holes are still visible, so it went quickly.
Then we moved to the big Andersen 52 next to the helm, which controls the boom‑vang. Heru and Sue cleaned while Jon disassembled, then re‑assembled. None of the holes for any of the cabin‑top winches are visible, because they were filled when the holes were de‑cored, and then the cabin‑top was sprayed with new gelcoat. The areas that were filled are still visible from inside, so Jon would drill a single hole from below in the center of a de‑cored area, and draw a line on deck towards another de‑cored area. With the winch base held by a bolt in the one hole, he'd rotate the base until the correct hole aligned with the line he drew. He'd drill a second hole there and check to make sure it also came through a de‑cored area. If so, everything was aligned correctly and he could drill the remaining 3‑4 mounting holes. He drilled the holes slightly undersized and then tapped them, which should hold the bolts very firmly.
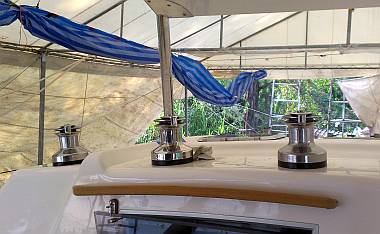 The 3 portside cabin-top winches, happily re-mounted |
Once the holes were drilled, the base was removed, everything was wiped down with acetone, the bolts and holes were coated in silicone to keep water out, the bolts were tightened down, and Sue put a big washer and a lock nut on the bottom from inside. By the end of the day we'd serviced and mounted 4 winches: the little traveler winch, the big vang winch, and both jib‑sheet winches (the big main‑sheet winch was mounted several weeks ago to help with mounting the forebeam).
Heru disassembled and re‑assembled the Andersen 46 jib‑sheet winches mostly by himself, with Jon overseeing. We plan to have him service the 2 winches on the mast tomorrow, as they're also 46's. These 2 halyard winches can't be removed, so he'll be working with a table out in the field.
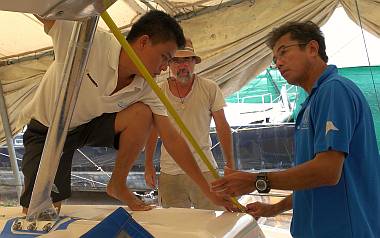 Ocelot getting measured for a dodger and side curtain shades |
We were pleased to have the folks from Thai Sailing come by late morning with all our new salon cushions (carefully wrapped in plastic) which we've piled in the store room for now. Then we spent half an hour with them up on deck discussing the dodger options, and the way we want the side Sunbrella shade flaps to work. They'll be getting back to us with a quote tomorrow. We like the work they did on the salon cushions, especially on the tricky curved seat backs.
Friday, January 24:
A good day, with only one minor set‑back and unexpected help and good progress on Jon's jobs.
First thing in the morning Baw and Heru scrubbed the starboard steps with 3M Nonskid Cleaner, rinsed and let it dry, then laid down new, clean protective vinyl. This dirty, sandy yard sure does reek havoc on clean decks.
Once the outside was protected, they lifted the old vinyl pieces from the salon floor. To our dismay, 2 of the teak and holly floor panels had damaged varnish. Turns out that whoever laid the (used) vinyl pieces weeks ago had not checked that the undersides of the vinyl were completely clean and free of chemicals or epoxy. So Baw removed the bad panels (luckily, not big ones), sanded the varnish, and then, dare we say it, sprayed more satin varnish. They look great, and the fix was quick, but such backward stepping is getting old.
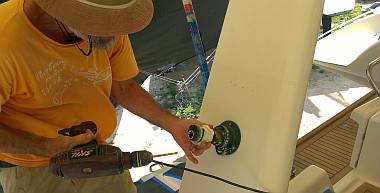 Jon's hat mounting the dinghy hoist winch that Heru serviced |
Houa was seen ghosting up and down the ladder with big white headliner pieces all day, or heard in the starboard aft cabin grunting and mumbling as he tried to fit the pieces into place. He called Jon down for verification of the reading lights on the outside "wall", and we noted the position for the Hella fan that was to be mounted on the teak wall. By the end of the day he invited us in to see the almost finished cabin. Just one more headliner piece to install and we'll have 2 finished cabins. Baw acted as Houa's assistant, which is probably a bit low on his skill set, but he is at least a careful and patient worker, so the 2 of them do well on these finicky panels.
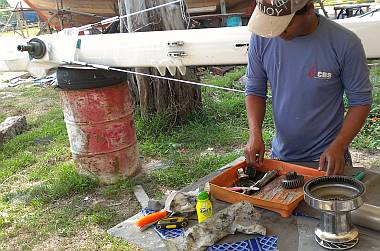 Heru also serviced both halyard winches on the mast |
Heru seemed very happy to strip and service 3 more winches today. The first was the small Andersen 40 that mounts on the targa bar and is used to raise the dinghy. He got it all cleaned and greased before lunch, and Jon got the base and drum mounted on the targa bar. Unfortunately this winch has a broken plastic disk that forms the spring to grip the rope, and we're not sure if we can get a replacement here in Thailand. In the afternoon Heru moved the work table to the shade near the base of the mast, then stripped, cleaned, greased, and reassembled the 2 remaining Andersen 46's. When Sue asked how he was doing, he replied, "Very well. I am a professional." He is, too. This is a good skill to have developed. As far as we know, there were no left‑over or unaccounted‑for bits of hardware.
Pla was once again inside Ocelot all day. He was finishing up the gelcoat repairs and sanding/polishing in the heads. Apparently there is about a half a day of work on the 4th (and final) head. He also got the new gelcoat inside the emergency hatches all polished up. So now everything's ready for us to install the polycarbonate "windows" that will replace the emergency hatches.
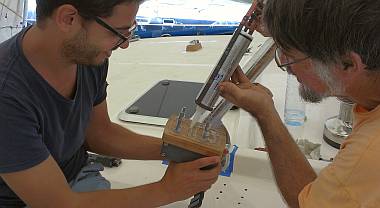 Roy and Jon mount a set of 3 spinlocks to the port cabin-top |
Sue played gopher (and photographer) as usual, finding all the spinlocks and their new teak bases in the storage room. She applied a UV resistant coating (similar to Armor All from the States) which brightened up the old, dull plastic housings. We'll see how long the effect lasts. Jon began to drill the bolt holes for the starboard double spinlock set, but realized that the teak holes needed some serious drill press precision work. So he took all the new teak bases to the yard workshops and spent time getting the holes set just right. This helped immensely in mounting the bases and spinlocks! Sue helped get the first one set up, and we were about to mount it, when we realized the washers overlapped on the salon ceiling, so Jon had to spend more time in the workshop cutting the edges off big stainless steel washers.
Lunchtime arrived and Jon walked up to the Kotanod village motorbike shop to retrieve Scooter, which had gotten an oil change and 2 new rear shocks ($33 total). While we enjoyed our normal shady lunch on the beach at the yard, Roy from Strummer stopped by and offered to lend Jon a hand while he waited for his Zodiac dinghy repair to be done. (Next to the Coconuts Yard is the Andaman boat yard which specializes in building and repairing inflatables.) So Sue scootered off on errands, bringing more boat parts from the apartment. Roy took over Sue's position as Jon's assistant and they mounted another set of 3 spinlocks and the central turning blocks for the mainsheet and vang. This means all the through‑deck fittings on the cabin‑top are now finished, as the remaining small rope fairleads just screw into the deck, not through it. Of course, there are still fittings to be mounted on the side decks, but we're getting there!
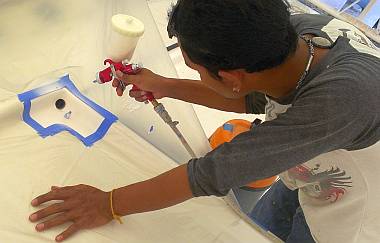 Spraying new gelcoat on the bimini corners & the rain catches |
Saturday, January 25:
A lot of shifting gears today on Ocelot, as we and the men took on new projects.
Baw got instructions from Jon on using the Dremel tools and was set free to clean up the edges of the PVC water‑catch pipe in the corners of the bimini. Then he masked the areas off and sprayed 2 coats of Thai gelcoat (color matched to Ocelot White) in the corners to cover all the work that had been done there. On Monday Pla will sand and polish it to blend in with the rest of the bimini.
Heru polished up the 2 big pad‑eyes that the vang clips to on the side decks and Jon positioned them, drilling and tapping their mounting holes. Since they take a lot of load, Jon bolted them to the deck with his impact driver, while Sue tightened on big washers and lock‑nuts down below.
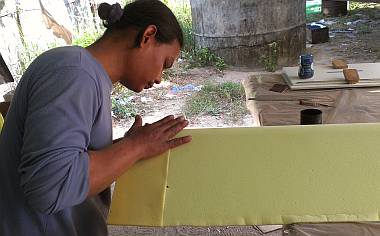 Houa fitting new foam to a headliner panel |
Houa peeled back and replaced the foam and the vinyl on one of the ripped headliners in the starboard aft cabin. Jon got the fan connected in there, so Houa could mount more panels. By day's end Houa proudly showed off the aft cabin. It's still missing 2 overhead pieces, but the tricky side panels are installed with all their electrical wiring protruding in the proper places. This headliner replacement has been a MUCH larger project than we anticipated.
Jon showed Heru how we wanted to replace the 2 bilge pumps in the forward cabins with faster centrifugal pumps. Heru did a great job, taking out the old pumps and the water strainers (similar to what he did in the starboard engine room) then installing the new pumps in the deepest bilge in each cabin. He attached the hoses with the non‑return valves and got everything hose‑clamped together, leaving the electrical connections for Jon.
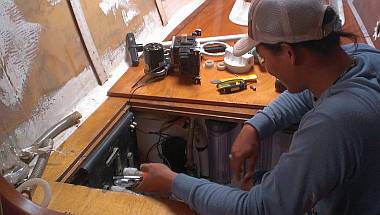 Heru ripping out the old port forward bilge pump |
Pla continued his quiet gelcoat work. He finished polishing the 4th head so we can now re‑assemble things like the under‑sink lockers and the toilet seats. Then he went up onto the bimini to begin the dit‑dot repair work around the nonskid up there. On Monday he'll sand and polish the newly sprayed gelcoat corners.
Sue scootered around looking for plumbing parts and scored some perfect gaskets for the old shower drains. We still need to find the top, stainless parts of the drains.
In the afternoon, Jon worked with both Heru and Baw, showing them new plumbing projects we want them to do. Heru drew the more difficult job of trying to get the old toilet hoses out from behind the portside fridge, but they look like they're screwed to the hull and inaccessible. So he'll have to just push new hoses up next to the old ones, as the old hoses have so much calcium deposited inside that they're no longer usable. It's a difficult job, as the spaces are small and the 1.5" (38mm) hoses are quite stiff. But we found that one of the hoses did not have the required siphon‑breaker at the top of its loop, so we'll have to buy and install those as well.
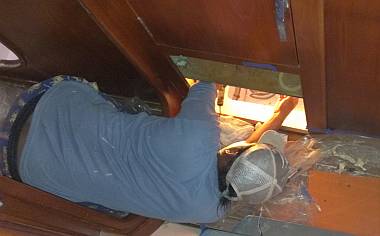 Heru twisted into impossible positions to get at the toilet hoses |
Baw got the job of plumbing in the 2 new forward diesel tanks. They each need new vents installed and connected, clear sight tubes running up the sides so we can tell how much fuel is in each tank, and the fills have to be plumbed and connected as well, which involves twisting more heavy 1.5" hose into spaces that are really too small. But Baw fits in the space next to those tanks much better than Jon does, and he was able to install one of the fill tubes, so now we can mount that fill fitting to the deck.
In recognition of Heru's enthusiasm, interest in learning and taking on new tasks, and because he has a new baby, we gave Heru a 20% raise which brings his pay more in line with the others.
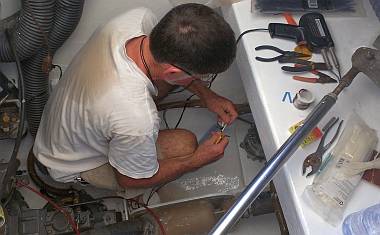 Preparing to solder the engine room bilge pump connections |
Sunday, January 26:
We had our ritual Sunday brunch at Flint's Bakery, then scootered to the yard. Houa was there
doing woodwork for our Swiss friends. With the boat to ourselves we cranked up some Boston on
the stereo and tackled some tasks on the (ever‑shortening) list.
Jon got on a roll playing electrician. His first project was to hook up the wiring for the new bilge pump that Heru installed in the starboard engine room. It was hot and sweaty in there but Jon persevered. After hooking everything up (and sending Sue off for some more shrink tubing) he carried a bucket of water up to the engine room, dumped it in, and Whoosh! That Rule 1500 pump spurted water out the through hull faster than the yard hose had filled the bucket. 1500 gallons/hour is almost a gallon every 2 seconds, or 1.5 liters/second. Awesome.
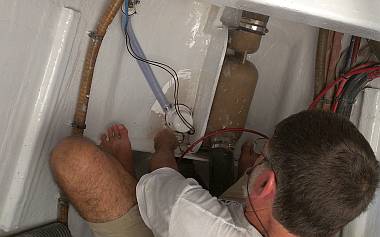 Testing the starboard engine room float switch & bilge pump |
The next bilge pumps needing electrical hookup were the 2 newly installed ones under the forward cabin floors. All went well on starboard and it tested out OK. It was only after getting the port forward bilge pump wired in that he realized the float switch circuit doesn't work, although the pump runs fine in manual mode. But by then it was 4pm and Jon had soaked his shirt in sweat, so we decided to call it a day. Jon will sort out the float switch another day.
Sue hit the 2 local hardware stores in search of new stainless steel drains for the showers (success!) and a big bronze or PVC nut for the new galley faucet (no luck). Somehow, when we returned from the States last year with the new faucet, we managed to misplace the big nut that tightens the faucet to the sink. As of now we have a lovely new faucet and no way to mount it. We will probably take the faucet (now carefully wrapped in protective plastic) to the local machine shop to see if they can cut us a big nut on their lathe.
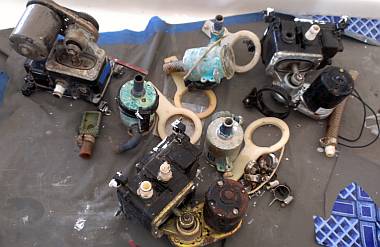 The 3 big (slow) bilge pumps & strainers that Heru removed |
Sue also whacked the old head hoses to loosen the dried calcium inside and cleaned them out, getting them ready for re‑mounting in the port side heads. That hose is $12/foot, so we don't want to replace it if we don't have to. She also lay around on the foredeck with sponge and bucket cleaning the fiberglass dust out of the new tank lockers so that Baw won't be so hesitant to crawl in there to do the diesel plumbing, as he was complaining of fiberglass itchies yesterday.
Can we have a weekend now? Please?
Thai Refit:
Ocelot Pages:
Top Level: Home | Destinations | Cruising Info | Underwater | Boat Guests | Ocelot | Sue | Jon | Amanda | Chris | Site Map | Make a Comment
|
If our information is useful, you can help by making a donation |
Copyright © 2000‑ Contact: Jon and Sue Hacking -- HackingFamily.com, svOcelot.com. All rights reserved.