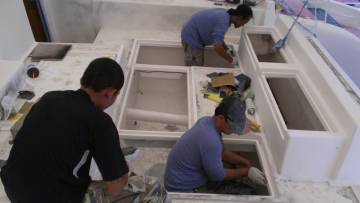
Ben, Lek, and Pla wet-sanding gelcoat in the cockpit
83 Laying Nonskid
 Ben, Lek, and Pla wet-sanding gelcoat in the cockpit |
Summary: A high energy week of preparing and gluing nonskid panels to the deck. But on Tuesday Sue slipped on a plywood hatch cover and fell through the opening, cracking a rib, so she recuperated at the apartment for the rest of the week. Mike from AME brought helpers for a couple of days to show our guys everything to do. Shapes were corrected, edges straightened, backs cleaned, alignmnet checked, decks were sanded, cleaned and masked, wood battens cut, and heavy water-jugs schlepped. Mike gave a quick demonstration for everyone on a small hatch, with Wiwat providing translation for our men, and then we started on the decks in earnest. We started in front of the salon, by the anchor winch, and moved out and down the decks. By weeks end we'd glued down 26 (of ~80) panels. Pla, Lek and Ben continued sanding the cockpit gelcoat while the AME guys were with us. Once the pieces were down, some needed glue picked out from around the edge, then they were re-taped and masked with thick vinyl.
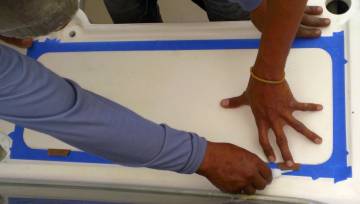 Nonskid pieces get locator blocks super-glued to the masking |
Monday, June 3:
A really fun, relaxing weekend in Ao Po with rainforest walks, scooter exploration of back roads, massages,
good food, and fun friends. Monday morning came far too fast, as we had to scooter back
one hour to Chalong. Sue and Jon both hit rain showers, but at different parts of
the trip. Good scooter experience for novice Sue!
Today was the big Nonskid Monday, and it occupied the whole day for Jon, Sue, Baw, Houa and Mike from AME. The other 3 workers continued their sanding and polishing in the cockpit.
Mike arrived at 8:30 and we got organized with a nonskid system. Sue's job was to clean the deck enough to lay the nonskid pieces down but leaving the pencil lines intact. Sue also organized which of the 30‑odd pieces went with which, and in what order we wanted to work with them. We decided to start at the center bow, then work aft down the starboard side.
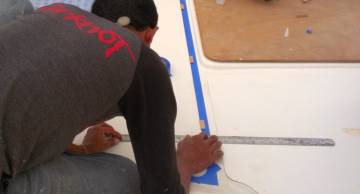 Diamond pattern must line up correctly with boat & neighbor |
Mike worked below, grinding the bottom of each fiberglass/gelcoat panel to be sure the bottom was smooth. Sue passed these up to Jon, Baw and Houa, who fitted them onto the deck. This involved lining up the diamond pattern as perfectly as possible, while staying within the parameters of that nonskid area.
Mike had originally cut each piece about 1mm wider than the template called for, giving us an overall 2mm wider panel. Rather than make Mike sand every panel down to remove the extra, we decided that if all of them were like that it wouldn't hurt anything, so we chose to stay with the slightly larger panels. This has 2 advantages: 1) we get a larger nonskid area to walk on, and 2) we can move faster as Mike didn't have much edge sanding and fiddling to do.
It took a couple hours to get the first few pieces put in place and checked, but we all had a steep learning curve. While the guys lined up the pieces on deck, Mike continued grinding the backs smooth.
On deck, Jon and Baw used the fishing line marker to find "true" fore/aft, and make sure the panel's diamond pattern lined up. Then they checked the side gutters against the toe rails to be sure they were the same width. Sometimes we had to hand down a sheet to Mike to grind a bit more curve or hollow into a piece to have to fit better.
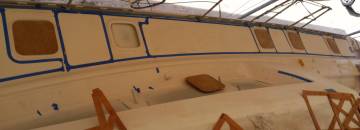 5+ of the panels on starboard that we got located & masked |
We soon realized that the most obvious "edge" we'd see is the edge of the nonskid, not the exact line up of the diamond pattern. In fact, it's very difficult to see how the diamonds line up nose to tail - it's MUCH easier to see them lining up diagonally, along the "faces" of the diamonds, and along the troughs between the diamonds. But these lines rapidly move to the side, and there's a fairly large hatch between these pieces of nonskid, so very few of the visual lines (mostly the troughs) continue on to the next piece. This meant that we don't have to worry too much about the diamonds lining up and we could focus on the edges, which made the work go faster.
Once a panel was deemed "in position" Baw used blue tape, with a 1‑2mm gap to delineate each nonskid piece's territory. Then Houa super glued small wooden blocks to the tape to act as brackets against which we will be able to push/mount the nonskid on mounting day.
By day's end, Jon, Baw and Houa had fitted 11 panels on the foredeck and down the starboard side deck, plus 2 large ones on port deck. They were all carefully marked and brought back down to be stored on a flat table for the night. Mike will be back on Wednesday for gluing! Tomorrow we have more preparations to do - cleaning and sanding the deck, cleaning and masking the panels themselves, and fitting the portside panels to the deck.
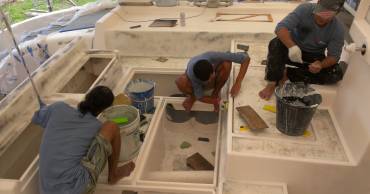 Lek, Ben & Pla made good progress in the cockpit - 1,500 grit! |
Tuesday, June 4:
Wow. A very cool day. New things happening for the deck!
Today was our "day between" Mike's visits to Ocelot, so we had a lot to accomplish before he comes tomorrow to glue the first of the nonskid panels down to the deck. Sue spent the morning with acetone and rags cleaning all the nonskid areas from the foredeck right back to the aft deck on the starboard side, 12 nonskid places. She scrubbed away months of grime and dirty footprints, and cleaned the edges where we'll put tape to catch the polyester glue tomorrow. Yes, these areas were about to be sanded, but theory says that if you sand a dirty surface you can actually embed some of the grime into the sanding lines, and still have a dirty surface. Clean first, then sand.
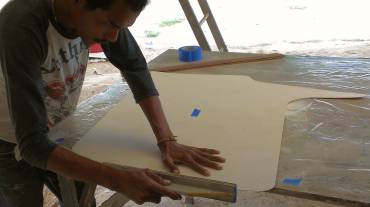 Each piece had edges straightened if necessary |
Houa set up a work table back in his shed where he could very carefully, very lightly sand the backs of some pieces of nonskid that Mike didn't get to yesterday. The goal is to smooth the fiberglass back of each panel so that it lays flat on the deck. He tried several different grit sandpapers on his grinder, but they all gummed up too soon, as the polyester backing is still tacky (on purpose). He got the best results using a 40 grit sanding disk.
From Houa's station, each piece then went to Baw for detail checking. If the corner or straight edge (even curved edge) had a bit of a wiggle or kink in it, Baw carefully sanded that out with a short board and sandpaper. He reshaped some of the large radii internal curves that needed correcting, using a piece of PVC pipe covered in sandpaper. If there was no problem with the edges, he laid down a border of blue tape 1‑2 mm inside of the edge, so that just a smidge of white showed. This will define where the gutter gelcoat gets sprayed, and will allow for a slight bevel of the edge.
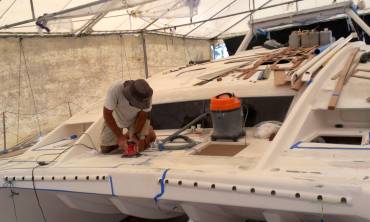 Jon sanding where the nonskid will go, on Ocelot's foredeck |
Jon and Houa (once he finished the few back sandings) worked up on deck with orbital sanders and gnarly 40 grit sandpaper. Their goal was to get the areas under the coming nonskid as level and roughed up as possible, so that the glue bonds well. This was a dusty, messy project, and there was some concern as some of the areas have both polyester filler and gelcoat on them. The soft filler sands much faster than the hard gelcoat, so they ended up with some dips and slopes. Not to worry, as the "glue" will have fillers in it, so that slight indents can be handled.
When Jon and Amanda laid out the templates, they tried to use only 2 different radii for corners, to make it easier for Mike to cut the nonskid. The small radius (60mm or about 2½") was used for most outside corners, and the large radius (about twice the small radius) for most inside corners. We made special bits of PVC pipe as models, so we could easily draw either type of corner. We made copies of these models for Mike, but apparently he never got our large model. Instead of asking us for one, he found a paint can that he thought looked suitable, so he used that when cutting out the nonskid. His paint can was much larger than what we were planning on, but it actually looks fine most of the time. We found only 3 instances where his larger radius curve brought a corner too close to something and we had to sand it back to our radius. So we now have 3 different sizes of curve (plus many gentle curves to follow the toe‑rail or the cabin‑top) but they all look fine.
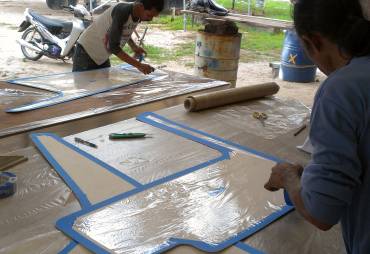 All pieces were masked with tape and plastic |
Pla, Ben and Lek, the cockpit team, wet sanded the cockpit today, but we pulled them off that job after lunch. We are trying to get the entire starboard side deck ready for nonskid gluing by tomorrow morning and we had work for them! Pla and Ben were assigned to hand‑sand the very outside borders of each nonskid area, the edge closest to the blue tape where Houa and Jon could not (dared not) reach with the machines. By day's end, they had hand‑sanded all the way from the foredeck to the stern on starboard. And they'd also polished much of the cockpit up to 1500 grit!
Baw's job of blue‑taping the nonskid panels continued throughout the day, with Sue sorting and ordering the pieces as they were prepared. After lunch we pulled Lek down from the cockpit and had him cut and tape clear plastic to mask the top side of each nonskid panel. This will allow us to use a roller over the nonskid to press the glue to the edges without compromising the nonskid surface. Sue noticed some grit between the clear plastic and the nonskid surface, and asked Baw to please ask Lek to be careful to clean the surface before covering in plastic. But what we discovered was that the local cheap polyethylene plastic sheeting has bits of grit and sand embedded in it! Time to change course! We ended up using very thin plastic wrap as a covering, with much better/clearer results.
Sue had fun being the gopher (more blue tape, more plastic, etc) and also the nonskid panel organizer. It was fun and challenging to keep track of which pieces had gotten which operation. They all had to be labeled correctly, not only with port or starboard but also the panel number and an indication of which way was forward. By day's end she had about 16 panels of varying sizes and shapes all bottom cleaned, masked, marked, plastic wrapped, and placed in piles according to the order in which we're going to glue them down. Very exciting!
Wednesday, June 5:
A day of significant progress - and a giant step backwards as well.
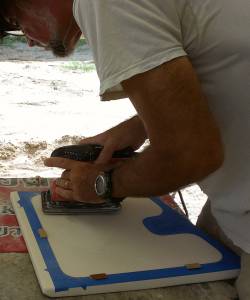 Hatch & nonskid were sanded & cleaned |
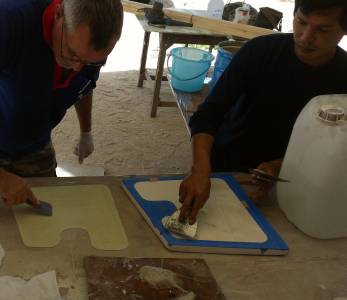 Thickened polyester was spread on the nonskid & the hatch |
Today Mike and Wiwat brought their AME team (plus ex‑employee Lee) to stick down some of the nonskid that they've been making for us. We've been cleaning the deck where the nonskid goes, and trying to keep it clean by not walking on it. Unfortunately, this doesn't leave a lot of places to walk. Sue was hurrying to direct a worker when the hatch‑cover she stepped on slid out from under her and she fell into the starboard forward cabin. This has one of the big, new hatches we're putting in, that are big enough to crawl out of - or fall in through.
She hit the side of the hatch pretty hard and when the pain didn't go away, Pla took her to the hospital on his scooter, where they determined that she'd cracked her 11th rib. They gave her a corset‑type compression bandage which helps a lot with the pain. She slept a bit this afternoon and felt well enough to go out to our local restaurant (slowly) to join friends for dinner. But she probably won't be doing much boat work for a while, as it's difficult for her to even bend over.
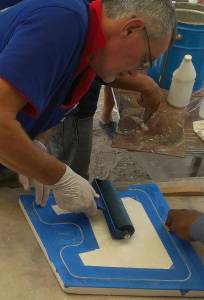 Rolling air & glue out to the edge |
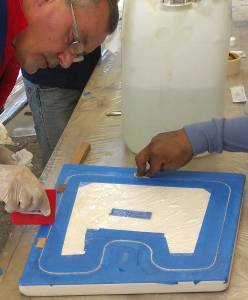 Scooping off excess glue from the edges |
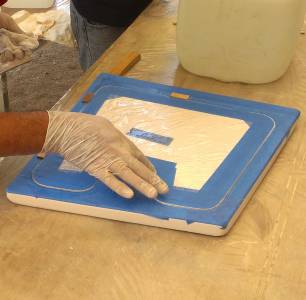 All important finger wipe for a nice filet around edge |
On a more positive note, we got a lot done on Ocelot. The primary goal for today was to stick down as many nonskid panels as we could, and also to show our workers, especially Baw and Houa, how it's done, so in the future Mike won't have to bring any of his workers at all. Lee, an ex‑employee of AME, has the most experience and was contracted to show Baw what is necessary.
Mike arrived with his special polyester glue mixture (silica and talc) and he mixed up a test batch to see how it would harden. Since silica tends to accelerate the process, he dropped the hardener down to 0.5%, but that batch took too long to harden. He made another batch with 0.8% catalyst, but that went a bit too fast, so he settled on 0.6% catalyst. All glue was measured out onto a scale, and the catalyst was added with a syringe, to make sure that we had a good, reliable and repeatable process. We don't want surprises.
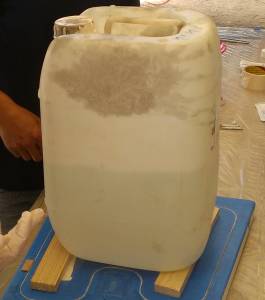 Finally, water jugs hold the nonskid down |
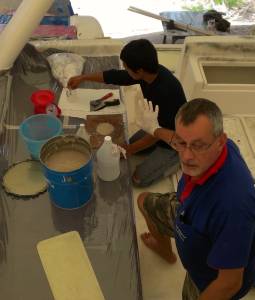 Mike & Lee mixing glue in the cockpit |
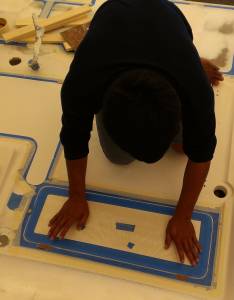 Lee lays down the 1st piece on foredeck |
Mike started out by doing a small demo piece on a table under Ocelot, so everyone could stand around and watch. We chose a small hatch, sanded it, cleaned it, masked it off with blue‑tape, and super‑glued 3 positioning blocks to the tape so the nonskid panel will always go to the same place. The nonskid panel itself was cleaned, the top masked 1mm (.04") in from the edge, and clear plastic was put on top of the blue‑tape to protect the diamond pattern of the nonskid surface.
The back of the nonskid panel got a thin layer of glue, just enough to make it look wet, and the bulk of the glue went on the hatch‑top. The nonskid was put on top of the hatch and slid until it snuggled up against the positioning blocks. Big rubber rollers were used to squeeze out any air or excess glue from between the nonskid and the hatch, with the excess glue being scooped off with small paddles and thrown away. The last swipe of the glue was done with a finger around the edge, to create a small filet against the outside of the nonskid (the nonskid panel is about 1.5mm or 1/16" thick). Then pre‑cut pieces of wood were laid on the nonskid and water‑jugs put on top of the wood, to make sure the nonskid was pushed down onto the hatch. Finally, all rollers and paddles were thoroughly cleaned in acetone, to prepare them for the next panel.
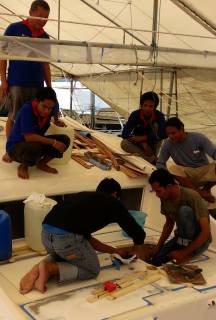 Everyone watching Lee roll out #2 |
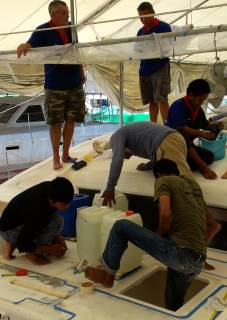 #1 & #2 now curing under water jugs |
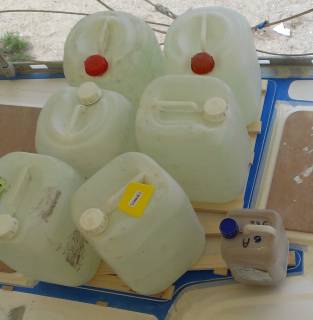 We put as many jugs as possible on each piece |
After Mike's demonstration, we decided to move operations to the cockpit. We started with panels up by the mast, and worked our way to the starboard side and then back along the deck. Mike tended to stay in the cockpit, to prepare the panels, while Baw and Lee worked where the nonskid was going down. Houa was usually down below, cutting the wood that went between the nonskid and the water‑jugs, although that didn't take much of his time. By the end of the day we'd done the demo hatch plus 11 more pieces along the deck. Whew! A long day, but lots accomplished.
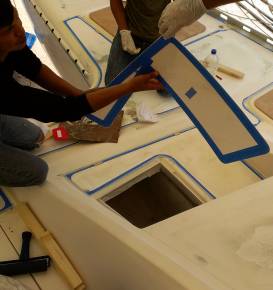 Mike delivered glued pieces from the cockpit |
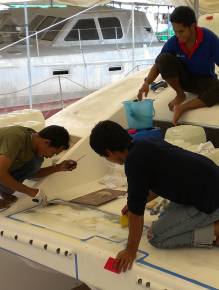 Baw & Lee work on #4 on foredeck |
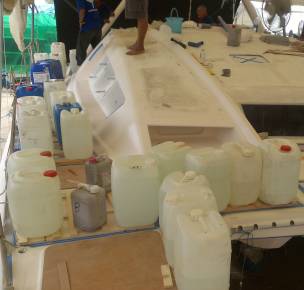 Lots of water jugs on Ocelot's decks by days end |
Although Mike was working on the starboard side of the cockpit, Pla, Ben, and Lek were able to work on other areas of the cockpit, wet‑sanding the gelcoat smooth. Much of the cockpit has already been sanded to 1,500 grit but there are still some areas that are only at 600 and need more work.
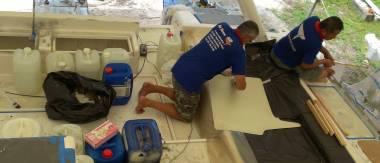 Mike moved his base of operations to the port side of the cockpit |
Thursday, June 6:
Another productive day! Sue went back to the hospital in the morning to get another x‑ray, but
it looks like a simple crack with no complications. She was told to take it easy for a couple
of weeks but there's nothing much they can do to help a cracked rib heal. Luckily, Ibuprofen
(and perhaps a bit of beer) seems to deal with the pain effectively.
The nonskid panels we laid down yesterday had all been prepared in the days leading up to Mike's visit, but we managed to lay down most of the panels that we'd prepared. This meant that we needed to do a bunch of preparation work before Mike arrived today. The portside deck needed to be cleaned with acetone, sanded, finger‑sanded around the edge near the tape, vacuumed, and acetoned again. The nonskid panels needed to be checked for straight (or uniformly curved) edges and shapely corners, then needed to be cleaned on the backs and masked on the fronts.
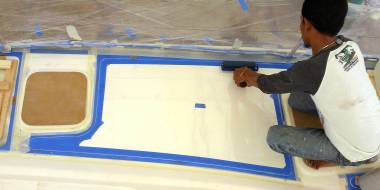 Baw rolling the glue and air out from under a big portside panel |
So we mobilized Pla and Lek, who've been working in the cockpit for the last several days, to help with the nonskid preparations. We also removed the water jugs from yesterday's nonskid and salvaged the battens that they sat on for use on the new panels.
Of course, we didn't finish all the preparations before Mike arrived, but we got a good jump on them. Some of yesterday's glue was still a bit tacky this morning, but Mike said it was fine. This "intermediate kick" stage is one reason Jon doesn't like polyester. Nice to have an expert give his stamp of approval. Wiwat and Lee also arrived, but the rest of the AME team had to return to university.
About the time our preparations were finished, the power went out! We don't really need much power for laying nonskid, but our tent can get pretty warm inside (our big awning off the port side blocks a lot of the breeze from the south) so we were sweating pretty freely, and we don't want any water (or sweat) to get into the glue on the big surfaces we're working on. So we normally run a couple of big fans, to cool everyone down a bit. Luckily, the power came back about 10:30 so we put the machinery in gear and started laying down nonskid panels.
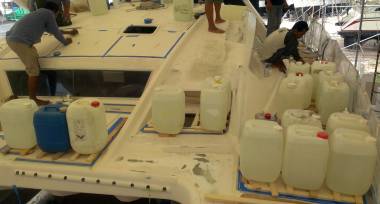 Houa preparing cabin-top panels while Baw works on portside |
We started with a long strip on the starboard side that we couldn't get to yesterday. This finished most of starboard side‑deck except for the bow and the sugar‑scoops. Then we went back to the mast and worked out to the port side and back, similar to what we did yesterday on starboard. By lunchtime we'd laid 5 nonskid panels down and were feeling pretty good about our progress. Wiwat, who played more of a translator role yesterday, worked with Houa today to cut and prepare all of the wood battens that go between the nonskid panels and the water jugs. This made things go much faster. We also found some more spatulas for spreading the glue, so Baw and Lee often worked on different panels at the same time, which also improved our speed.
By 3pm we'd laid 11 panels and pretty much finished everything we'd prepared on the port side (the extreme bows haven't been cut by Mike yet, and one panel on port proved to be defective and will have to be remade). Then the drinks lady arrived so we bought the guys lemon‑and‑soda water drinks, taking a break in the shade under Ocelot.
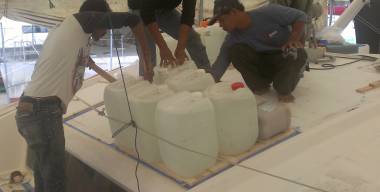 The cabin-top slope proved difficult for the water jugs |
This finished all the panels that we'd prepared, but Jon found some more panels for the front of the cabin‑top. This area has 2 issues: 1) The cabin‑top curves in both directions, so the nominally flat nonskid will need to bend in ways it doesn't want to, and 2) The front of the cabin‑top slopes enough that water jugs won't sit on it - they tend to slide off. But we wanted to tackle this area while we had Lee and Wiwat there, to have the benefit of their experience, and neither one will be on Ocelot again soon. So we gave it a shot.
We had to go through the whole preparation phase again, which took over an hour. And trying to keep the water‑jugs on the sloped battens proved more difficult that expected. One water jug got away from us, slid off the cabin‑top, hit the deck, and shattered, spilling water everywhere (luckily only on cured panels). We decided to only do one of the 3 panels that go on the front of the cabin‑top, and we'll have to come up with a better plan for the water jugs next time.
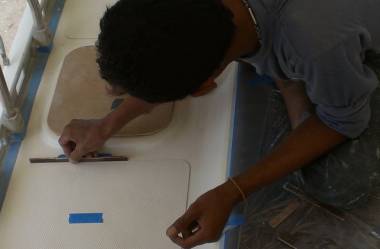 Baw's cute but tiny "long" board, for sanding the nonskid edge |
But we hit our target of 12 panels today!
Friday, June 7:
A strangely quiet day after the pandemonium of the last few days. Sue's cracked rib didn't let
her have a good night, so she stayed home.
The first order of business was cleaning up from yesterday's resin work. Our 23 water jugs were collected and stored on the cabin‑top, the wood battens were picked up and sorted by length for the next time they're needed, and the tape on the deck (not the nonskid) was removed to see how the edges of the nonskid looked. Most pieces were good, but there were blobs of resin here and there. These were chipped off and will need to be repaired, but it's an easy job. Baw noticed that there was some resin under the tape on top of the nonskid, so several people were put onto peeling back the edging tape and cleaning up underneath, picking out bits of excess resin. Baw made the cutest little tiny "long‑board" for sanding the edges of the nonskid.
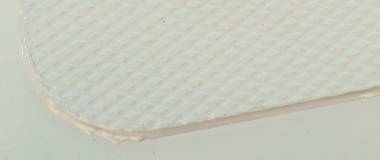 Baw's experiment: finger-wipe some gelcoat on the nonskid edge |
Mike's plan is to just spray the edge of the nonskid (and some of the surrounding deck) with gelcoat, which will then need to be sanded and polished. Baw had the idea to smear a bit of gelcoat around each piece by hand first (after sanding, of course!) He tried it out on one of our baby hatches. It certainly looks better than just having the resin on the edge, but we're not sure we want to go through all that work. We really need to see if Mike's spray will cover the edges of the nonskid adequately, as that's certainly the easiest to do.
Mike is expected back tomorrow, so we needed to prepare more panels to be stuck down. The one we did at the front of the cabin‑top yesterday was a bit of a fiasco, but it looks OK now. The main problem is getting the battens to bend to follow the curves of the cabin‑top, and to keep the water‑jugs from sliding forward. Houa sliced several of the battens so they'd bend more easily, but the water‑jugs was a bit trickier. Jon eventually decided to rig rope slings to a tent frame back above the cockpit. It's a bit klugey, but it's easy to use and should keep the water‑jugs from sliding.
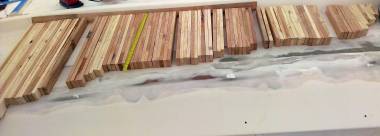 Sorted battens, waiting for the next batch of nonskid to go down |
We also decided to prepare 2 more panels - these on the forward outside corners of the cabin‑top. These 2 area are very dirty because they were never properly sprayed with gelcoat, so they only got a dusting of sticky overspray. With everyone walking on them, they picked up and held onto a lot of dirt, which had to be removed with acetone before we could even start sanding. These areas are also curved, but only in one direction, so getting the nonskid panels to lie down is easy. But they're even more steeply sloped than the central cabin‑top, so we'll still have sliding water‑jug issues. Talking it over with Houa, we realized that these pieces go over the new "eyebrows" so we can get underneath them. We'll just clamp some boards in place at the forward edge of the eyebrows, and they'll keep the water‑jugs from sliding.
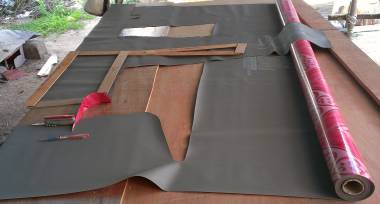 Jon's vinyl cutting station (with template) in Houa's workshop |
Jon also started working on the nonskid that's to go on the steps down the port sugar‑scoop, but Mike probably won't have enough time to do those tomorrow. The 4 panels at the front of the cabin‑top are pretty big, so they'll take some time.
Saturday, June 8:
Bit of a strange ending to the week, but we still managed to make progress. Sue is still
suffering with her cracked rib, as it makes sleeping difficult, so she's staying in the apartment.
Among other things, this means that few photos are taken. Like Sue, Jon has sold many photos
professionally, but Sue is now the usual photographer and Jon just doesn't tend to think of it as
he's working. Sue will usually return from a days work with 50‑70 photos, but Jon is lucky to
get half that many.
Baw pointed out that glue was getting under the protective tape surrounding the nonskid. It comes off reasonably easily with a sharp knife, probably because there's a residue of the polymer release agent that Mike uses when he makes the nonskid panels, but it's still a pain chipping the glue off. When Mike arrived at 9:30, he said that he'd showed the men how to push the protective tape down into the grooves of the nonskid so the glue won't get in there. Perhaps he did, but the message didn't get through, so the guys spent many hours picking glue out from the grooves around the edge of the nonskid. At least we now know how to prevent this problem in the future.
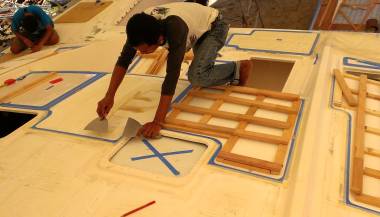 Baw laying glue for a panel while brother Ben picks glue out |
Jon had thought that everything was prepared and when Mike arrived we could quickly start laying nonskid, but this turned out not to be the case. There was still a lot of preparation work to do. Jon had to apologize to Mike for dropping the ball here, as Mike could only stay for a couple of hours. In the end, the team worked feverishly to prepare 2 more panels at the front of the cabin‑top. These were tricky, as the cabin‑top slopes so the water‑jugs want to slide off, but yesterday Jon had rigged up a couple of slings back to a tent frame that prevented the water‑jugs from sliding forward.
The sling worked OK for the center panel, but the starboard side panel also wanted to slide sideways, so additional ropes had to be tied on and wedges glued to the deck to prevent the panel from sliding on its slippery glue. Again, a bit of a fiasco, but we got everything under control before the glue hardened up so it should be OK.
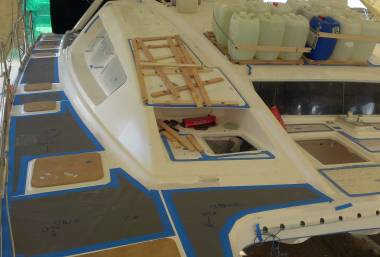 Thick vinyl on the nonskid, and water jugs retained by slings |
Picking the glue out of the edges of the nonskid means that the masking tape and plastic had to come off. We don't want to leave the vulnerable nonskid exposed to dirty feet while we continue to work on Ocelot, so Houa brought another roll of thick vinyl to protect them. Jon used the original nonskid templates to mark out the size and shape of the panels, and then cut the vinyl about 1" inside those lines. After the glue was picked out of the edge of a panel, masking tape was stuck down right to the edge, and then the vinyl was taped on top of the masking. Finally, another strip of tape was put over the edge to prevent it from collecting dirt until we get a chance to spray gelcoat around each piece of nonskid.
Mike will be returning Monday afternoon, so Baw and Jon decided which panels to make ready. We don't really have enough water‑jugs to do more than 2 of the big cabin‑top panels, so we'll only do one there and then do some smaller panels elsewhere. In this case we'll do some panels along the sides of the cockpit (there's a raised ridge between the cockpit and the side‑deck) and we'll start on the portside sugar‑scoop steps. All panels were positioned, taped, and masked. The areas still need a bit of sanding and cleaning, and the wood battens need to be arranged, but that should happen easily before Mike arrives.
We also discovered a minor screw‑up today. We've tried to be meticulous about numbering the panels and sticking a bit of tape on top showing which direction is forward, but somehow one (rather rectangular) panel got laid down the wrong way. This means that it doesn't line up very well with its neighbors, but since those neighbors are about 20" (50 cm) away, you only see it if you look for it. Houa might be able to trim off a bit with his router (only about 1/8" or 4mm would need to come off) but we're not sure that it's really worth the trouble (and it might mess things up even worse). We Shall See...
Thai Refit:
Ocelot Pages:
Top Level: Home | Destinations | Cruising Info | Underwater | Boat Guests | Ocelot | Sue | Jon | Amanda | Chris | Site Map | Make a Comment
|
If our information is useful, you can help by making a donation |
Copyright © 2000‑ Contact: Jon and Sue Hacking -- HackingFamily.com, svOcelot.com. All rights reserved.