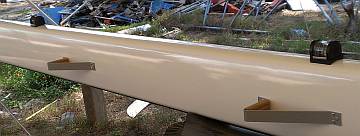
The (backup) running lights and the steaming light
120 Mast & Boom
Summary: A good week, as we charge headlong to a hoped‑for 3 March splash. The work this week focused mainly on getting the mast and boom ready to mount (outside) and the salon headliners (inside), but many other projects were completed along the way, despite being down to only 4 workers these days. Team accomplishments this week include:
|
 The (backup) running lights and the steaming light |
Monday, February 17:
A bizarre morning, with only Heru showing up, but Houa and Pla arrived after lunch and got a good
half day of work, so things went OK.
Jon worked alone all morning on the mast navigation lights: the backup running lights (red and green) and the steaming light. The wires for these come out just above the first spreader, and the lights are separated by several feet. We use the running lights a lot less than the (primary) tricolor on the masthead, so we've not converted these to LEDs.
The running lights went reasonably well, although our tap for the 4mm mounting bolts kept galling in the aluminum mast. The steaming light came with plastic side‑flaps and a silly little foredeck light, so Jon cut both off as unneeded. He used Duralac anticorrosive on the stainless steel bolts and sealed the wire holes with silicone to prevent excess water incursion.
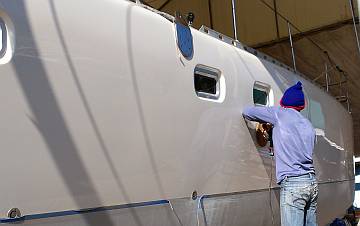 Heru finished waxing the starboard topsides |
Heru finished waxing the port topsides in the morning, so now all the hulls are gleaming and shiny. We thought maybe the men would begin cleaning the bimini and deck today in order to wax the areas around the nonskid, but with Baw gone it didn't happen. Sue did clean up all the cockpit stuff (bolts, screws, project boxes, etc) and put stuff either inside the salon or under the cockpit floor in the big lockers there.
Once Heru finished the waxing, Sue introduced him to the few remaining rusty bolt heads on the port engine, at the forward end. Heru perched on the engine and got into amazing positions sanding, wire brushing, vacuuming, and cleaning the small rusty areas. He brushed on phosphoric acid, let it sit 10 minutes, then washed it off. After letting it dry during lunchtime he mixed up a Thai version of Rustoleum (2‑part) primer, and brushed that on. The engine is now 2‑toned, original gray and primer brown, but at least it's not rusty brown!
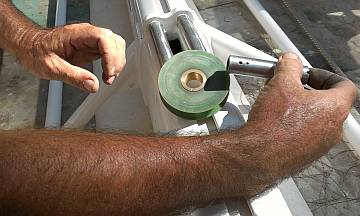 Jon playing with the sheave for the vang, and its big pin |
In the afternoon, Jon started work on the boom sheaves, the 12 plastic rollers over which the 6 ropes in the boom move. We had taken most of them out and had them re‑made as they get sloppy on their steel center pins. We hadn't been able to remove 2 of them earlier, but Jon managed to get them out today. Unfortunately, only 3 of the 6 leader strings are still in place to pull the ropes through, so the others will have to be run tomorrow before we start replacing the sheaves and jam‑cleats.
We've decided to use International Interswift antifouling. We'll be putting on 25 liters (5 cans), using 2 cans of black first as an indicator of when the top layers are thin (it's an ablative antifouling) and then 3 cans of blue as the top coat. Top's chandlery will be delivering the paint tomorrow. But the men still have to sand and clean the hulls before we paint (especially removing the topsides wax).
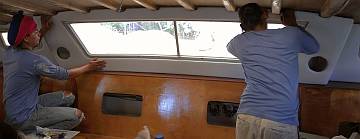 Heru and Houa finally re-install the salon front headliner |
Houa gave us half a day today, and we hope to see him working consistently until the launching now, as he has the longest list of work to do other than Jon. Houa got the final forward salon bracket in place for the big piece of headliner that surrounds the front window. Then he and Heru fitted that piece several times, making modifications either to the fiberglass channels that define the headliner location on the ceiling, or in the headliner itself. It meant more peeling back of vinyl and foam, sanding to the right shape, then re‑stapling. Hooray for the staple gun!. Houa promises tomorrow to fit all the other surrounding salon pieces. He also acknowledged that he has lots of work, and he is willing to work overtime to be sure he finishes.
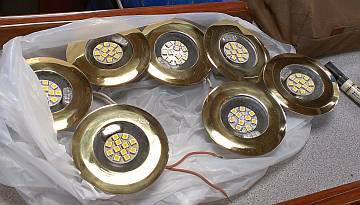 Some of our interior LEDs that Sue tested |
Sue cleaned up and tested all 22 overhead LED lights that fit into the headliners in the cabins, passageways and salon. Thankfully, most are working just fine. Some need a bit of wire tweaking, but Jon's always good at that sort of thing.
We were happy to see Pla again, as he is such a steady hard worker. We haven't always got work for him now that we're on the wrap‑up, but those days we do, it's nice to have him. Today we gave him the job of sanding the underwater section of the stainless steel bow shoes, and the epoxy on the sail drives. Once he had the areas taped off and sanded, he gave them an acetone wipe and applied 2‑part Jotun HB primer, which is a good all‑round underwater primer. This epoxy primer will be a barrier coat under the copper antifouling.
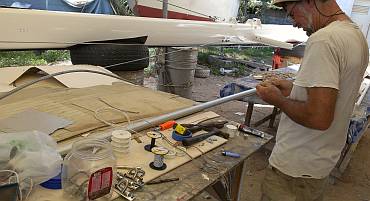 Jon's "barely controlled pandemonium" workspace |
Tuesday, February 18:
All's well that ends well, and that about sums up today. Underlying comment: It didn't begin
so well for Sue, who had expectations...
Sue's day began happily when she greeted Pla before anyone else arrived (he's often the first worker at Ocelot). He pantomimed doing more on the Jotun HB primer, but we think there's enough on the bows, so Sue took him inside to show him the gelcoat trim on the bunks that needs some attention. Eager to work, he gathered all that he needed, and was just getting ready to work on that interior project when Baw and Heru arrived and immediately set about closing up the boat.
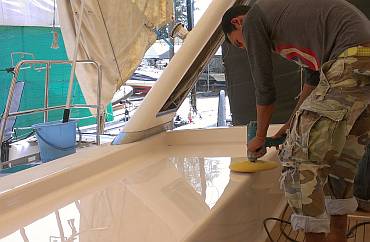 Baw polished the on-deck gelcoat, giving it a beautiful shine |
Ok. Conflict of jobs. There's no way anyone should have to work inside with all the hatches closed. So we figured Baw would give Pla work to do on the deck preparation for polishing. Somehow, it wasn't communicated, and next thing we knew, Pla had left. Sue fumed. She had other work for him, and it felt like other workers were being territorial in who got to work, and Pla was pushed out. Everyone denied it, but that didn't help Sue's suspicions. Anyway, Baw and Heru and Sue cleaned up the deck and cockpit (a great shoving of bucket and boxes and supplies into lockers and the salon). Then the men began hosing down the deck, from bimini down, using Boat Soap and a long handled brush.
Sue retreated to work with Jon on the boom (trying hard not to be grouchy about losing a worker when there were things he could be doing). Eventually she got into the swing of things and together with Jon lots got done on the boom. Only 3 of the 6 rope‑pulls remained, so we needed to get the other 3 strings run. We used 1 line to pull through 4 new lines, and Jon made a small shuttle so the lines wouldn't get tangled as they were pulled through the boom. We tied off the ends of the lines, as we won't pull the ropes through until the mast is up and the boom is mounted on the gooseneck.
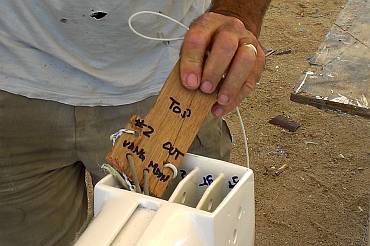 Jon's shuttle for pulling multiple ropes through the boom |
Next up were the 12 sheaves that the 6 boom ropes (3 reefing lines, outhaul, mainsheet, and vang) run over. Each end of the boom has 4 sheaves on a single pin, but the other 4 are sprinkled along the boom. Some of the holes had too much paint and had to be opened up before the pins would go back in. Each pin was coated in Tef‑Gel anticorrosive, as they touch the aluminum boom. Each plastic sheave got a dab of winch grease in its central hole to keep it spinning happily. Where sheaves had to go deep within the boom, we put a string around them so we could maneuver them into position without dropping them into the boom.
Soon all 12 sheaves were snuggled into position. The pins are held in place by small diamond shaped plates that screw to the outside of the boom, covering the pin's holes and preventing the pins from falling out. We were able to screw several of these plates into place, but 5 seem to have gotten lost since the boom was stripped. They're not sold anywhere on Phuket, so Jon talked to Manop, the owner of the yard, and he got his machinists to make some more for us. They should be ready tomorrow.
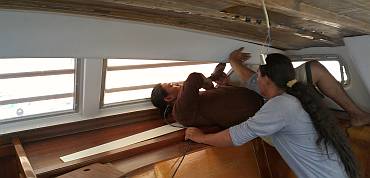 Houa & Heru got into strange positions to mount the headliners |
After lunch things were looking up. Pla arrived, looking a bit bashful, and he and Baw immediately began machine polishing the smooth (not nonskid) parts of the deck. They got the whole deck polished to a lustrous shine. It was already pretty good, but it was dirty, and some places had been repaired and never polished. They finished the day washing off the scatter from the polishing, so that the boat decks and bimini are all ready for a final waxing tomorrow.
Heru worked with Houa, pulling staples from old Velcro around the galley window and replacing it with new. Then they test mounted the galley headliner, which will unfortunately have to be cut down a bit to accommodate the teak trim above the sink. They also got into all kinds of crazy contortions when mounting the first long headliner on the port side of the salon, under the windows. This is screwed in, up under another piece of headliner, and rather difficult to get to. Lots of grunting and laughs, but it finally got placed. We're looking a bit whiter in the salon now! They even tested the first of the long overhead pieces, and Houa was happy with it, so that's good. More tomorrow.
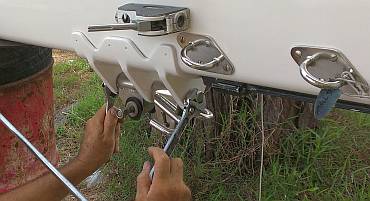 Installing the gooseneck on the mast |
Outside, Jon finished mounting the outhaul traveler that holds the mainsail clew to the boom. This effectively finishes the boom (except for the pin cover‑plates) until it gets mounted to the mast. He then mounted the gooseneck (which joins the boom to the mast) onto the mast, checking old photos to make sure it was oriented correctly. Next was an additional spinlock on the side of the mast. The mast has provisions for a topping lift (which holds up the end of the boom) and a mainsail halyard at the back of the mast, and 4 halyards coming out the front of the mast. But only 3 of those 4 halyards have ever been run, so Ocelot has only had 5 spinlocks to secure ropes. Now that we're running all the halyards, we need the 6th spinlock. Jon marked where the mounting holes had to go, drilled them out, tapped them, gooped the bolts in Duralac, and Voila! A new spinlock on the mast.
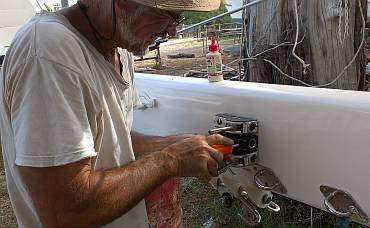 Mounting the new spinlock (rope jammer) to the mast |
At the end of the day, Jon was able to make the mounting brackets for the 2 new foredeck lights. These are brand new 10W LED flood lights, putting out over 1,000 lumens. They're completely sealed in an aluminum casing, but the mounting bracket was mild steel, so Jon got some aluminum and made a new pair of brackets. Tomorrow he hopes to mount them to the lower spreaders and wire them up.
Wednesday, February 19:
Moving along, with a full team of 4, so lots of things got done. If tasks weren't on the list,
we'll add them so we can cross them off!
Jon spent much of the day on the mast and boom. He got the new foredeck light brackets drilled, tapped and the lights mounted. Still needs to wire them up. He got a couple more pin covers mounted. We received 6 new ones from the yard ($3 each!) and Pla polished them so they can go on tomorrow.
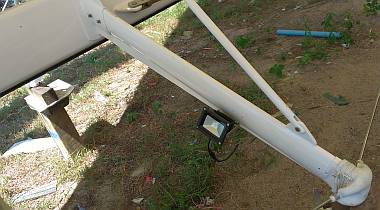 Our new port LED foredeck light, mounted on the spreader |
We still had 14 more mast steps to mount, so Jon attacked the "easy" ones first, the ones that were to go right back in the old positions, with the same rivet holes. Then came the fun of figuring out where to place the new ones. These are between the 2nd and 3rd spreaders, where we used to have small plastic folding steps. But we now have new triangular aluminum steps with nonskid teak foot‑pads, which are much safer, so we're tossing (selling?) the folding steps. Figuring out where to put the new ones meant seeing which ones were restricted somehow by rigging or tangs. Once those were determined, Jon divided the remaining space, snapped a straight chalk‑line on the mast, and was able to determine the new placement. Each new step will need the additional effort of being drilled before being riveted, but another few hours should finish that job.
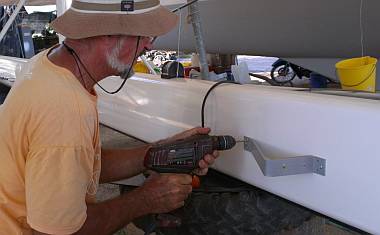 Jon mounted half of the remaining 14 mast steps |
The men started out by cleaning the waterline. After Baw polished and waxed the topsides, there was quite a bit of residue on the epoxy lower down. This will prevent the antifouling from adhering, so it needed to be thoroughly cleaned off.
Houa and Heru worked together on the salon headliners, getting the long port side pieces mounted, then working on the galley headliners. These all needed strips of wood with Velcro added to lock neighboring pieces in place. Jon had to get called up to determine where the salon fans were to go and to solder up the wires before one long overhead piece could be mounted. One vertical piece near the galley sink was really long, and Sue thought maybe Houa had it in the wrong place until he said, "Remember, you ask me to make sink higher!" Right. A long‑forgotten improvement to the galley. So the headliner needs trimming. Nothing new there.
Pla and Baw worked together in the forward cabins, sanding and cleaning the gelcoat trim around each bunk. Some of it was chipping off, and some had epoxy yellow smears. Given how nice the 2 aft cabins bunks turned out, we were hoping for a similar effect forward. They got the old gelcoat sanded, then cleaned it and brushed on a new coat. It's not as satiny smooth as it would be if they sanded and polished it, but there's no time for that now, and it actually looks fine.
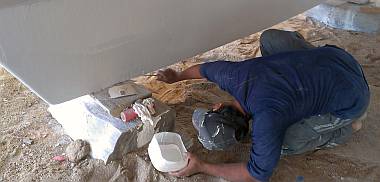 Pla getting down & dirty, sanding & painting the keel bottoms |
After lunch Pla sanded back the (dried) epoxy drops under the keels, lying on his side and back in the dirt with the sanding attachment on the grinder. Starboard had big stalactites of epoxy to remove, but on port the keel was smooth. Some of the epoxy barrier coating had never been sanded and primed, so Pla sanded it, then rolled on 2 coats of Jotun HB, an all‑purpose primer, good for underwater and under antifouling. We've now got our 25 liters of antifouling, but we're waiting until next week to paint as the antifouling doesn't want to wait too long before going in the water.
Baw prepared to do the satin varnish repairs inside the cabins. There were several scratch marks and scuffs from the (very hasty) first attempt at mounting the headliners down there. Now that they are all in and we won't be transporting sharp‑edged plywood around tight corners anymore he can do the final work. He got both starboard cabin steps taped and then spent a couple hours cleaning the dust from the floors, walls, lockers, anywhere that could contaminate the final smooth varnish. We are really seeing the horrors of this dusty yard now that we're trying to keep the boat clean, both inside and out. Just 24 hours puts a gritty coating on the decks.
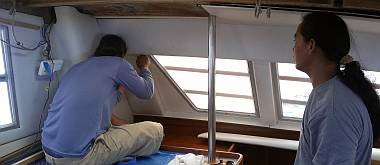 Houa and Heru test fitting galley headliner panels |
Sue was, as usual, general gopher, finder, organizer, overseer, photographer, and errand girl. We have projects farmed out to 8 Phuket companies and it's a challenge to stay on top of the progress of each job (like the radar mount, the dodger and side flaps, and the Profurl swivel), and to organize how and when we are going to retrieve the finished sail cover, scuba gear, bimini drains, etc. Challenging, but exciting, too, as we near the end of the list of things we need to farm out.
As a side note, the boatyard acquired a used, 10‑ton crane today. Manoon was playing with it, seeing what it could do. Our mast is nowhere near 10 tons, but we need a long reach to lift it up and put it back on deck. This crane seems to have a long enough reach, but we're not wild about being the guinea‑pigs as Manoon learns how to control his new toy...
12 days to splash down. Will we make it? Oh gosh, what have we forgotten to add to the list?
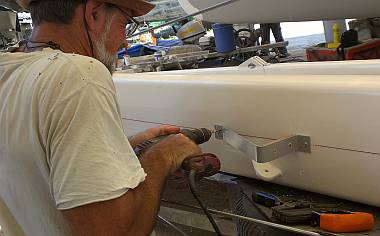 Jon got the last of the mast steps riveted to the mast |
Thursday, February 20:
This week is going by a bit too fast. Or maybe it's that no small job is really small, and
we're running full speed to the finish line.
Sue began the morning with the men schlepping stuff from the store room to the boat. We brought over all the heavy anchor rode, the oars, and parachute anchor, all ready to get stowed on Ocelot. When How arrived he grabbed Heru again as his assistant, and they spent the day sorting out the galley and aft salon headliners. They cut some back, added bracing wood strips, and slowly moved through the pile of headliners.
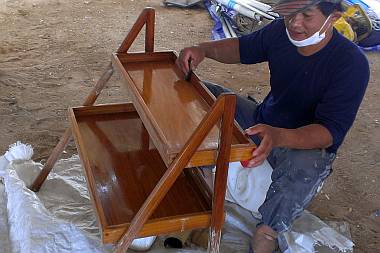 Pla sanding the galley shelves, preparing them for varnish |
Pla got the job of sanding the varnish on the galley shelves. This is an awkward 2‑story teak structure that we had built in the Galapagos (of all places!) and it has served us well. Sue was hoping to get at least part of it enclosed with sliding doors, but Houa will be working flat out to finish all his other projects for us before we launch. Oh well, something more for "down the line." Anyway, we've held off re‑varnishing it as we thought it might get semi‑rebuilt, but now's the time to cut to the chase and varnish it! After Pla's sanding, Baw got a coat of clear gloss Epifanes brushed on, and Pla got that sanded in the late afternoon.
Baw was inside Ocelot all morning, touching up places that needed satin varnish. This included a deep scratch (from careless headliner handling by workers no longer with us). At first Baw thought he'd have to sand back the entire bulkhead (a big one) to fix the scratch. But he agreed to try a repair on it first. To our pleasure (and maybe his surprise) he was able to do a careful varnish repair and it's no long visible. Well done, Baw! He also re‑varnished the satin on the steps to the bunks as that was something Lek had done, but Lek is nowhere near the master of varnish that Baw is. Baw also brushed satin varnish on the insides of several lockers in the cabins that had been overlooked and appeared still glossy.
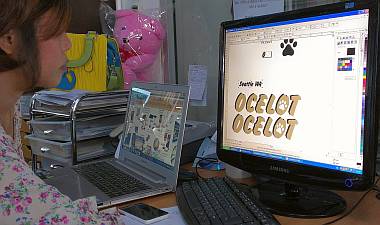 Gan, the graphic artist, with Ocelot's name/logo for our bows |
Sue's morning coup was a very successful trip to Phuket Art, a graphic arts house and sign maker just up the road. With a black and white photo of our original OCELOT sticker, Gan, the English‑speaking artist, was able to match it out of her huge stable of fonts, and she played with size and spacing and shadow until we got a really cool sticker designed for our bows. It will be 14" (35cm) high and 60" (1.5m) long, done in gold with a black shadow (reminiscent of the colors of a real Ocelot) with a cat print in the second "O". She'll make us 2 full‑size name stickers for our bows, as well as our home port sticker for the transom, all in the same FlashDBol font, for only $125. That's half the price we paid for the originals in St. Maarten 12 years ago! Stickers will be ready on Monday.
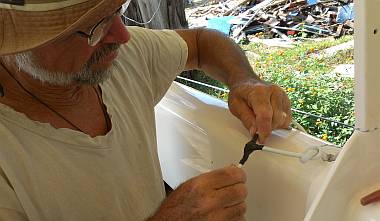 Jon's flying triple splice, wrapped in self-amalgamating tape |
Jon got the last of the mast lights wired in this morning. The 2 foredeck LED floodlights are mounted on the1st spreader, far enough apart to illuminate the full foredeck. But wiring them up required 6 flying splices, 2 of them triples, and the wind was strong enough that Jon's 240 watt soldering gun was having trouble heating the wires hot enough to melt the solder, even with Sue holding up a windshield. Tightening the connections to the tip of the gun helped, but then the wind kept blowing out Jon's lighter when he was trying to shrink down the insulation (3 layers) around each connection. After today, the only project left on the mast electrics is to mount the radar.
What's holding up the radar mounting is procuring an aluminum mounting plate. We thought it would be easy, but our local machinists were unable to find a piece big enough, so we called on AME up in Boat Lagoon to make us one. Sue scootered up there in the afternoon on a multi‑purpose trip. She picked up the "ice cream cone" bimini drain screens (custom made by AME), the aluminum sheet for the radar's base, some bronze sea‑cocks, and our refurbished (for $400) Profurl top swivel. She missed out on a lot of photo ops all afternoon, but it was a worthwhile trip.
After lunch, Baw pointed out that the new primer on the stainless steel "shoes" on the bows could be easily peeled off, so Pla had to remove all of the old Jotun HB primer with a scotch‑bright grinding pad. Then he and Baw sanded wet epoxy into the stainless, so that it will bond with the metal and prevent oxidation.
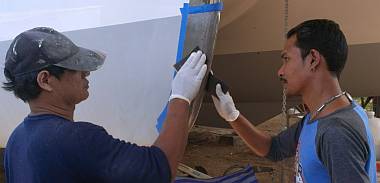 Pla and Baw sanding epoxy into our stainless steel bow shoes |
Baw's afternoon job was a bit out of character. He had discovered a few strips of bare (hull) fiberglass in the aft cabins between the headliners (from when we'd stretched the bunks). We decided that to look nice, these areas needed a teak strip screwed in. So Baw offered to play carpenter and make the teak strips. We were surprised, but pleased, and confident in his good job as he has proven himself to have an excellent eye for shape and form as shown in his work on remaking Ocelot's transoms and cabin top, the model boats he's built and the artistic belt buckles he makes. So Sue visited the store room with Baw to find some teak‑faced plywood, but ended up with an old teak floor grate from one of the fo'c's'les, something we'd stopped using long ago. He grabbed it, disassembled the strips, and after Houa planed them to the right thickness, Baw cut them to fit the bare spaces. By afternoon they were already cleaned up and varnished.
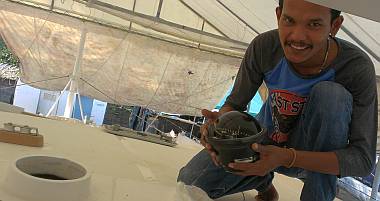 Baw cleaned up the compass and its circular pedestal |
Jon got the last of the mast steps mounted, the ones that needed new holes drilled, so now we (read: Jon) can climb all the way up the mast in secure footholds. Next Jon wanted to mount the compass, but of course, it needed some prep work before the (relatively straightforward) mounting could happen. The top of the small pedestal that the compass sits on wasn't smooth, so Jon taped a sheet of sandpaper to a pane of glass and sanded the mounting surface flat. Baw started taking the old silicone residue off the mounting surface of the compass. He also needed to sand the sides of the compass pedestal, as it had somehow been overlooked when we were polishing and waxing.
When Sue returned from Boat Lagoon she helped Jon with the frustratingly more‑difficult‑than‑expected job of attaching 2 stainless steel plates to the sides of the anchor bracket. These protect the relatively soft aluminum from being worn away by the anchor chain or the anchor itself. Each plate is about 10" (25cm) long with 7 holes for 5mm bolts. Jon drilled and tapped each hole, cleaned everything, then began inserting short 5mm bolts covered in (messy, yellow) corrosion inhibiting Duralac. For some reason, several of the bolts got jammed and the holes had to be re‑tapped, which delayed us. We eventually finished well after all our workers had left. Definitely beer o'clock...
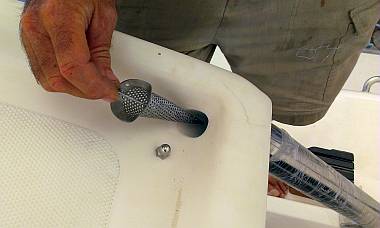 Cute drain strainers for our water-catch holes in the bimini |
Friday, February 21:
Movin' Along. Ten Days and counting. Freaking Out. Focusing. Panicking.
Working Hard. Checking things off the list.
It didn't help that both Baw and Heru were missing this morning. Turns out that one of our previous workers, Yando, was sick in the hospital, so Heru spent the day with him, and probably Baw took time off to take Heru there. These things happen.
Pla showed up bright and early, as usual. He began by sanding the last coat of gloss varnish on the galley shelves. Then he prepared the teak filler strips for the aft cabins by sanding their varnish as well. Then we asked him to clean the "hongs" (literally "rooms") which is how the men refer to the fo'c's'les. We want to begin stowing oars, spare roller furling sections, and other long things in there, but not on top of weeks of dust and grit. While cleaning, Pla discovered a place where the enamel paint was buckling (poor surface prep no doubt). He's really good at pointing out things that sometimes other workers would ignore. So he asked if he should sand and re‑paint that area. Sure, good idea. While he was at it, we pointed out areas under the cockpit hatches that had been sanded back for the gasket, and he cleaned and painted those as well. He also got several coats of polyurethane on the teak strip above the galley sink. This is the original teak, refurbished by Houa, and newly mounted.
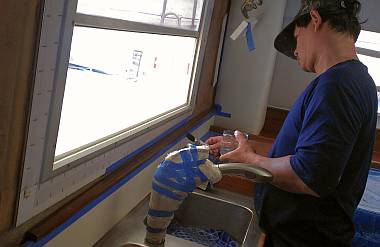 Pla brushing polyurethane on teak in the galley |
Without Heru there helping Houa today he didn't get any new panels mounted in the salon. Basically Houa spent the day cutting, shaping, fitting, and stapling the long aft headliner pieces for the salon. Fingers crossed for some real visible progress tomorrow.
Jon began the day finishing up small jobs on the mast. Once Sue had hit the local hardware store for tiny screws, Jon mounted the last 5 newly made covers for the sheave pins. No sooner done, than Sue unearthed the real pin covers that had been lurking in a baggie in a box. This is how little things get lost! The other small mast job was to put stopping rivets at the bottom of the PVC wire conduit so that it doesn't slide down when the mast is up. Jon put in 3 just where the PVC ended and 2 more into the plastic itself.
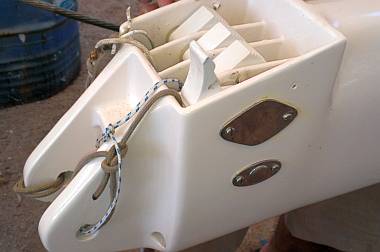 Covers for the pins that hold sheaves & jammers in the spars |
Just before lunch we made a scavenging trip to the store room to see what is still there. One great find was the VHF antenna that was loose, and had somehow escaped being put on the inventory list. Finding it saved Jon a trip to the marine electronics store in town and no doubt lots more money. Back at the mast, Jon mounted the stainless steel VHF bracket and then the stainless steel whip antenna, securing the coax connection with self‑amalgamating tape.
Baw arrived after lunch and got the bow "shoes" sanded and ready for Jotun HB primer on top of the sanded‑in epoxy coating. We don't like the Jotun HB primer as much as the International 263 gray that's on the rest of the hull (under the water) but we're not about to buy a whole 5‑liter can just for 2 small areas.
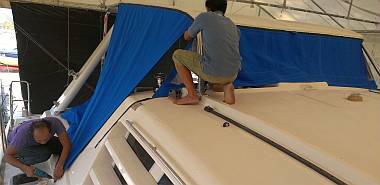 Thai Sailing came for another fitting check - looking nice! |
Sue showed Baw another small area in the starboard forward cabin where the teak trim was missing (due to removal of the old thick "suede" hull covering). So, once again, he played carpenter and found just the right piece of solid teak, shaped it to match the curving, wavy hull, sanded and varnished it. He also assisted Houa by removing the plastic‑wood headliner pieces in the heads so that Houa can cut the holes for the LED lights. Tomorrow Baw will mount those headliners and seal them with Sika. Houa seemed very happy to have someone else doing some of "his" work. And we're happy to keep things moving!
The men from Thai Sailing came by with the very‑nearly‑finished dodger and side flaps for the cockpit. The corner triangles look great, with their clear plastic windows! Having the cockpit enclosed when sailing in bad weather will be great! Not that we want to sail in bad weather, but it does happen.
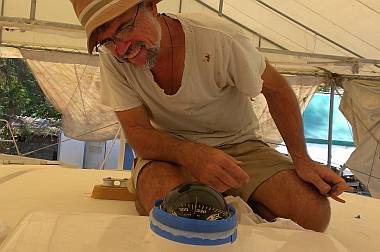 With our compass mounted, we know which way we're headed |
Sue scootered off to Rolly Tasker to pay for the sail cleaning ($65), and the mainsail "stack pack" (they call it a "lazy bag") repair and name application ($120). We can ride with the stack pack on the back of the scooter, but not the furling headsail, so we were happy when the manager, Johnnie, offered to deliver the sail and cover to the boat either tomorrow or Sunday. Sue also picked up a small jam cleat for the dinghy hoist system, to replace our worn one. Perfect match. Ridiculous price ($35) but now we can assemble the dinghy hoist system, something that needs to be done before we launch.
Jon got the compass cleaned up and mounted, so now we have a direction! He started to replace the 1/2" ball valve seacock in the port forward cabin bilge but the bronze hose barb ($18, thank you very much AME) was too small. The crystal ball sees one more trip to AME early next week. The perforated stainless steel plates that AME wrapped into cones for us fit really well into the 2 corner rain‑catch drains on the top of the bimini. So now we don't have to stuff rags in there to keep debris from falling into the bimini legs.
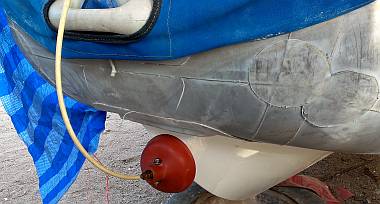 Tomcat's tang-guard - functional (and distinctive) if not aesthetic |
Jon's other small job was to put the (not very elegant but very practical) bumper on the bow tang of the dinghy. This hefty aluminum tang (that holds the steel painter) is a lethal protuberance if it crashes down onto a swim platform behind a boat. So, to prevent damage, we've always had a rubber toilet plunger head mounted on the tang. The old one died, and we had to bring one from the States (the local ones are made of junk rubber and turn to black rubber mush in the sun). Jon got it bolted on and the workers laughed. Not beautiful! But to Jon, beautiful is not how something looks as much as how well it works!
While sorting the coils of anchor rode and the parachute anchor, Sue managed to spear her hand with a very rusty split ring, then as she removed it, the bag swung round and the other (sharp) end of the pin stabbed her finger. Ye‑ouch! Talk about rusty pins and nails! Last Tetanus shot was 2007 in the Seychelles. The neighborhood clinic is just a block from the apartment and the doctor arrives about 6pm after his day at the government hospital in town. Sue was the first patient (it's a first‑come, first‑served situation) and learned that the doctor is actually an orthopedist and had been in surgery all day. But he does general medicine at the clinic each evening. Quick consultation about the tetanus shot. Recommendation of a booster in a month and again in 6 months for 10 year coverage. The shot. The bill: under $7. Medicine the way it should be. Oh, and the finger is fine, healing well, though throbbing a bit.
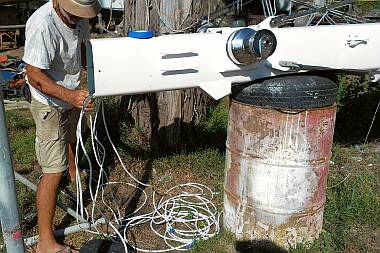 Jon cleaning up the wires at the base of the mast |
Saturday, February 22:
A long day, a good day. But not a real Saturday, as we will be working tomorrow along with
Carpenter Houa and Talented Baw. Exhausted is an understatement.
Jon began the day sorting out the wires at the base of the mast, cutting them to 6' (2m) tails and coiling the excess so it's not in the way when we mount the mast. He did not cut the radar wires or the VHF coax, as we want them to be contiguous. This adds a bit of hassle factor but gives us much better performance from those electronics.
Baw and Heru worked on the plasti‑board headliners for the heads. With Sue's consultation on which LED overhead light to put where, they marked the position and drilled the holes for the wires, or, in the case of 2 of the lights, for the whole big embedded light. Baw was obviously outside his comfort zone as he tried to figure out how to mount the small light with its metal springs. Sue tried to demonstrate (with her arms, elbows and body!) how the springs should be bent and the hole enlarged to accommodate them, but that was totally confusing (make the hole bigger?). Sue appealed to Houa who was too hassled with his own jigsaw puzzles of headliners, and Jon was not easily distracted from the mast wiring and ropes. To Baw's credit, he didn't get frustrated, but was happy to see the solution when Jon got the time to show him. From there it was smooth sailing to mount each of the 4 head headliners, which are screwed in place, and then get white plastic dot covers over the screw heads. Sue helped with the final fitting of the LED wiring, and enjoyed Baw's amazement as the brilliant light flashed on when he flicked the switch.
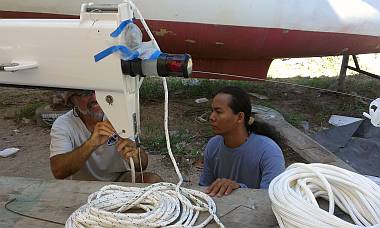 Jon and Heru working on a jammed pull-through string |
Heru and Jon get the award for the Biggest Progress of the Day by attacking the mast ropes (aka running rigging). First they scootered to the apartment to bring all the new lines to the yard, but there seemed to be some missing. So Sue and Jon scavenged in the store room and came up with no less than 3 huge bags of old lines, only some of which were annotated as to where on the boat they belong. (Amazing how easy it is to forget things like rope size and color!)
Our mast has 6 ropes in it: the topping lift (which holds up the back of the boom) and 5 halyards (mainsail, jib, screecher, small spinnaker, and big spinnaker). Jon would tie the pull‑through line to the halyard, Heru would tape it to avoid it getting caught on something, they'd feed the end into the top of the mast, and Jon would pull from near the bottom of the mast while Heru unreeled the line hand‑over‑hand to prevent it from twisting inside the mast. The new big spinnaker and main halyards went well, but the topping lift pull‑through seemed to be stuck on something. We'd checked that the lines all ran easily, but that was before we put the electrical wires in. Maybe something got caught. <sigh> Jon gave it a mighty tug and something popped loose, but there was still too much friction. So we tried feeding the new rope up from the bottom (the direction the wires were fed in) instead of down from the top. The line caught on something for a moment, but then it came free and ran easily.
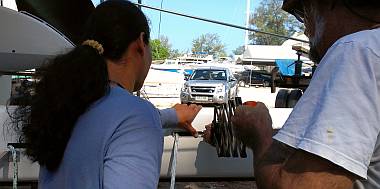 Riveting on the fairleads where the ropes come through the mast |
The jib and small spinnaker halyards were in good condition so we just re‑ran the existing ropes. For the screecher halyard we just ran the old topping lift, which should be completely adequate. Once the halyards were all pulled through, Jon fitted on the mast base and bolted it on. Hopefully we won't need to look inside the mast again anytime soon!
There are stainless steel fairleads where the ropes come out of the mast at the bottom. They had to be riveted, so Sue had bought special Monel rivets for them. Once they were all riveted in place, we fed the ends of the lines through their respective spin‑locks. The other (working) ends of the ropes were brought down and tied near the base of the mast, the lines were pulled tight, and the extra line was coiled and tied to the mast, out of the way. The only exception was the main halyard, which actually comes to a block at the head of the mainsail and then goes back up and ties to the top of the mast. But the block had been hiding in the store room and needed a thorough cleaning and overhaul. The main rollers were OK, but the plastic balls for the side thrusts were so much plastic gravel. Jon had 67 spare 3/16" (4.75mm) balls, but it takes 102 to fill both sides of the block, and it was too late to get any more, so we'll have to go up to Rolly Tasker on Monday before we can reassemble that block.
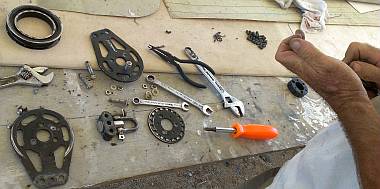 Mainsail halyard block disassembled for cleaning and repair |
Nothing new to report on the Houa‑Headliner scene, except that he is shifting the piles of liners and testing one after the other, cutting more blocking wood strips and covering them in Velcro. The reason this is taking so long is that when the panels were sent to TMT to be recovered in new foam and vinyl last year, all the mounting blocks had to be removed, and TMT didn't put them back. This was actually at our request, as the positioning is critical -- and were they to get something wrong we'd end up with unsightly holes in the new vinyl. On the companionway and galley side of the salon there are lots of odd‑shaped pieces that overlap. Houa has to put up a panel, hold it in place, then fit the next 1‑2 pieces that overlap it, and get the brackets lined up just so. It's very fiddly and exacting. Hats off to Houa for his perseverance, though he is looking a bit piqued.
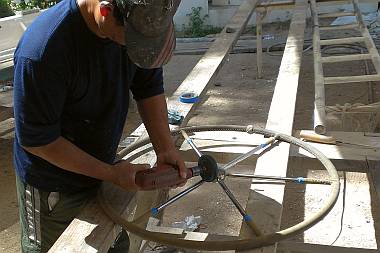 Pla polishing up our leather covered stainless steel wheel |
Pla was our steady workhorse once again. He spent the morning wet‑sanding the galley shelf assembly. Baw has given it 3 coats of gloss Epifanes varnish now. And with this last sanding today, it's ready for its final spray coat of satin. Pla also made several trips to the store room with Sue to bring back boat goodies. One trip produced not only a missing piece of head headliner, but also the big stainless steel wheel, which Pla polished up beautifully. He also schlepped back the bunk mattresses. We took them out of their new cloth covers (the new foam is still wrapped in cling wrap to keep it clean) so we could test fit them on the bunks. We have single big mattresses in the forward 2 cabins, but have split the bunks into 2 mattresses each in the aft cabins. All the foam pieces fit like a glove with no room for linens unless the cover is very snug and actually squeezes the mattress down a bit. We are going to leave them in place until Thai Sailing comes again and can determine if they need cutting or if a good re‑make of the (local seamstress‑made) covering will do the trick.
Baw and Houa will be joining us at the yard tomorrow for our Sunday Push to Get Things Done.
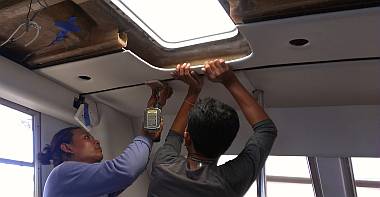 Houa and Baw test-installing a headliner over the galley |
Sunday, February 23:
A hot, productive Sunday with good music on our stereo and just Baw and Houa joining us at the yard.
Houa and Baw were already deep into salon headliners when we arrived after our Sunday brunch. Houa built some small vinyl‑covered brackets to mount on the ceiling, into which he can slide the long headliners to test their lengths without having to screw them in place. Why are we not surprised that the first ones he did were too long? All that extra thick foam from TMT. It would be nice if he could just cut off one end and be done with it, buts several pieces have to fit around overhead hatches, and the opening has to still be in the right place, meaning he has to adjust the length from both ends.
|
Baw and himself filleting the corners in the heads |
Baw put blue tape around all the plasti‑board headliners in the heads, then cleaned with alcohol, and shot each joint with white silicone. He did a wet finger wipe to smooth out the silicone and make the joints look smooth. One last little push to cover the screw heads, and then the heads will be done. Baw also sprayed a coat of satin varnish on the galley shelves, and made a small teak platform for our huge storm anchor.
Jon (with assistant Sue) spent all day on our Kiwi feathering propellers. Some background: Sailboat props usually have 2 or 3 blades, but we've found that 2 bladed props can cause our rudders to vibrate so we prefer 3 blades. Props can be either fixed (normal), feathering (the blades still stick out, but they align with the water flow when they're not being driven), or folding (the blades fold down behind the propeller hub when they're not being driven). Fixed props give the best drive and they're by far the cheapest ($400) but they're huge buckets in the water holding you back when you're sailing. Folding props are probably the best overall, as the blades can be shaped to give good drive, yet they fold to essentially nothing when they're not in use. They're the most expensive ($3,000) and give the worst performance in reverse, but we've never had a reversing problem with folding props (we used 2 bladed folding props all across the Pacific). Feathering props use flat (not shaped) blades so they're not quite as efficient at driving the boat, and they have marginally more drag than folding props, but they're a pretty good compromise and our Kiwi props are only $1,350 each.
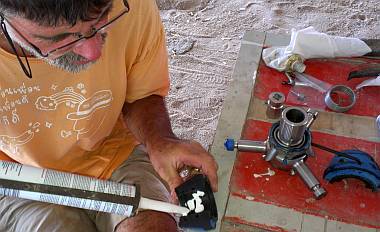 Jon assembling our original Kiwi-prop |
We bought one to try out in 2010 when we were in Borneo, but it got damaged when we had an argument with a reef in the Andaman Islands. Since we had to order parts for it anyway, we went ahead and bought a whole second feathering Kiwi prop. To improve the drive, the new prop came with larger blades, and they included a set of the larger blades for our older prop as well.
Mounting the new propeller went really fast. The sail‑drive shaft had to be greased up with good waterproof grease (we use Lanocoat, derived from sheep lanolin) then the prop slid on. A big custom nut holds the prop on, and no less than 3 locking bolts make sure the nut doesn't get up and wander away.
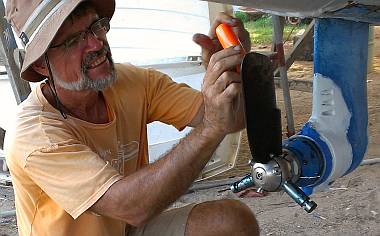 Installing the blades on our original prop |
Repairing the old prop took much longer. First Jon succumbed to RTFM (Reading The Fine Manual) because it's a pretty complex device. The manual uses some quirky names for the components (boss, tripod, nosecone, etc) but they make sense after a while. It only has about 15 major pieces, but the assembly (and the manual) is complex. You have to grease all the moving parts (of course) but stuff right nearby needs to be kept clean for bonding with 5200, and there's a big spring inside that has to be pre‑tensioned correctly so the blades return to a feathering orientation after reversing. We did most of a test assembly without goop first, then stripped it back down and assembled it correctly.
Once the core was assembled, putting the blades on was a bit time consuming (they all had to be correctly greased) but fairly straightforward. How exciting to see Ocelot with a pair of 3‑bladed feathering props on, all ready to go!
Thai Refit:
Ocelot Pages:
Top Level: Home | Destinations | Cruising Info | Underwater | Boat Guests | Ocelot | Sue | Jon | Amanda | Chris | Site Map | Make a Comment
|
If our information is useful, you can help by making a donation |
Copyright © 2000‑ Contact: Jon and Sue Hacking -- HackingFamily.com, svOcelot.com. All rights reserved.